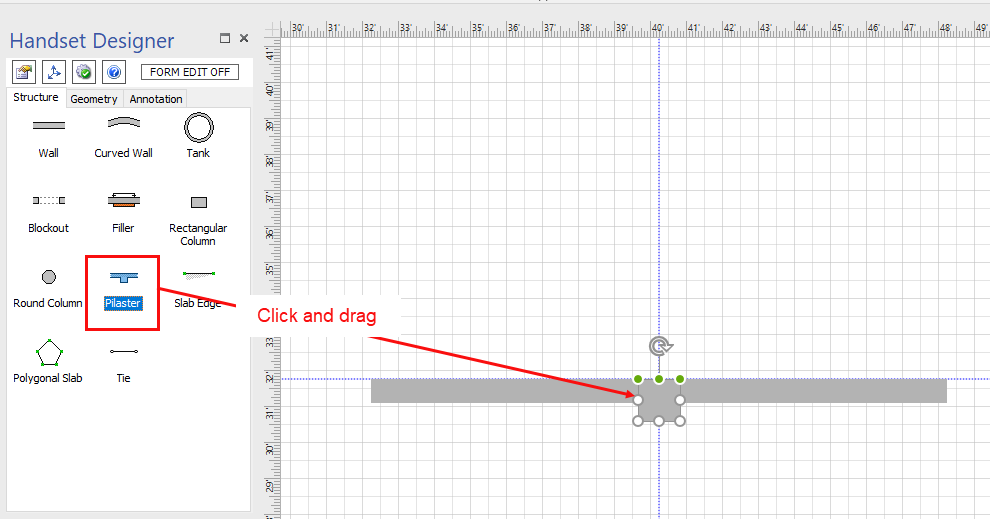
Connecting a Pilaster to an existing set of walls is a simple drag-and-drop procedure.
To connect a Pilaster to an existing set of Walls:
- Click Pilaster shape in the Handset Designer Stencil pane, then drag and drop it onto the appropriate Walls.
- Click one Wall to select it.
- Drag the Wall away from the Pilaster form and align the center connection point with the intersection of the Walls.
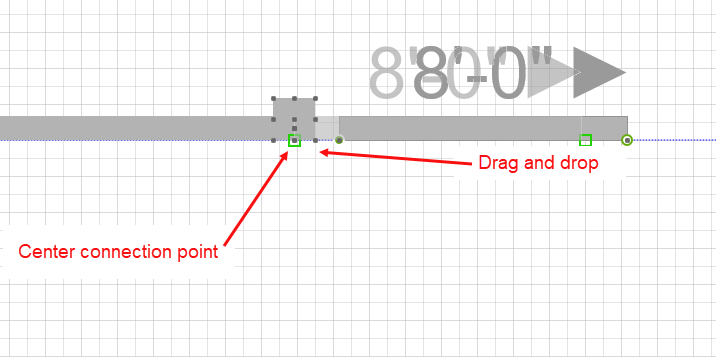
- Release the mouse to connect the Pilaster and Wall.
- Repeat the drag and drop procedures above to connect the Wall on the opposite side.