You can easily add and configure properties for new layers.
To add a layer:
Click the Handset Designer tab, then click the Layers Table button in CAD Tools group.

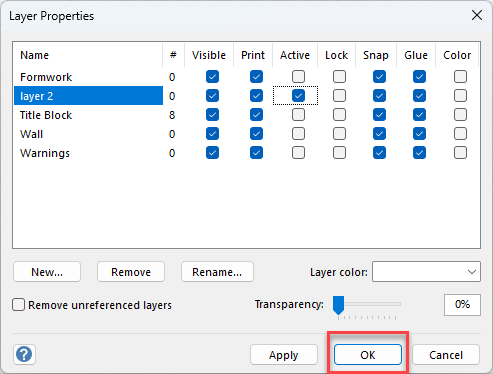
The Layer Properties dialog appears.Click New.

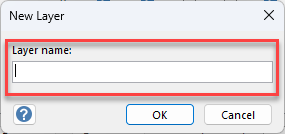
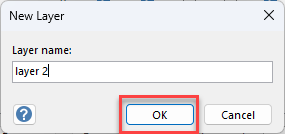
The New Layer dialog appears.Click in the text field and enter the name of the new layer.
Click OK.
The new layer appears in the list of layers. By default the Visible, Print, Snap and Glue checkboxes are checked.
As necessary,Click the Active checkbox
Click the Lock checkbox.
Click the Color checkbox.
Click the arrow on the Layer color dropdown and select a layer color.

Click OK.