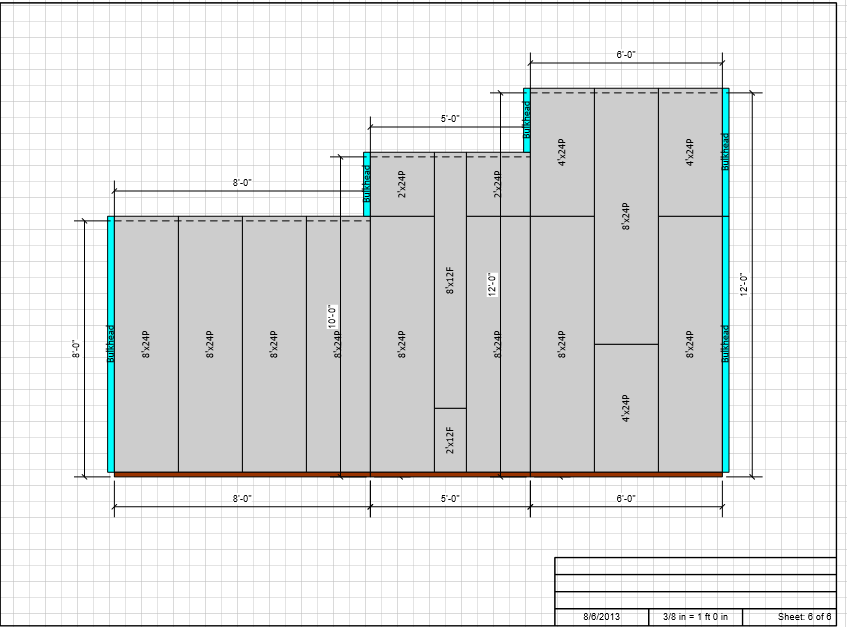
When you need a stepped Wall, Handset Designer enables you to use connected Wall segments and differing elevations to easily create one. The example below shows you how to create a stepped Wall that is made up of three Wall segments of unequal lengths and heights (elevations).
- Drag and drop multiple Wall shapes to the Drawing page.
- Click one Wall shape and, if necessary, click the Shape Data button in the Handset Designer toolbar.
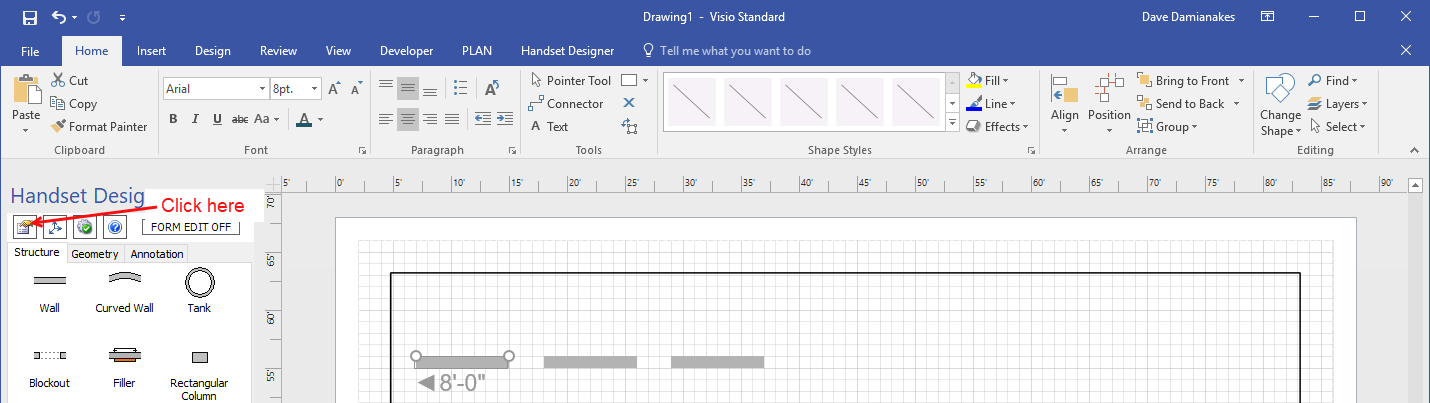 The Shape Data popup appears.
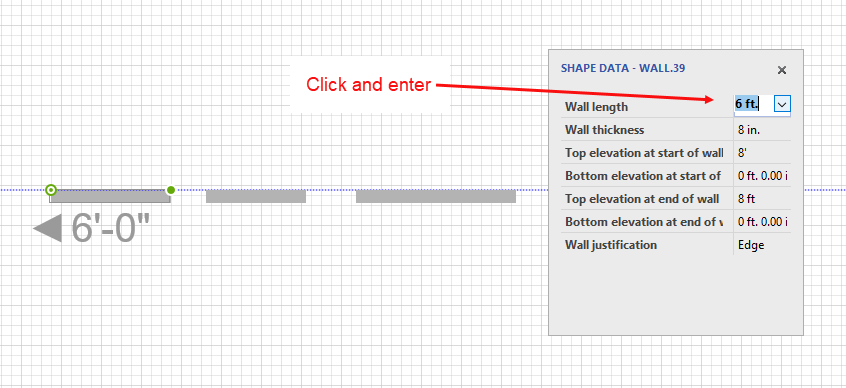
 - Click the Wall Length text field and enter a new Wall length.
- Repeat the above two steps for each Wall shape.
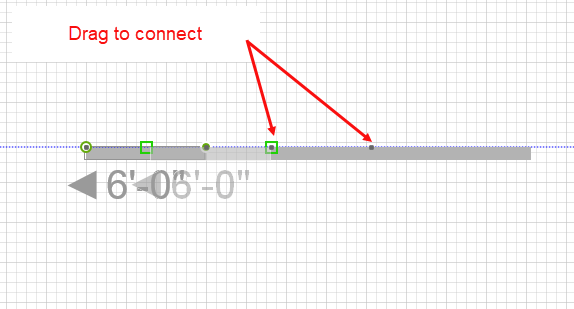
Note: For measurements, use ft. for feet, in. for inches or m. for meters. You can also use the standard notations " for inches or ' for feet. - Drag Walls to glue them together at their connection points.
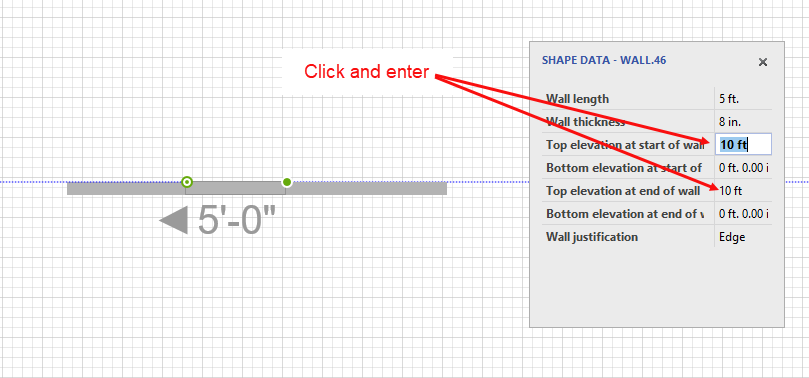
- Click one of the new objects, to select it.
In the Shape Data popup: - Click the Top elevation at start of wall text field and enter a new start elevation.
- Click the Top elevation at end of wall text field and enter a new end elevation.
- Repeat for each Wall, as needed.
The elevation page shows the three Wall segments of differing lengths and elevations making up the stepped Wall.
Since the view in the Drawing Page looks down upon the tops of the Walls, you must first draw formwork and then draw an elevation in order to see the stepped Wall. (Refer to Drawing an Elevation for a Wall for detailed instructions on drawing an elevation.)