The Overlay methods in Handset Designer typically only recognize lines and polylines imported from AutoCAD. The walls in AutoCAD drawings typically consist of two lines, one for each side of the wall. The Overlay process only needs one of these lines and places the Wall reference line along the imported line. It is recommended that you import both lines from a drawing, so you can determine if the overlaid Wall is in the proper location.
About Short Walls
Occasionally you may notice a short Wall on the imported drawing on which Handset Designer will not place a Wall. Since shorter lines are likely to be completed with a pilaster or a column, they are not usually overlaid.
Note: If the line length is less than twice the wall thickness, a wall will not appear.
To overlay a line (or multiple lines):
- Click on a single Wall in your drawing to select it.
- Click the Handset Designer tab and then click Convert to Walls in the CAD Tools group.
 The Overlay AutoCAD Lines dialog appears.
As necessary: - Click in the Thickness text field and enter a new value.
- Click in the Top of wall text field and enter a new value.
- Click in the Bottom of wall text field and enter a new value.
- Click the Always use these values as default checkbox (to put a check in it).
This sets the chosen values as a default setting for all Walls. - Click the Add dimensions checkbox (to put a check in it).
This ensures that Handset Designer draws dimensions for each new Wall. - Click the Add guides checkbox (to put a check in it)..
This ensures that Handset Designer adds guides for each new Wall.
Note: These values can also be set in Formwork Options in the Application Group of the Handset Designer ribbon.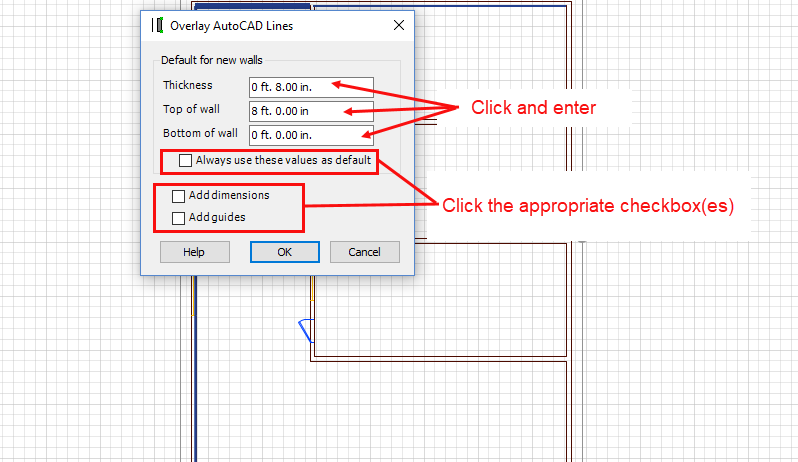
- Click OK.
Handset Designer draws a Wall on the line. - If the Wall isn't between the boundaries of the lines, right-click the Wall and select Flip Wall on Reference Line from the menu that appears.

Note: You can also flip the Wall by clicking one of the Flip buttons in the CAD Tools group.