Use the Billing tab in a Job Site dialog to set billing and invoicing preferences for a Job Site.
Note: If the Job Site will not be billable (meaning that Quantify will not generate invoices for the Job Site), disable the option This Job Site is Billable. If you do, no additional information will be required in this tab.
If this job is going to be invoiced, leave the This job site is billable checkbox checked.
Note: If this job is not going to be invoiced, click the This Job Site is Billable checkbox, to remove its check.
Use the information below to help you configure the Billing tab and its sub-tabs, then continue with the rest of the tabs, as necessary.
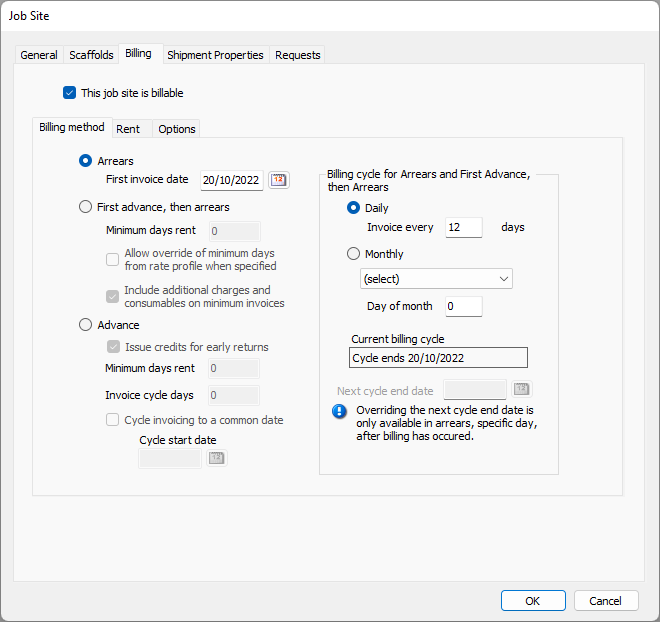
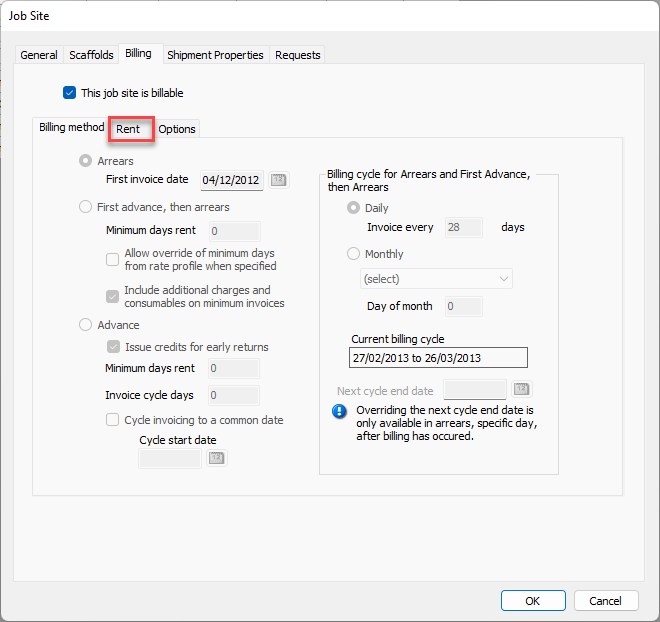
Billing Method Sub-Tab
Use this tab to set the invoicing cycle and terms. Three methods are available:
Arrears
First Advance, then Arrears
Advance
For details and examples of these methods, refer to Working with Billing Methods.
Once the first invoice is saved for the Job Site, Quantify locks the billing method and cycle options for editing.
Arrears
The Arrears billing method only bills for the period of time that billable products were at a Job Site.
Arrears | When this radio button is selected, Quantify only bills for the period of time that billable products were at a Job Site. |
First invoice date | Use this date field to determine when Quantify will generate the first invoice. |
First Advance, Then Arrears
First Advance, Then Arrears (FATA) is a combination of both the Advance (below) and Arrears (above) billing methods
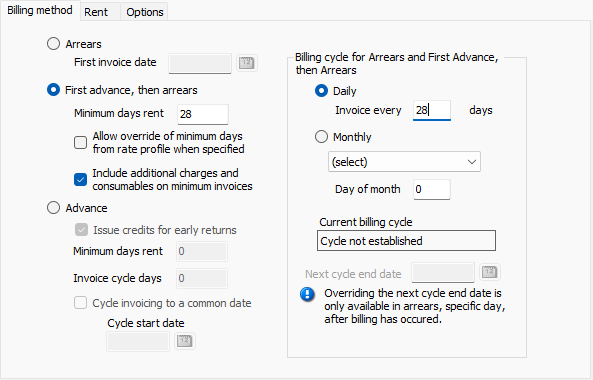
First Advance, then arrears | When this radio button is selected, Quantify bills using a combination of both the Advance (below) and Arrears (above) billing methods. |
Minimum days rent | Use this text field to determine the minimum number of days for which Quantify will bill rent. |
Allow override of minimum days from the rate profile when specified | When this checkbox is checked, Quantify will override the minimum number days rent entered into the Rate Profile selected in the Billing tab and use the minimum number of days entered above. |
Include additional charges and consumables on minimum invoices | When this checkbox is checked, Quantify will include additional charges and consumables in invoices that apply to the minimum number of days. |
Advance
With the Advance billing method, the initial invoice(s) is based on either the Shipment Rent Start Date or the defined Cycle Start Date. Subsequent invoices are generated based on the first day of each billing cycle (variable based upon previous billing) or upon the common cycle.
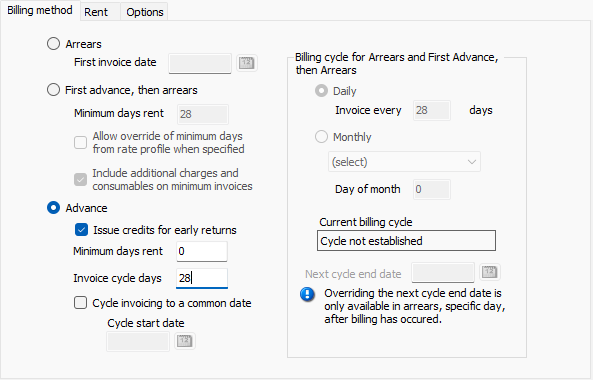
Advance | When this radio button is selected, Quantify generates the initial invoice(s) based on either the Shipment Rent Start Date or the defined Cycle Start Date. It generates subsequent invoices based on the first day of each billing cycle (variable based upon previous billing) or based upon the common cycle. |
Issue credits for early returns | When this checkbox is checked, if parts are returned with a Rent Stop Date in a previously billed cycle, Quantify will calculate a credit for the difference. A credit is never issued for rental days during the defined Minimum Days Rent. Note: This option is selected, by default. |
Minimum days rent | When a number has been entered into this text field, Quantify will charge rent for the minimum number of days entered, despite any returns. |
Invoice cycle days | Enter the number of invoice cycle days in this text field (required). This sets the number of rental days to include on a single invoice and how often invoicing should occur. Note: This field is required. |
Cycle invoicing to a common date | When this checkbox is checked, billing cycles for the Job Site will begin on the Cycle Start Date. Invoicing will occur on a regular billing cycle based upon the Invoice Cycle Days. For shipments with a Rent Start Date that occurs in the middle of a cycle, rent will be prorated (except minimums) to the end of the current billing cycle. |
Cycle start date | Enter the date on which you want billing cycles to begin into this date field. (This becomes required when Cycle invoicing to a common date checkbox is checked.) |
Billing Cycle for Arrears and First Advance, Then Arrears Section
Use this section of the Billing Method tab when you select either the Arrears or First Advance, Then Arrears billing methods. This section of the Billing Method tab enables you to configure the details of your selection.
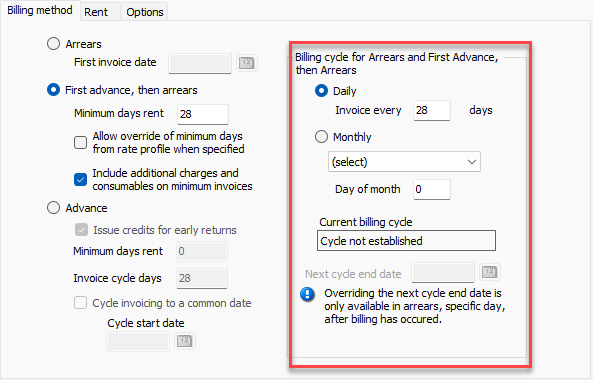
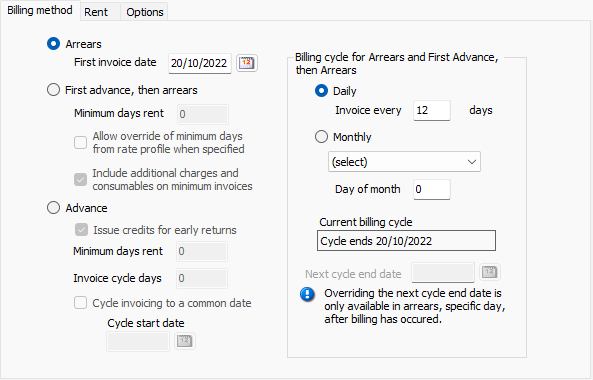
Daily | When this radio button is selected, Quantify invoices based on a configured number of days. |
Invoice Every X Days | Enter the number of days that will elapse between invoices into this text field. |
Monthly | When this radio button is selected, Quantify invoices based on a monthly basis. |
Day of Month | Enter the day of the month on which Quantify will invoice into this text field. |
Current Billing Cycle | Quantify displays the current billing cycle in this text field once you configure the Arrears or First Advance, Then Arrears billing method. |
Next Cycle End Date | Use this date field to override the date of the end of the next billing cycle. This field is only active and editable for Arrears billing that uses daily invoicing and after the current billing cycle has finished. |
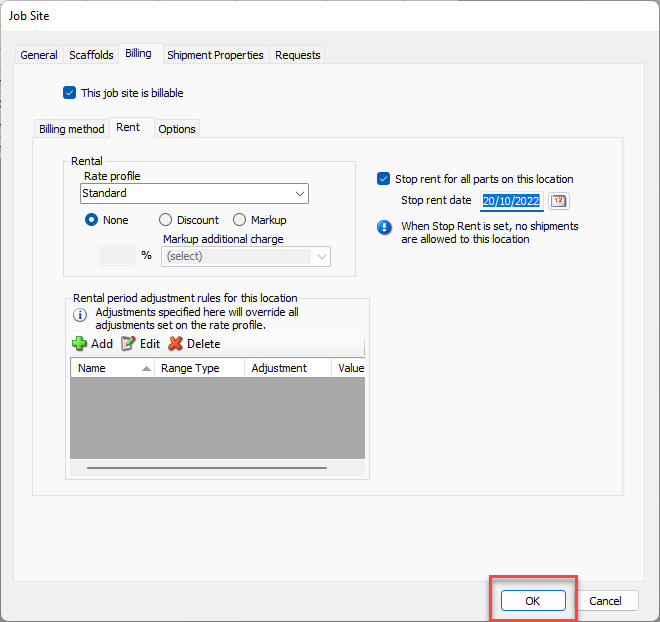
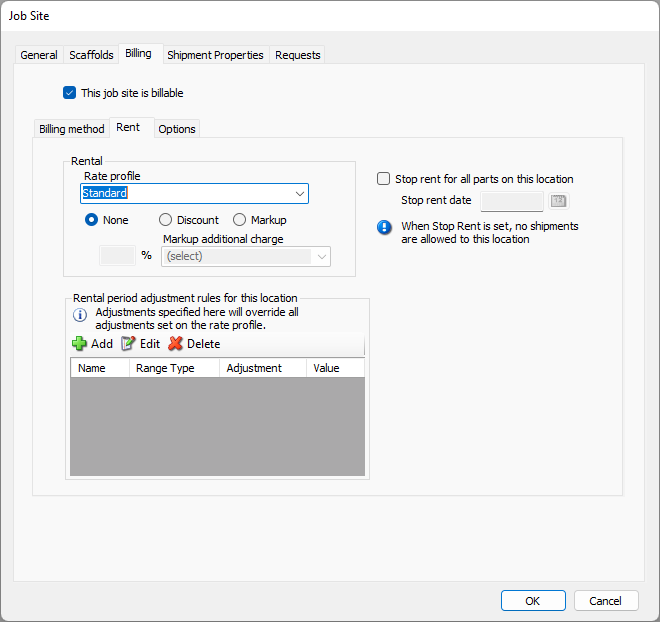
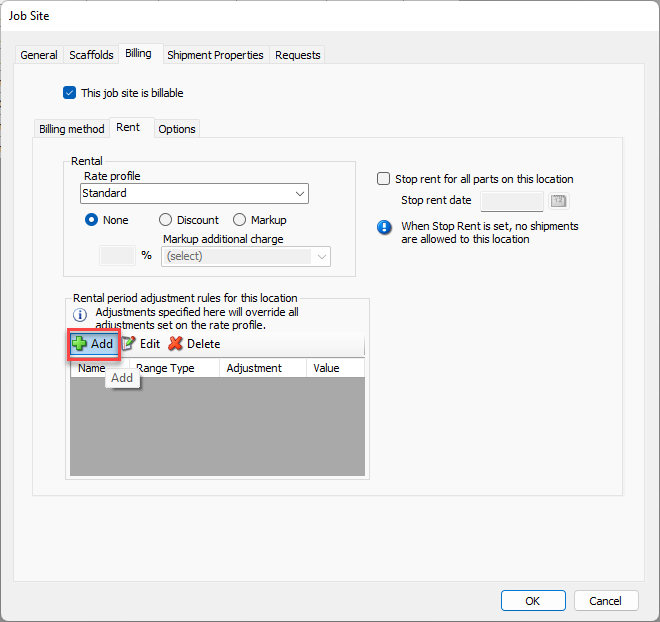
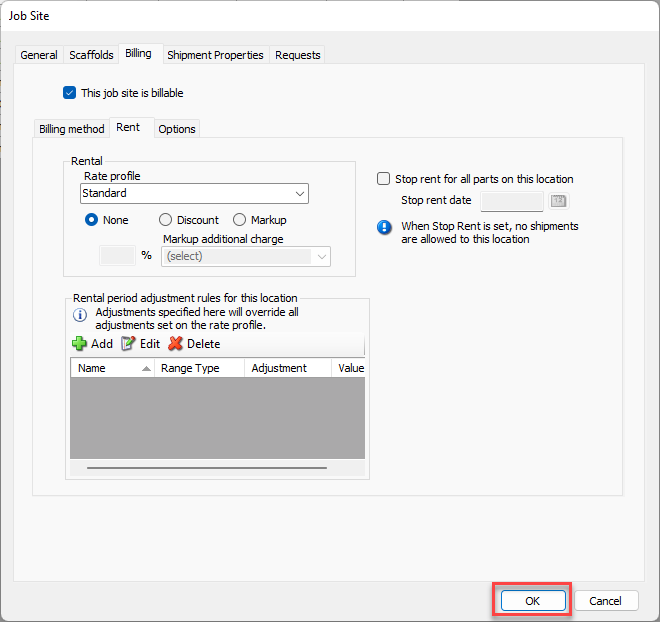
Rent Sub-Tab
The Rent sub-tab enables you to configure how rent is charged at the current Job Site and whether any adjustments apply to those charges.
Use this tab to add rental rates and adjustments.
Rental Section
The rental section of this tab enables you to configure what rent is charged at the current job site.
Rate Profile | Select the default rental rates for products, sell prices for Consumables, and other pricing for shipments from the Rate Profile dropdown to. For more information, refer to Working with Rate Profiles. Note: Assigning a rate profile is required. Note: If using Quantify in Single Rate Mode, this control is not included. |
None, Discount, Markup | Adding percentage Discount or Markup increases or decreases the total rent on generated invoices, which appears as a separate item on all invoice formats. Markups require that you select an Additional Charge to be used to identify the Markup on invoices. If you click the Discount radio button, enter appropriate percent discount into the % text field. If you click the Markup radio button, enter appropriate percent markup into the % text field. |
Markup Additional Charge | Use Markup Additional Charge dropdown and select the desired Additional Charge. Note: The markup will appear on invoicing with this Additional Charge label in the Product Charges section of the invoice. |
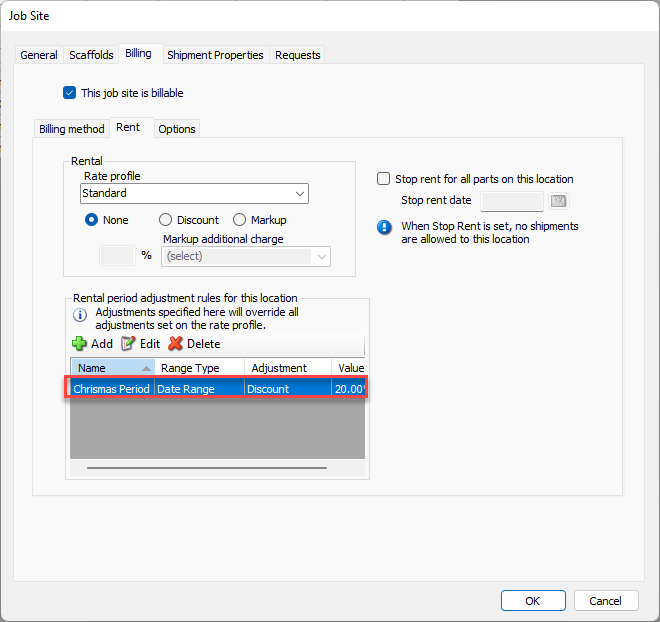
Rental Period Adjustment Rules for This Location Section
The Rental Period Adjustment Rules for This Location section enables you to add or remove Rental Period Adjustment Rules at any time. These rules override all adjustments that exist in the Rate Profile. For more information, refer to Working with Rent Adjustments.
Add | Click to add a Rental Period Adjustment Rule. For these procedures, refer to Adding Rental Period Adjustment Rules to a Job Site below. |
Edit | Click to edit a Rental Period Adjustment Rule. Refer to Adding Rental Period Adjustment Rules to a Job Site below. However, select the rule you want to edit, then click the Edit button. |
Delete | Click to delete a Rental Period Adjustment Rule. Select the rule you want to delete, then click the Delete button. |
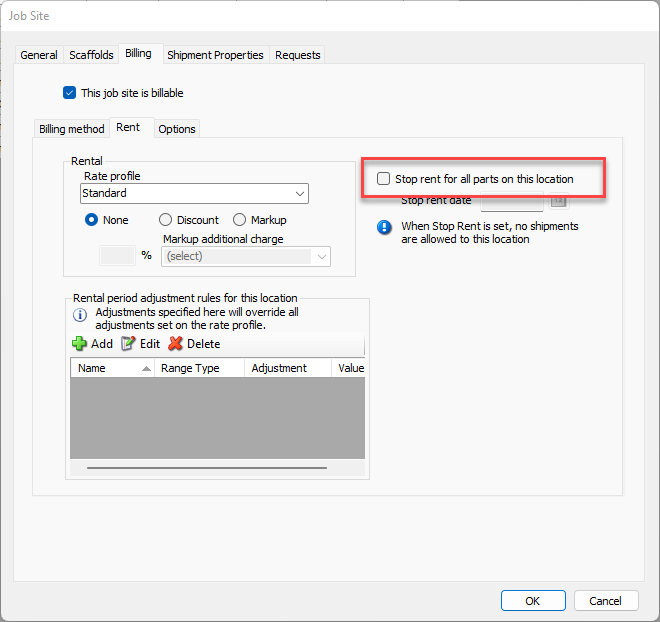
Right Side
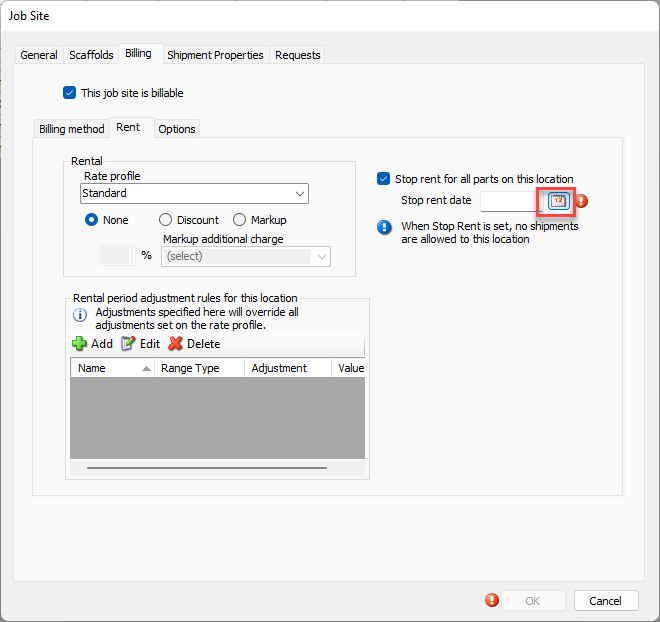
This side of the Rent tab enables you configure stop rent settings for the Job Site.
Stop rent for all parts on this location | Use the Stop Rent for all Parts on this Location checkbox to discontinue all rent and recurring charges as of the Stop Rent Date. |
Stop rent date | Enter the date on which you want to discontinue all rent and recurring charges into the Stop Rent Date date field. |
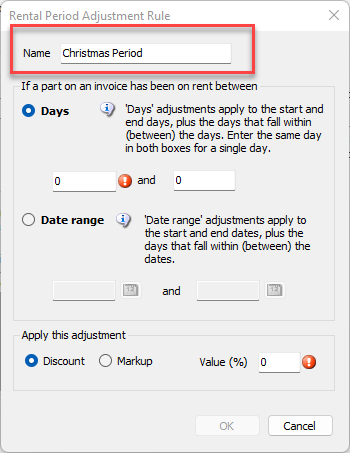
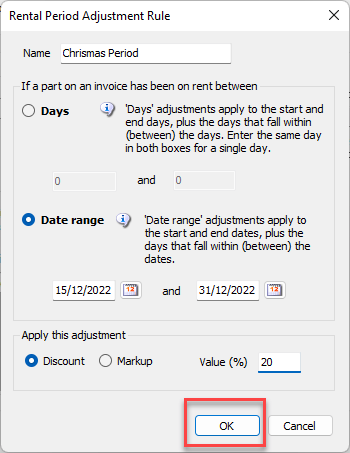
Rental Period Adjustment Rule Dialog
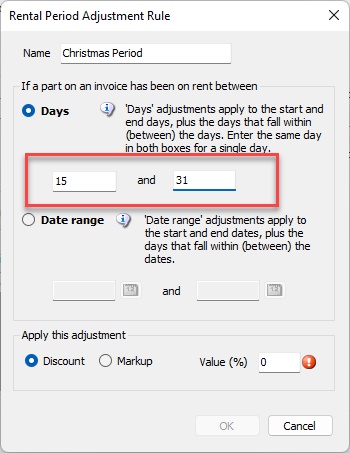
Use this dialog to adjust rent for items for a specific period of time, either by the count of days or by a date range. To learn how to add a Rental Period adjustment Rule, refer to Adding Rental Period Adjustment Rules to a Job Site below.
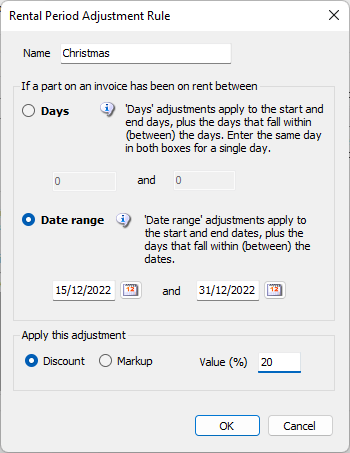
Name | Enter the name of the Rental Period Adjustment Rule into this text field. |
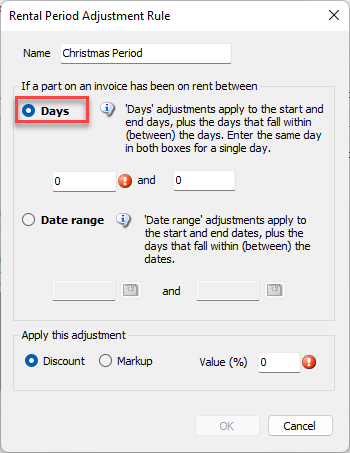
Days | When this radio button is selected, Quantify adjusts rent during the range of days you enter below. |
Days Text Fields | Enter the range of days of the month (for example: 3 and 12) for which you want Quantify to adjust rent. Enter the same day in each text field to adjust rent for one day. |
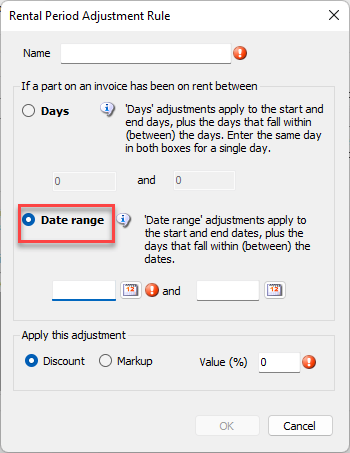
Date Range | When this radio button is selected, Quantify adjusts rent during the date range you enter in the text fields below. |
Date Range Text Fields | Enter the date range (for example: 9/16/2019 and 9/21/2019) for which you want to adjust rent. |
Discount | When this radio button is selected, Quantify applies a discount adjustment. |
Markup | When this radio button is selected, Quantify applies a markup adjustment. |
Value (%) | Enter the adjustment (in percent) into this text field. |
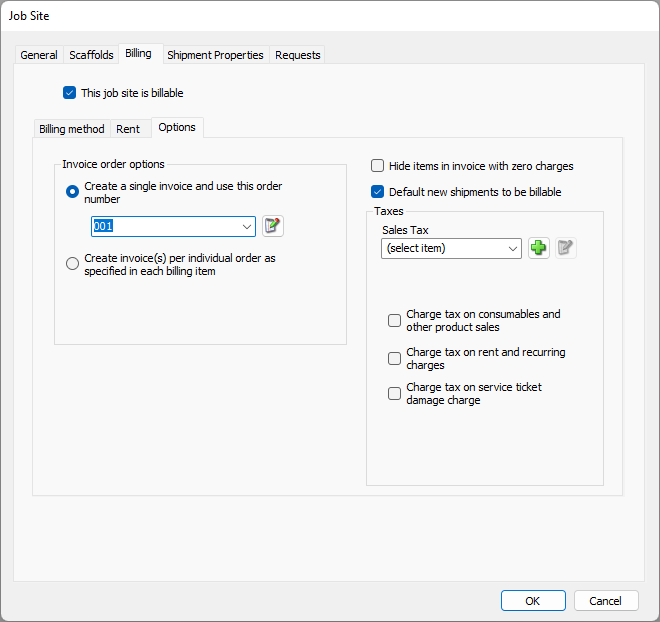
Options Sub-Tab
The Options sub-tab enables you to configure invoicing and tax options for the Job Site.
Use this tab to set invoicing and tax options.
Invoice Order Options Section
The Invoice Order Options and top-right sections enable you to configure invoicing options for the Job Site.
Create a single invoice and use this order number | When the Create a single invoice and use this order number radio button is selected, Quantify will generate a single invoice, using the invoice number you select in the dropdown below. You can select an order or leave this blank. Note: If you use this option, you can select the appropriate order number from the the Order Number dropdown. Note: For a Scaffold tracking Job Site, an addition order option will appear. |
Create invoice(s) per individual order as specified in each billing item | When the Create invoice(s) per individual order as specified in each billing item radio button is selected, Quantify will generate separate invoices based upon the PO or WO number assigned to each shipment and other billing items. Note: If you use the second option, each shipment to this job site will require an order number in the Billing for Delivery section of the shipment. |
Create invoice(s) grouped by purchase order. Order will be specified in each billing item | When the Create invoice(s) grouped by purchase order. Order will be specified in each billing item radio button is selected, Quantify will generate a single invoice per unique PO number and subtotal WO information within the invoice. Note: This only applies to Scaffold Tracking Job Sites. |
Top of Right Side
Hide items in Invoice with Zero Charges | When the Hide items in Invoice with Zero Charges checkbox is checked, Quantify will hide items that have no charge amount. Note: If all items on an invoice are hidden, Quantify will still generate a zero invoice. |
Default New Shipments to be Billable | When the Default New Shipments to be Billable checkbox is checked, new shipments will be billable. This option is selected by default for billable Job Sites. You can charge up to two tax rates on invoices for sales, rental and recurring charges, servicing and damage, and delivery charges. Select the desired tax rates and taxable items. For more information, refer to Working with Taxes. |
Taxes Section
The Taxes section enables you to configure tax options for the Job Site.
Sales Tax | Select the tax you want to apply from this dropdown. |
Other Tax | If necessary, select another tax you want to apply from this dropdown. |
Charge tax on consumables and other product sales | When this checkbox is checked, Quantify will calculate and charge taxes on the sales of consumables and other products. |
Charge tax on rent and recurring charges | When this checkbox is checked, Quantify will calculate and charge taxes on rent and recurring charges. |
Charge tax on service ticket damage charge | When this checkbox is checked, Quantify will calculate and charge taxes on charges for damages resulting in service Tickets. |
Charge tax on delivery charges and return charges | When this checkbox is checked, Quantify will calculate and charge taxes on delivery charges and return credits. |
Add | Click this button to add an item to the Sales Tax and/or Other Tax dropdowns. |
Edit | Select an item from either the Sales Tax or the Other Tax dropdown and click this button to edit the selection. |
Tax Code Dialog
This dialog appears when you click the Add or Edit buttons above. It enables you to add new entries in the Sales Tax and Other Tax dropdowns, or edit existing entries in either dropdown.
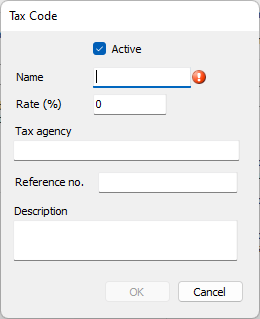
Active | When this checkbox is checked, Quantify will use this tax code in billing. |
Name | Use this text field to define the name of the tax code. This text field is required. |
Rate (%) | Use this text field to define the amount (in percent) of tax to charge. |
Tax Agency | Use this text field to define the agency to which the tax applies. |
Reference No. | Use this text field to define the reference number for internal use, as necessary. |
Description | Use this text field to define a short description of the tax. |
Adding Rental Period Adjustment Rules to a Job Site
Rental Period Adjustment Rules can be applied to Job Sites, providing temporary or permanent pricing adjustments from the rates specified in the selected Rate Profile. Rental Period Adjustment Rules can be a markup or a discount on the rent. Adjustments can be based upon a specific number of days on rent or based on a date range.
Warning: Rental Period Adjustment Rules added to the Job Site will override any and all Adjustments specified in the selected Rate Profile.
Warning: Changes made to Rental Period Adjustment Rules after invoices have been saved to the Job Site may affect return credit calculations.
Note: For Scaffold Tracking Job Sites, Rental Period Adjustments may be set on the Job Site itself (affecting all scaffolds) or on individual scaffolds associated with the Jib Site. For more information about adding rules to Scaffold Job Sites, refer to About Scaffold Tracking Job Site Rental Period Adjustment Rules.
To apply a Rental Period Adjustment Rule to a Job Site:
Locate and double-click the appropriate Job Site.
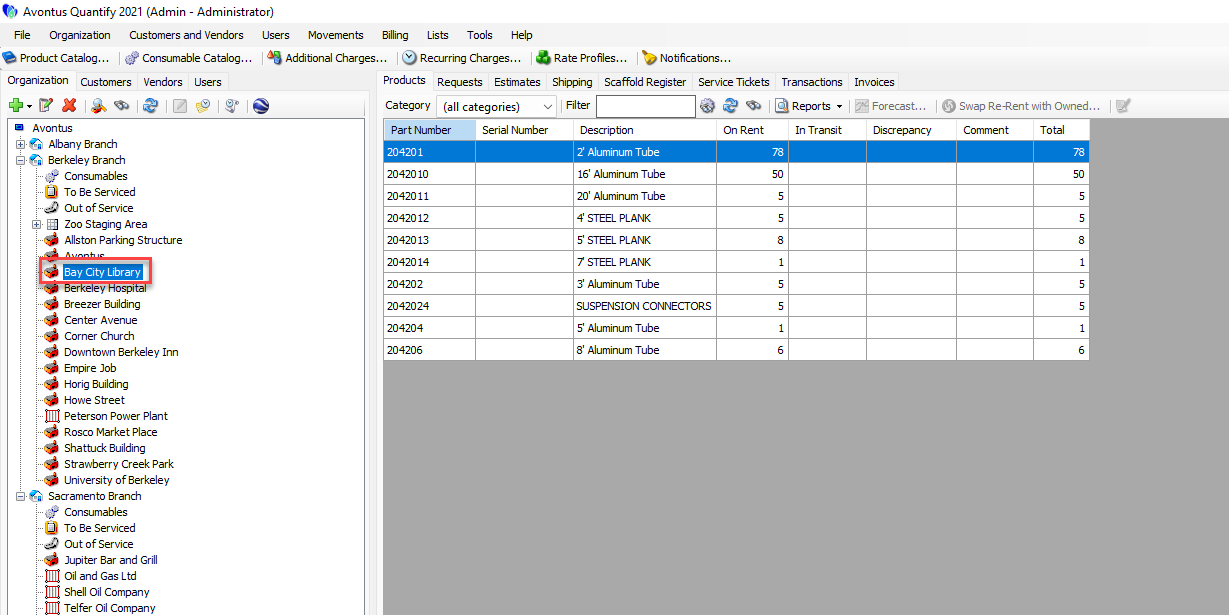
The Job Site dialog appears.Click the Billing tab.
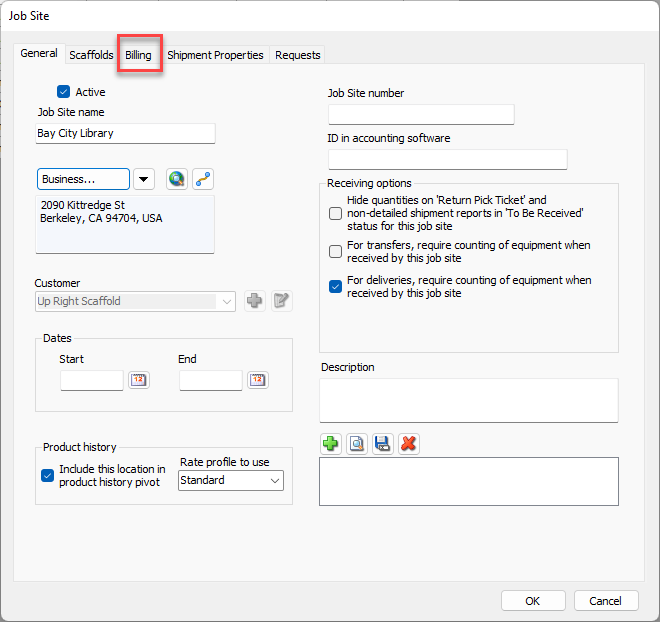
The Job Site dialog refreshesClick the Rent tab.
Click the Rental period adjustment rules for this location Add button (
 ).
).
The Rental Period Adjustment Rule dialog appears.Click in the Name text field and enter a name for the new rental period adjustment rule.
Determine whether this rule should be for a number of days on rent or a date range.
Days
The days of the month (e.g. 4th through 15th) an item is on rent begins on the Rent Start Date and ends on the rent stop date.
Date range
Date range rules are applied when the dates are included in the invoiced billing cycle
Note: If both Days and Date Range adjustments exist for the same time period, Quantify will apply the Date Range rules and will ignore the Days rule during the overlap time period.
Days
Click the Days radio button, if necessary.
Click in the left Day text field and enter the first day of the month on which Quantify will start applying the rule.
Click in the left Day text field and enter the last day of the month on which Quantify will stop applying the rule.
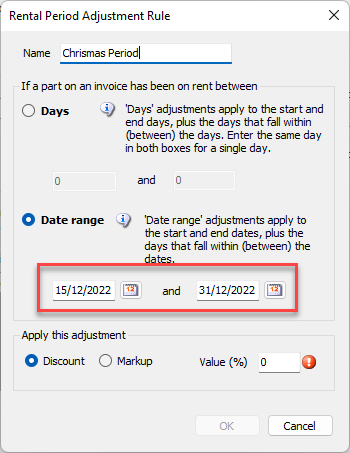
Date RangeClick the Date Range radio button, if necessary.
Click in the left Date Range text field and enter the date on which Quantify will start applying the rule.
Click in the left Date Range text field and enter the date on which Quantify will stop applying the rule.
Click the Discount or Markup radio button, as appropriate,
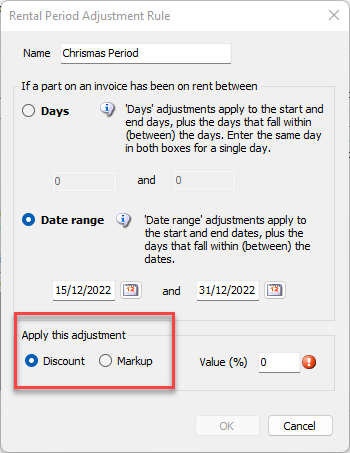
Click in the Value (%) text field and enter a value (in percent) of the discount or markup.

Click OK when ready.
You may add additional rules as desired.
Deleting a Rental Period Adjustment Rule from a Job Site
Quantify enables you to easily remove any current Rental Period Adjustment Rule.
Warning: Changes made to Rental Period Adjustment Rules after invoices have been saved to the Job Site may affect return credit calculations.
To delete a Rental Period Adjustment Rule from a Job Site:
Locate and double-click the appropriate Job Site.
The Job Site dialog appears.Click the Billing tab.
The Job Site dialog refreshesClick the Rent tab.
Click the rule you want to delete.
Click the Delete button (
 ).
).

A confirmation dialog appears.

Click Yes.
The Job Site dialog returns, minus the Rental Period Adjustment Rule.Click OK.
Applying a Stop Rent Date to a Job Site
All rent and recurring charges on a Job Site can be stopped as of a specific date, the Stop Rent Date. Products will remain at the Job Site, until a Return Shipment is completed.
Warning: For Job Sites or Rate Profiles with a minimum rental days, the Stop Rent Date overrides the minimum and will discontinue charges on the specified date. Rent for items within the minimum rental days will be prorated up to the Stop Rent Date.
Important!: Before you begin, make sure the Job Site does not have any Shipments in a non-completed status, such as Reserved or In Transit.
To stop rent on a Job Site:
Locate and double-click the appropriate Job Site.
The Job Site dialog appears.Click the Billing tab.
The Job Site dialog refreshesClick the Rent tab.
Click the Stop rent for all parts on this location checkbox, to put a check in it.
Click the Stop rent date calendar icon (
 ).
).
The calendar appears.
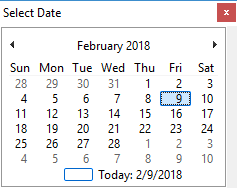
Locate and click the date on which you want to stop rent.
All current rent and recurring charges on the Job Site will discontinue as of this date. No additional deliveries will be allowed on a Job Site with a specified Stop Rent Date. Existing Deliveries or Transfers cannot be edited or voided when a Stop Rent Date is applied.Note: The Stop Rent Date cannot be edited or removed after invoices have been generated for the billing cycle that includes this date.
Click OK.