Importing information into Sage 50 from Quantify requires you to create a Sage 50 import template. The procedures below show you how to do that.
To configure Sage 50 to Import from Quantify:
- Launch Sage 50.
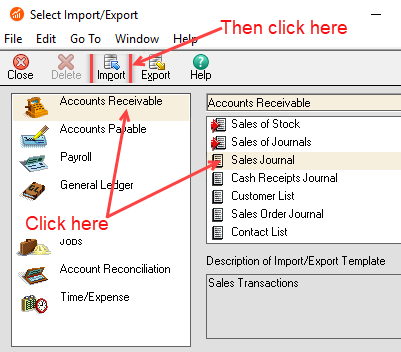
- Click the File menu and select Select Import/Export.

- Click Accounts Receivable.
- Click Sales Journal.
- Click Import.
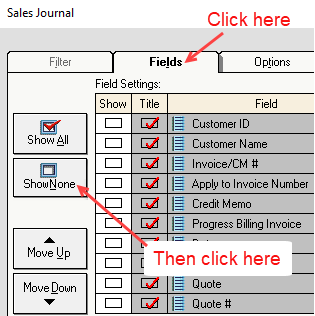
The Sales Journal dialog appears. - Click the Fields tab and click Show None, to remove the checks from all Show checkboxes.
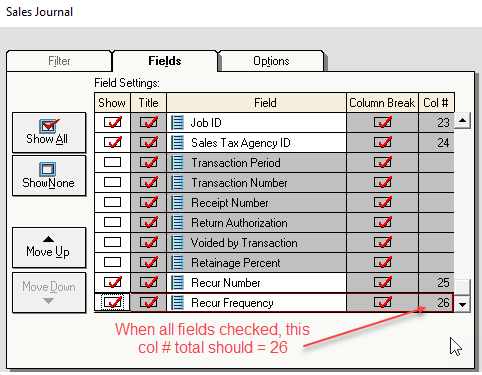
- Click the Showcheckbox for these 26 options (to put a check in them):
- Customer ID
- Invoice/CM #
- Apply to Invoice Number
- Credit Memo
- Date
- Customer PO (Not currently exported)
- Date Due
- Sales Representative ID
- Accounts Receivable Account (Not currently exported)
- Sales Tax ID
- Number of Distributions
- Invoice/CM Distribution
- Apply to Invoice Distribution
- Apply to Sales Order
- Quantity
- Description
- G/L Account
- Unit Price
- Tax Type
- Amount
- U/M ID
- U/M No. of Stocking Units
- Job ID
- Sales Tax Agency ID
- Recur Number
- Recur Frequency
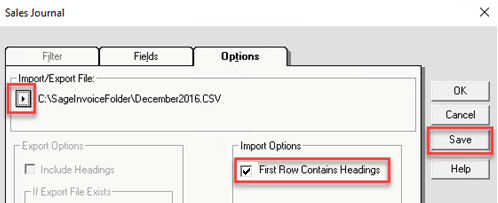
- Click the Options tab.
- Set the Import/Export File location to the location into which the exported .csv files will be saved.
Note: A .csv file must exist in this folder to select this location. - Click the First Row Contains Headings checkbox in the Import Options section, to remove its check.
- Click Save to save these settings to an import template for future use.
The Save As dialog appears. - Enter name of the template file (such as Quantify Invoice Import), then click OK.
- When back on the Options tab, click Cancel, to dismiss this window.
Note: If you click OK now, the Invoice Import process will begin.We recommend backing up your Sage database at this time to save this template.