You can import plans from CAD (AutoCAD) drawings to use as a 2D background to your Avontus Designer drawing. Once in, Avontus Designer enables you to edit its properties.
Note: This feature only supports AutoCAD drawings in 2007 format or prior. For newer versions, re-save the file in a compatible format before inserting.
Importing a 2D Drawing from CAD/AutoCAD
Avontus Designer enables you to import a 2D CAD/AutoCAD drawing and configure it to best fit your drawing.
To import a 2D drawing from CAD/AutoCAD:
Select the Import/Export ribbon, then click CAD Drawing in the Import controls
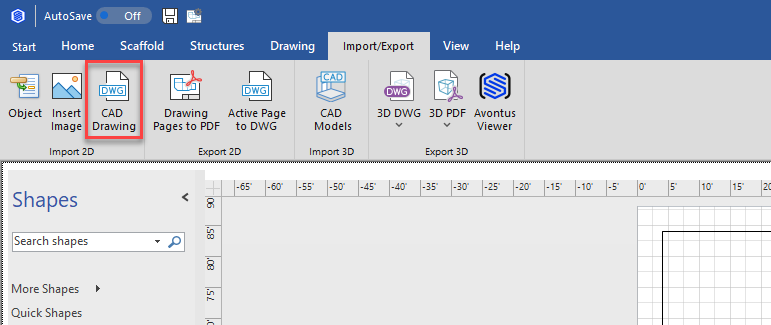
The Insert AutoCAD Drawing dialog appears.Locate and select the appropriate .dwg file and double-click the file.

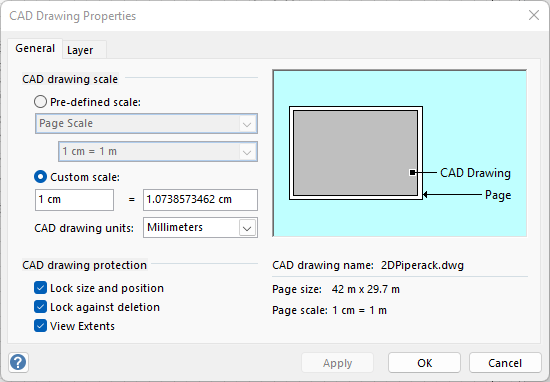
The CAD Drawing Properties dialog appears.
You will now enter information based upon the CAD drawing's properties that will ensure the drawing is properly scaled and displayed when inserted into your Avontus Designer drawing.Assign a scale to the drawing.
To assign a pre-defined scale:Click the Pre-defined Scale radio button.
Click the top dropdown and select the appropriate standard.
Click the bottom dropdown and select the appropriate ratio.

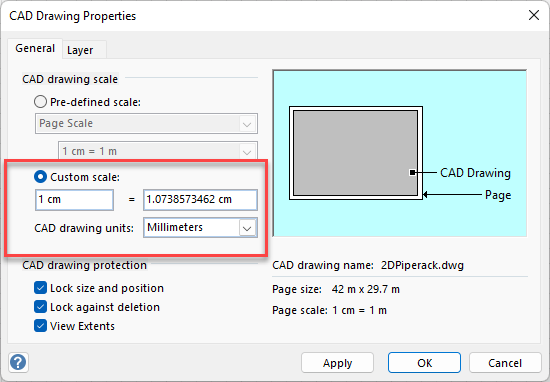
To assign a custom scale:
Click the Custom Scale radio button.
Enter the scale dimensions in both textvboxes
Click the CAD Drawing Units dropdown and select the appropriate drawing units.
Click the appropriate CAD Drawing Protectioncheckbox(es) to uncheck them. All options are enabled by default. Your options are:
Lock size and position
This locks the relative size and position of the inserted drawing by locking the related layer
Lock against deletion
This prevents the inserted drawing from being deleted.
View Extents
This will zoom out on the CAD drawing to view all extents of the drawing. When not enabled, the zoom level of the CAD drawing will be retained which may result in a partial image.Inserted drawings are added to a Layer of the Drawing Page. Use these options to set the properties of the Layer.

Click the Layer tab.
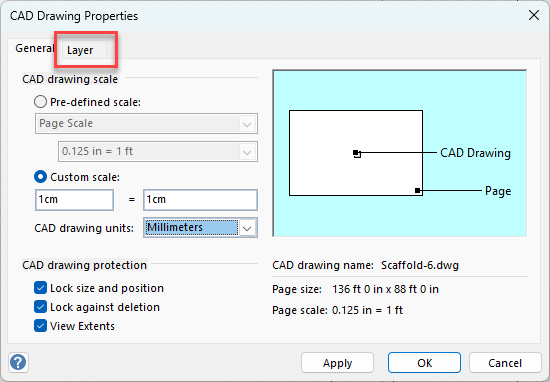
The CAD Drawing Properties dialog refreshes.Click Set Visibility. This changes the drawing visibility from Yes to No or No to Yes.
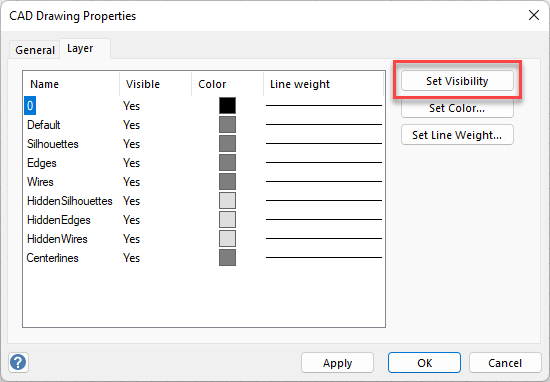
Click Set Color.

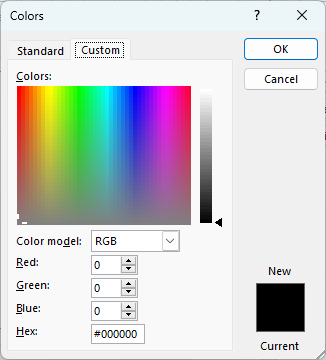
The Colors dialog appears.
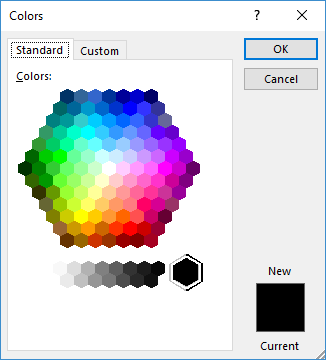
Select a custom color for the lines of the inserted drawing and click OK
The CAD Drawing Properties dialog returns.Click Set Line Weight.

The Custom Line Weight dialog appears.Click in the text field and enter the thickness or weight of the lines of the inserted drawing.
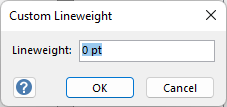
Click OK.
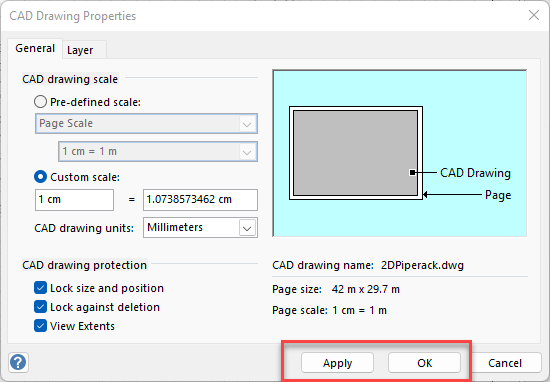
The CAD Drawing Properties dialog returns.Click Apply to preview the changes.
Click OK when ready.

Avontus Designer inserts the drawing.
Editing an Inserted CAD Drawing's Properties
Avontus Designer enables you to edit all of the properties that were chosen during a CAD drawing's insertion.
If you want to edit an inserted CAD drawing's properties:
Double-click the CAD drawing.
Note: Or right-click and select
The CAD Drawing Properties dialog appears.
Use the procedures above to edit the drawing's properties
When done click Apply and OK