To start, you will build one end of the structure, before adding Pilasters that connect it to the other end of the structure.
To start the structure:
- Click the Wall shape and drag it onto the drawing page.
- Right-click the Wall and select Shape Data from the Data sub-menu.
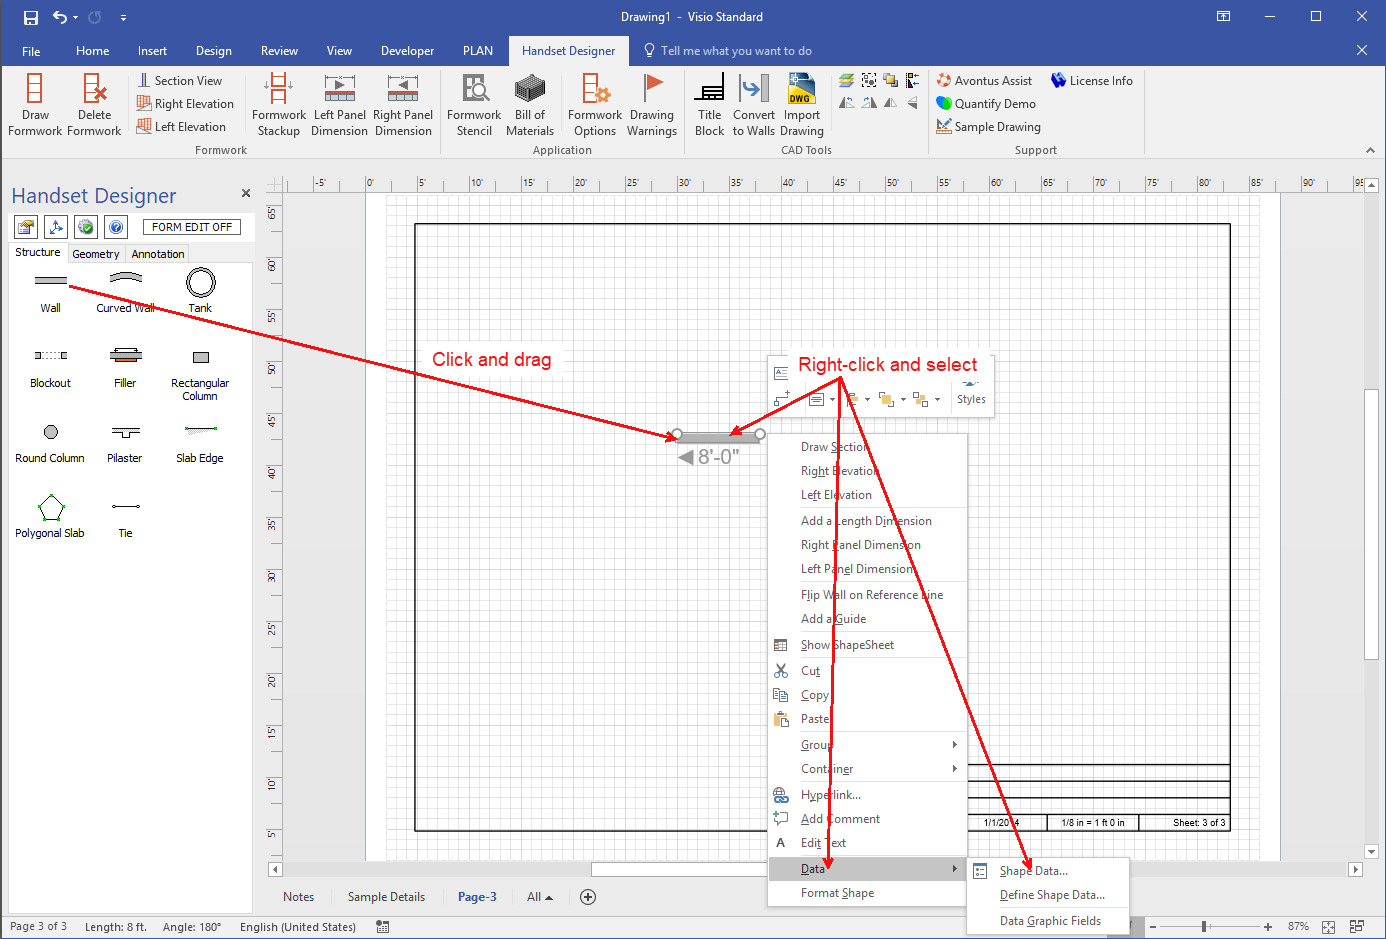
The Shape Data - Wall popup appears. - Click in the Wall length text field, enter 16 ft. and press the Enter key on your keyboard.
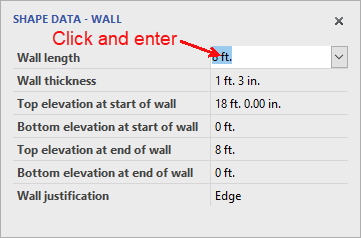 Note: By default, the Wall's reference line should be on top. If is isn't, right-click the Wall and select Flip Wall on Reference Line from the menu that appears.
 - Click the Wall shape and drag it onto the drawing page.
- Click a corner of the Wall and drag it so it is vertical..
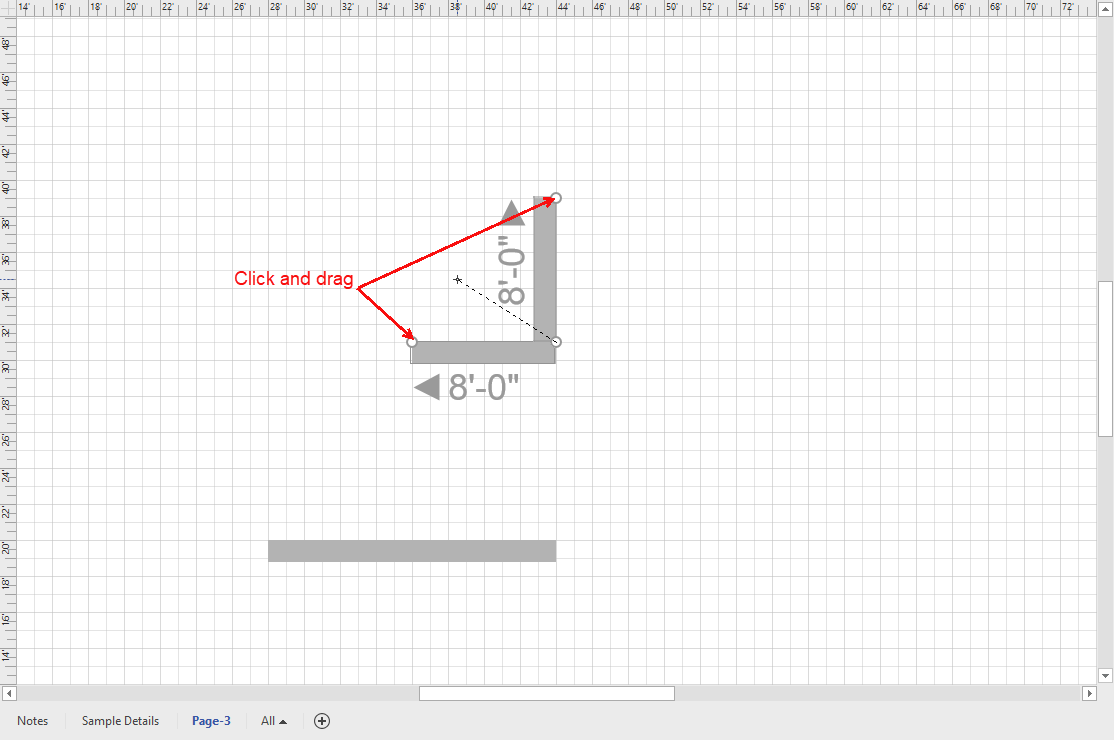
- Use the Shape Data popup to make the Wall length 6 ft 6 in.
- If the Wall's reference line is on the right, right-click the wall and select Flip Wall on Reference Line from the menu that appears.
- Make a copy of the new Wall, right-click the Wall and select Flip Wall on Reference Line from the menu that appears, so the reference line is on the left.
- Click the right vertical Wall and drag it onto the corner of the horizontal Wall, so that it glues to the Wall.
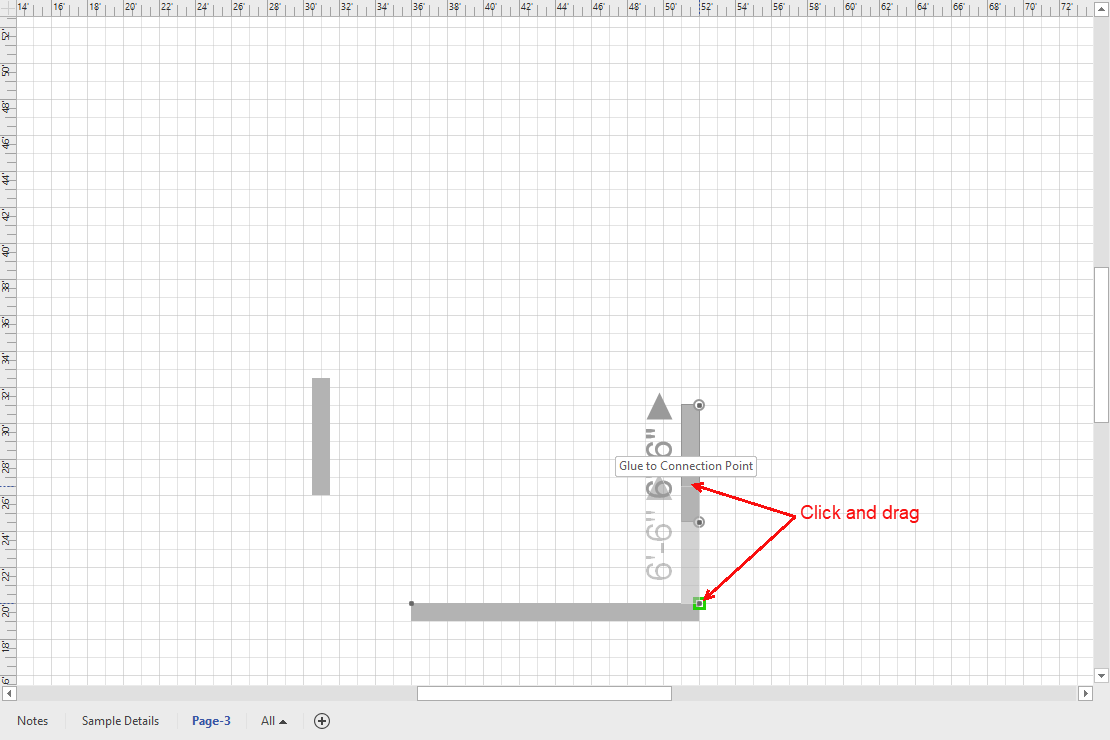
- Repeat the above step for the left Wall, then add Pilasters and the remaining straight Walls.