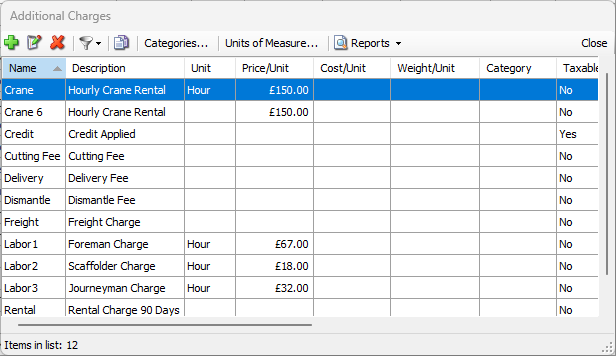
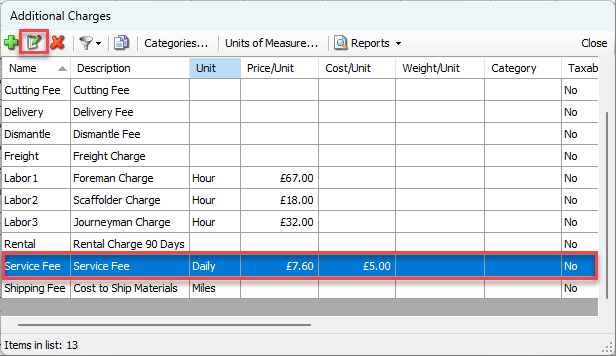
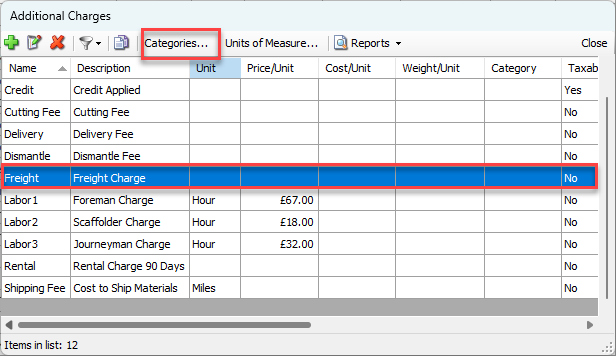
Additional Charges allow for the billing of one-time charges (such as freight or labor items) and may be applied to Shipments, Estimates, Service Tickets and Invoices. The Additional Charges dialog displays the Additional Charges that currently exist in the database.
Adding an Additional Charge
Quantify provides a simple process for adding Additional Charges. Before you start, make sure you have the following information:
Whether the Additional Charge will be taxable
Whether the charge will be used on all Service Tickets
What category the charge will belong to
What Units will apply to the Additional Charge
What will be the default charge per unit, if any
What was the cost per unit paid when the item was purchased if needed
Any appropriate accounting Items necessary for export to your accounting program, such as QuickBooks
Important: The procedures below only use the required fields for an Additional Charge. Some accounting software packages require more information for successful integration. For example, some require that the Additional Charge have a description and revenue code. If your company uses such a package, be sure to enter that information into the Additional Charge dialog.
To add an Additional Charge:
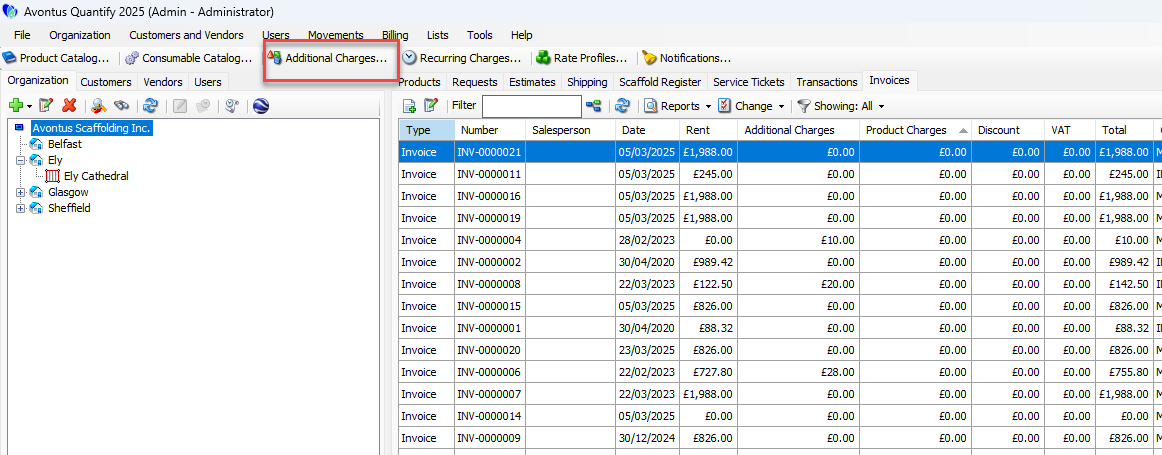
Click Additional Charges.

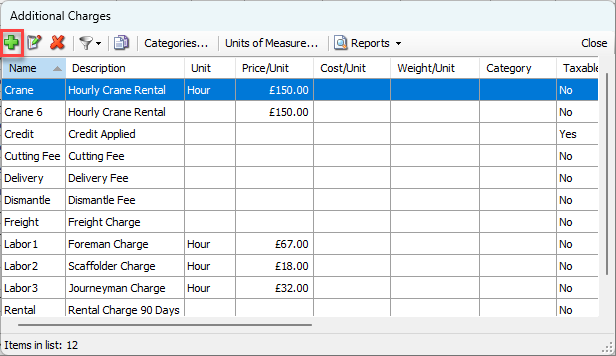
The Additional Charges dialog appears.Click the Add Item button (
 ).
).
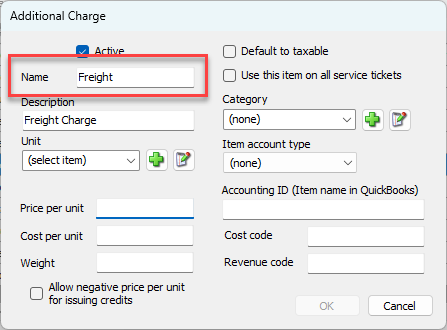
The Additional Charge dialog appears.Click in the Name text field and enter a name for the new Additional Charge.
Click in the Description text field and enter a short description of the new Additional Charge.
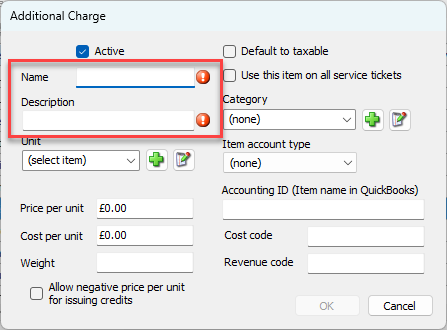
Complete the Additional Charge dialog with information specific for this charge.
Active checkbox
Enabled by default, the Additional Charge will be available for use
Default to taxable checkbox:
Disabled by default. If this item will be taxable enable this checkbox
Use this item on all service tickets checkbox
Disabled by default. To includes this item on all service tickets enable this checkbox
Category dropdown
Select a category for item from the drop down if needed. Use the ADD button to add a Category to the database on the fly
Unit dropdown
Select the unit entry from the drop-down, as appropriate. Use the Add button to add a Unit of measure to the database on the fly.
Price per unit text field
Enter the default charge per unit. If left blank, amount will be entered manually in the shipment or estimate as appropriate
Cost per unit text field
Cost paid when item was purchased if needed. If left blank, amount will be entered manually as appropriate
Accounting Items text fields
These include Accounting ID, Cost Code and Revenue Code. Complete as necessary for export to your accounting program, such as QuickBooks
Click OK.

Adding an Additional Charge for Credit
Quantify provides a simple process for apply credit through an Additional Charge. Before you start, make sure you have the following information:
Whether the Additional Charge will be taxable
Whether the charge will be used on all Service Tickets
What category the charge will belong to
What Units will apply to the Additional Charge
What will be the default charge per unit, if any
What was the cost per unit paid when the item was purchased if needed
Any appropriate accounting Items necessary for export to your accounting program, such as QuickBooks
To add an Additional Charge that can be used to apply credit(s):
Click Additional Charges.

The Additional Charges dialog appears.Click the Add Item button (
).
The Additional Charge dialog appears.Click in the Name text field and enter a name for the new Additional Charge.
Click in the Description text field and enter a short description of the new Additional Charge.
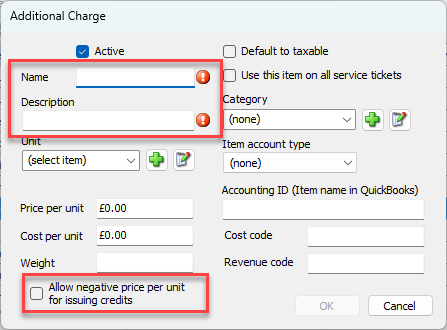
Click the Allow Negative Price per Unit for Issuing Credits checkbox, to put a check in it.
This enables users to enter a negative or positive amount in the price field when adding this charge to Shipments or Invoices.
Complete the Additional Charge dialog with information specific for this charge.
Active checkbox Enabled by default, the Additional Charge will be available for use Default to taxable Disabled by default. If this item will be taxable enable this checkbox Use this item on all service tickets Disabled by default. To includes this item on all service tickets enable this checkbox Category Select a category for item from the drop down if needed. Use the ADD button to add a Category to the database on the fly Unit Select the unit entry from the drop down, as appropriate. Use the Add button to add a Unit of measure to the database on the fly Accounting Items Complete as necessary for export to your accounting program, such as QuickBooksNote: Do not enter amounts in the Price per unit and Cost per unit. The amount of the credit can be added at the time it is added to a Shipment or Invoice.
If credits will be applied to taxable items or services, you may also set credits to Default to taxable. This will reduce the total taxes on an invoice that includes credits.
Click OK.

Editing an Additional Charge
Once an Addition Charge has been created, you can edit it at any time.
To edit an Addition Charge:
1. Click Additional Charges.

The Additional Charges dialog appears.
2.Click the Addition Charge you want to edit, to select it.
3. Click the Edit Selected Item button (![]() ).
).
The Additional Charge dialog appears.
As necessary:
4. Click in the Name text field and enter a new name for the new Additional Charge.
5. Click in the Description text field and enter a new short description of the new Additional Charge.

6. Update the Additional Charge dialog with information specific for this charge.
Active checkbox | Enabled by default, the Additional Charge will be available for use |
Default to taxable | Disabled by default. If this item will be taxable enable this checkbox |
Use this item on all service tickets | Disabled by default. To includes this item on all service tickets enable this checkbox |
Category | Select a category for item from the drop down if needed. Use the ADD button to add a Category to the database on the fly, |
Unit | Select the unit entry from the drop down, as appropriate. Use the Add button to add a Unit of measure to the database on the fly |
Price per unit | Enter price to charge per unit. If left blank, amount will be entered manually in the shipment or estimate as appropriate |
Cost per unit | Cost paid when item was purchased if needed. If left blank, amount will be entered manually as appropriate |
Accounting Items | Complete as necessary for export to your accounting program, such as QuickBooks |
7. Click OK.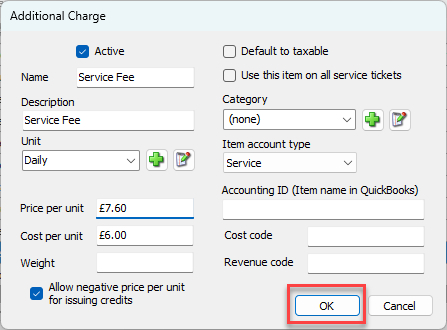
Deleting an Additional Charge
Quantify enables you to delete Additional Charges that have not been used.
To delete an Additional Charge:
Click Additional Charges.

The Additional Charges dialog appears.Click the charge you want to delete, to select it.
Click the Delete Selected Item button (
 ).
).

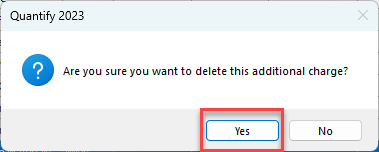
A confirmation dialog appears.Click Yes.
Copying an Additional Charge
Once an Addition Charge has been created, you can copy it at any time. Once copied, you can change it to suit your requirements.
To copy an Additional Charge:
Click Additional Charges.
The Additional Charges dialog appears.Click the Charge you want to copy, then click the Create new unit price from copy of selected button (
 ).
).
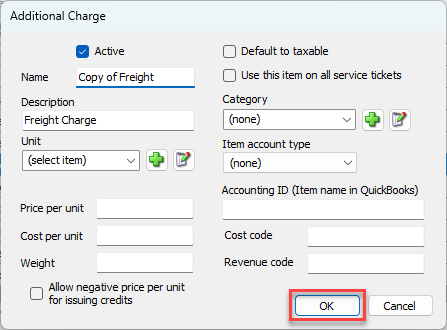
The Additional Charge dialog appears.Click in the Name text field and enter a new name for the Addition Charge.
As necessary, make changes to the details of the Addition Charge. For these instructions, refer to Adding an Additional Charge above.
When are done, click OK.
The Additional Charges dialog returns,Click Close.
