Pre-return Shipments enable you to return equipment from a Job Site and have it counted later, when the equipment is unloaded, thus allowing the equipment to be easily identified when the equipment is ready to be counted.
Configuring a Pre-Return's Counts
Before Quantify can process a pre-return, it must count the pre-return.
To configure a pre-return's counts:
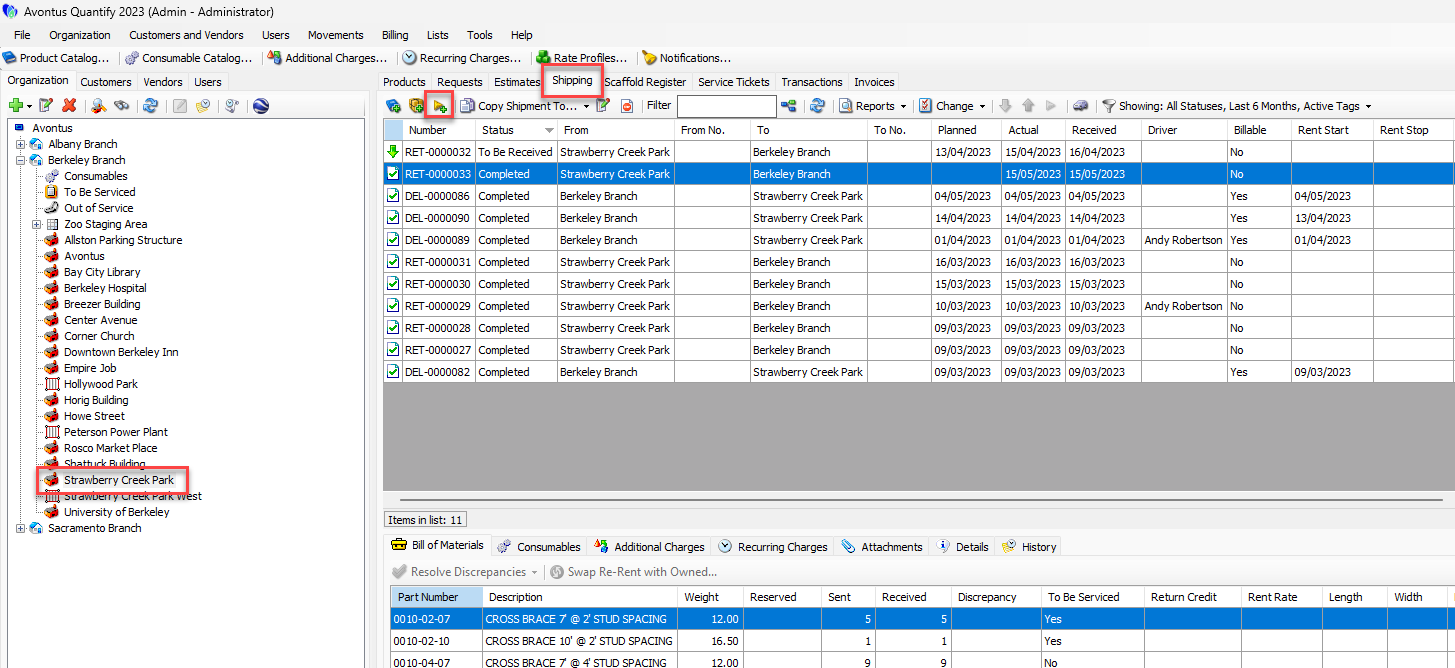
Locate and click the Branch Office or Job Site for which you want to configure pre-return counts and click the Shipping tab.
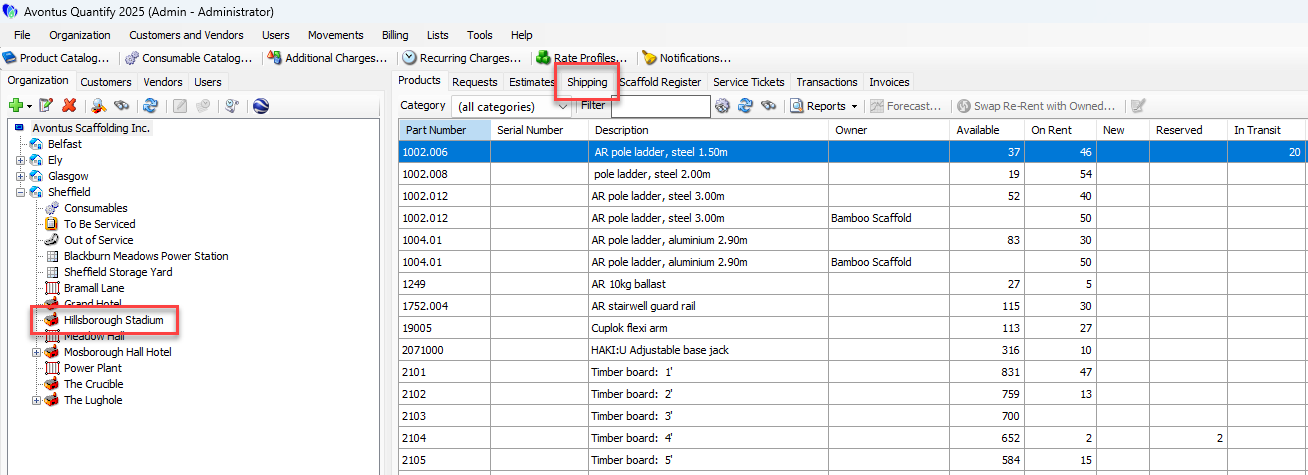
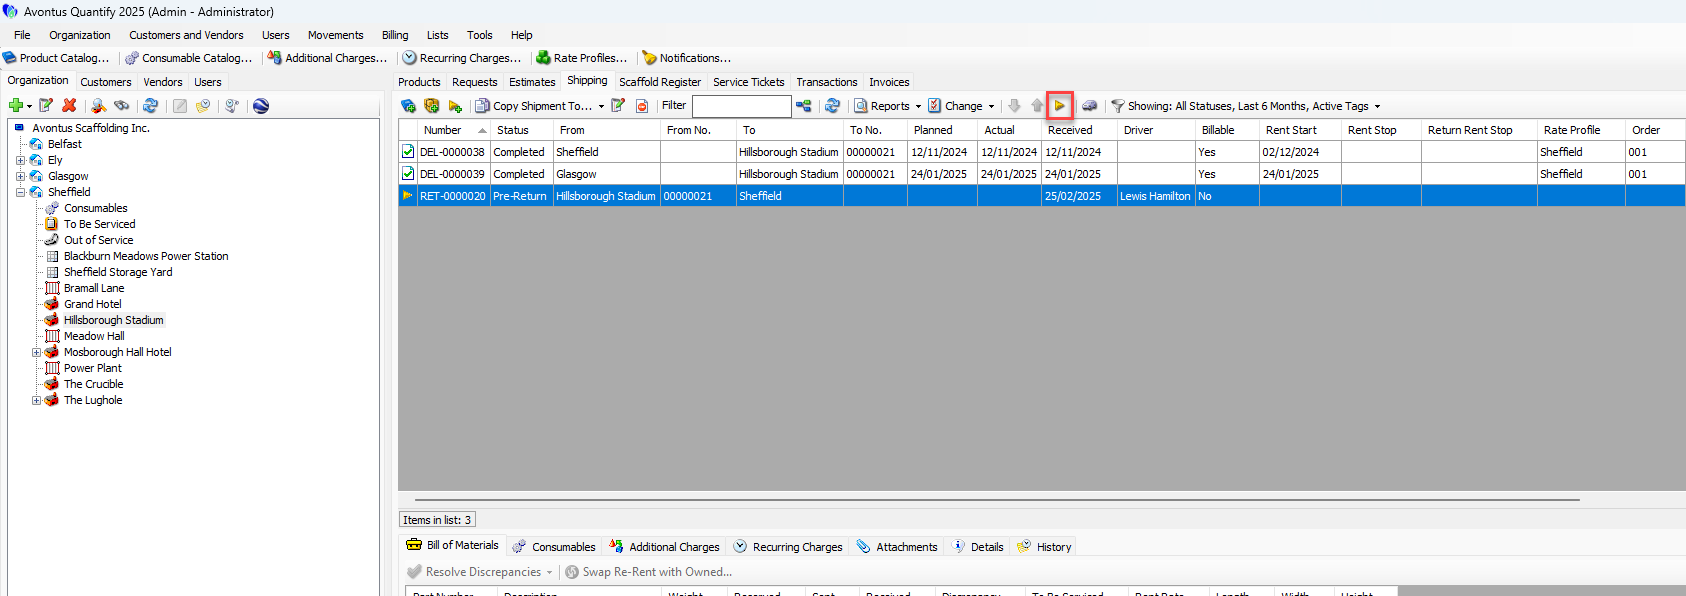
Click the pre-return you want to configure and click the Count Materials for Selected Pre-Return button (
 ).
). 
The New Direct Ship dialog appears.
Set the Planned Ship date
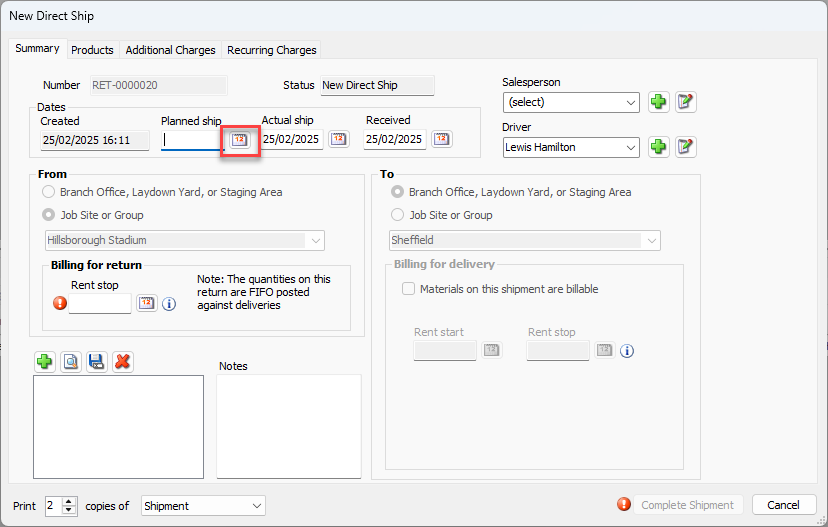
From the calendar icon, select a date
Click the Rent Stop calendar icon (
 ).
).
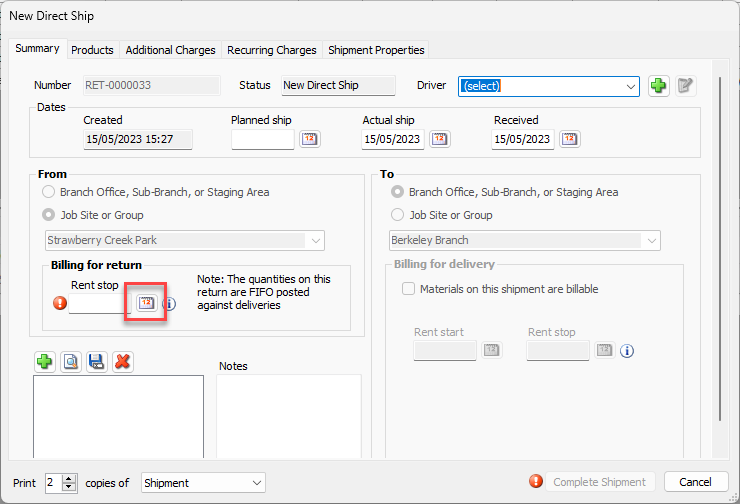
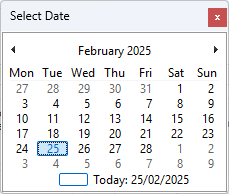
The calendar appears.
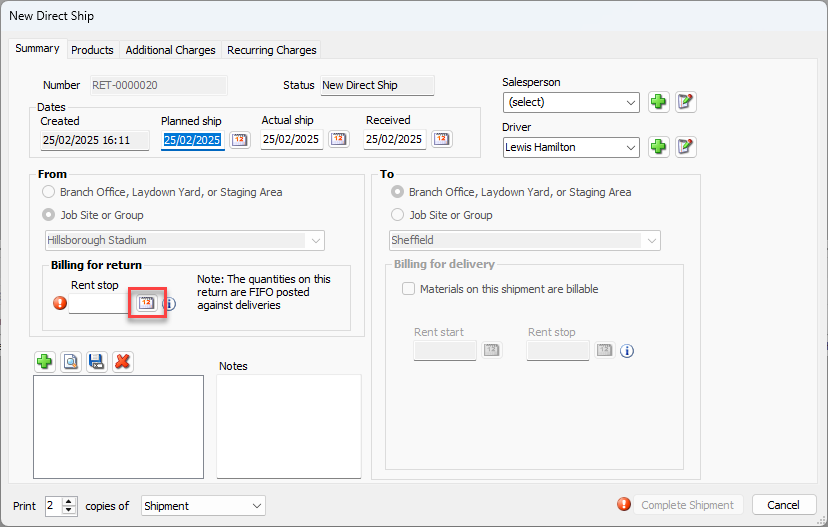
Locate and click the correct planned date of shipment.
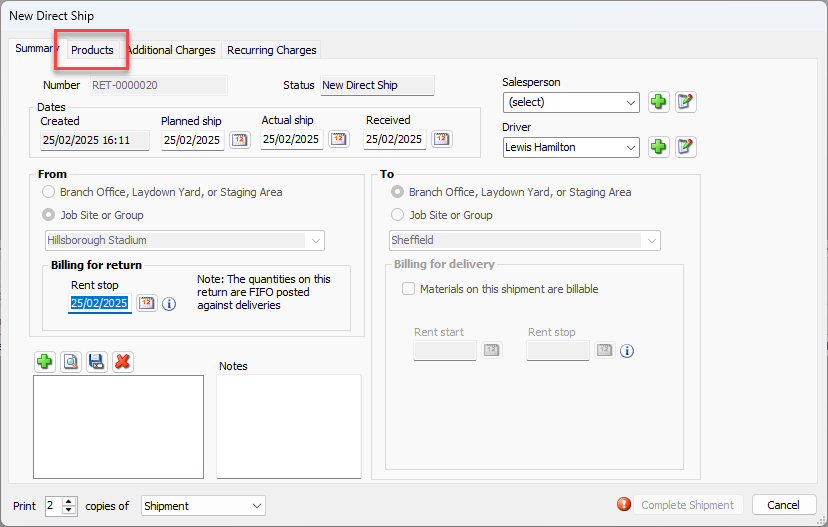
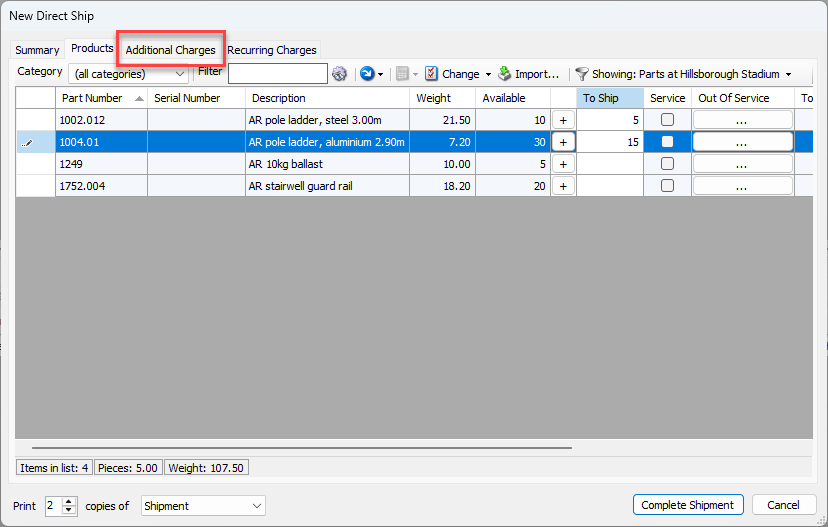
Click the Products tab.
The New Direct Ship dialog refreshes.
Locate and double-click the appropriate cell in the To Ship column and enter the number of units to include in the Shipment.
Note: The Available column shows the current stock of each part.
Alternatively, you can click the Plus ( ) button once for each unit you want to ship.
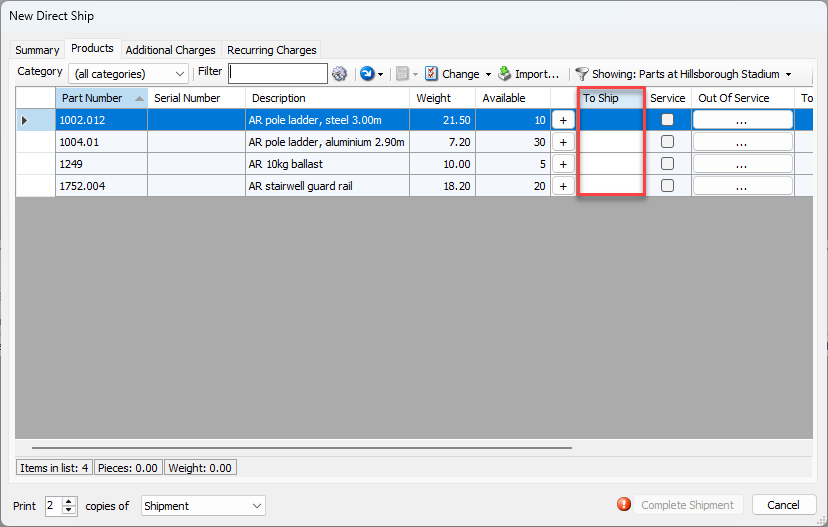
Repeat the above two steps as many times as necessary.
Click the Additional Charges tab.
Locate and double-click the appropriate cell in the Weight column and enter the appropriate weight.
Locate and double-click the appropriate cell in the Price/Unit column and enter the unit price.
Locate and double-click the appropriate cell in the No. Units column and enter the appropriate number of units.
Locate and click the appropriate Taxable checkbox.
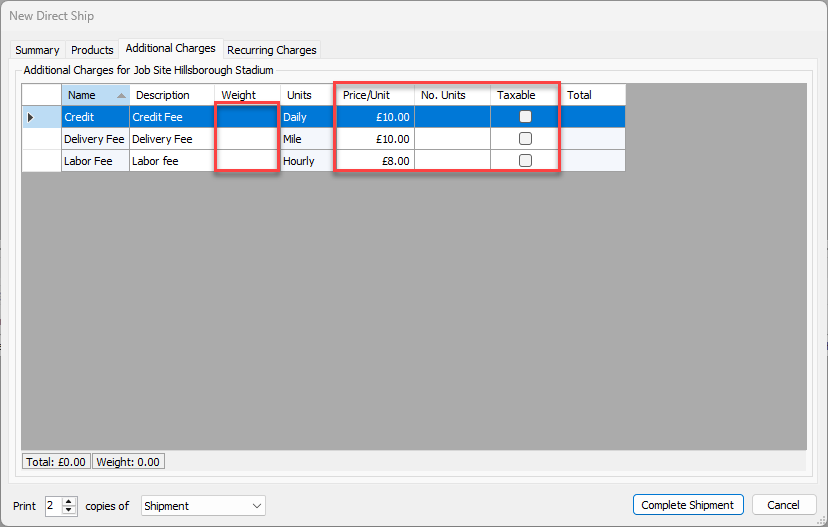
Repeat the above steps as many times as necessary.
Click Complete Shipment.

Quantify updates the shipping status to Completed and adds the Products to inventory.
Creating a Pre-Return Shipment
Pre-return Shipments allow equipment to be returned from a Job Site and counted later when the equipment is unloaded. The pre-return status allows the equipment to be easily identified when the equipment is ready to be counted.
To create a pre-return shipment:
Locate and click the Job Site from which you want to ship equipment, click the Shipping tab and click the Add Return for Products to be Counted at Another Time button (
 ).
).
The New Direct Ship dialog appears, set up for a return.
Note: You can also right-click the Job Site and select Pre-Return from this location from the New Shipment sub-menu.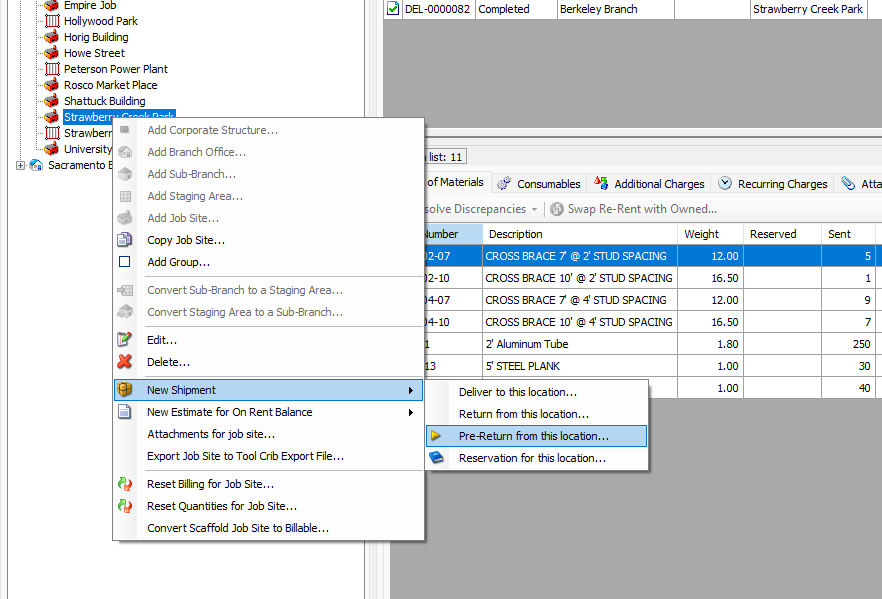
Click the Received calendar icon (
 ).
).
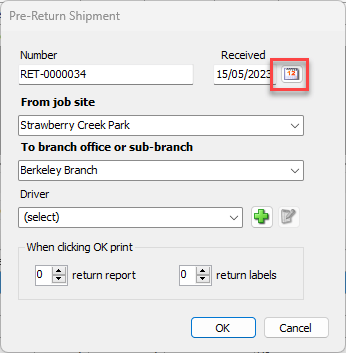
The calendar appears.

Locate and click the correct date of receipt.
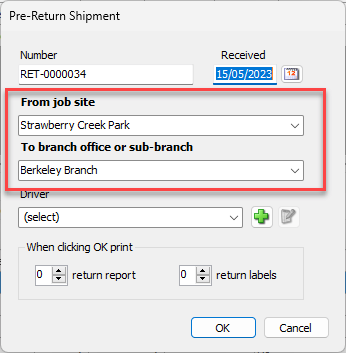
Click the From Job Site dropdown and select the Job Site from which the Shipment will originate.
Click the To Branch Office or Sub-Branch dropdown and select the location at which the Shipment will arrive.
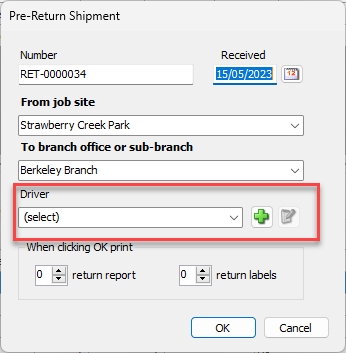
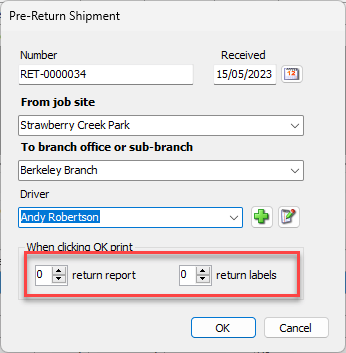
As necessaryClick the driver dropdown and select the appropriate driver.
Click in the Return Report text field and enter the number of copies of the return report you want.
Click in the Return Labels text field and enter the number of copies of return labels you want.
Click OK.
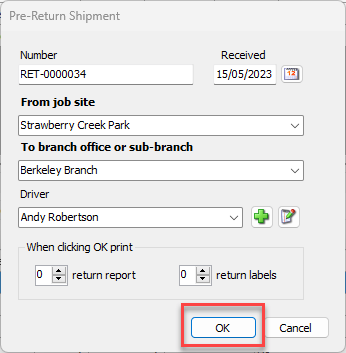
The pre-return appears in the Shipping tab.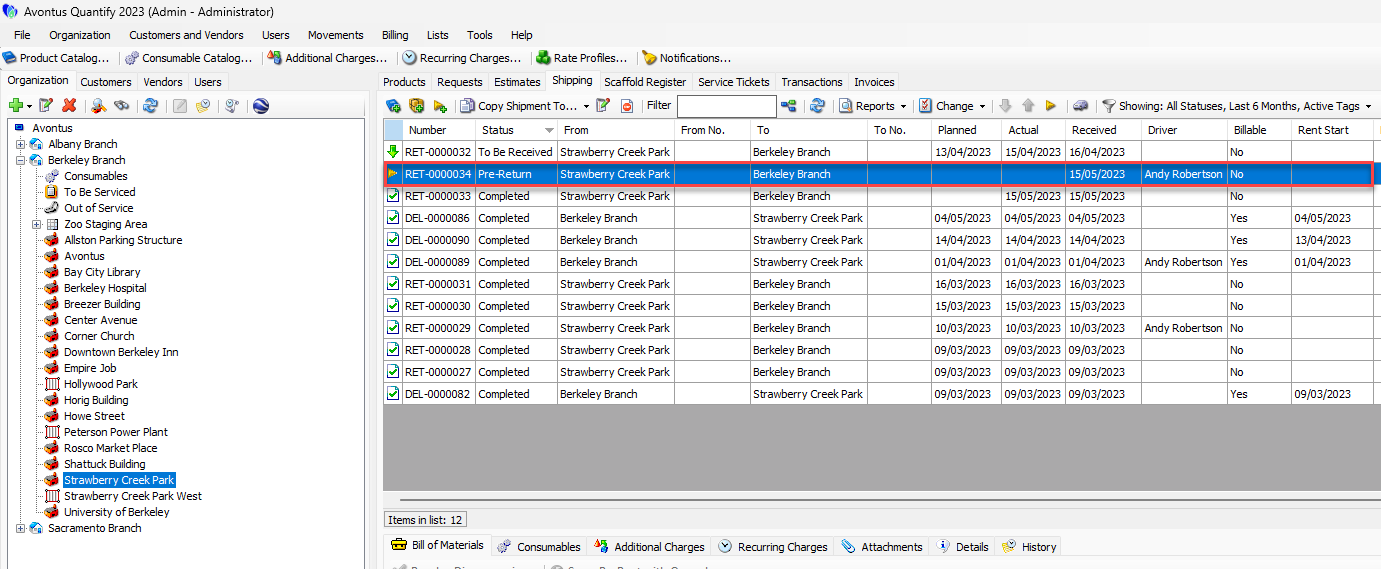
Quantify has created the pre-return without an associated Bill of Materials, but will create the Bill of Materials when it counts the pre-return.