The Quantify Request Portal utilizes Quantify Web to enable both Quantify end users and Quantify customer users in the field to request material or services for Job Sites. This functionality is available to those with purchased licenses of Quantify Web. It is accessible via web browsers and mobile devices (iOS, Android, WinPhone).
About the Request Portal

The Request Portal, accessed via a browser or mobile device, enables those with User and Customer User accounts to log in and access Requests from the web.
Control of who can log in to the Request Portal is by assignment to the Job Site Request Users lists. Permission to view Requests must be set on for the security role users are assigned to, refer to Working with Quantify Security.
When a user (Quantify end User or Customer User) logs into the Request Portal, they will only be able to view and modify Requests for Job Sites where they are assigned to the Request User list.
Logging in to the Request Portal
The Request Portal enables you to use a web browser to log in to the Request Portal, no matter where you are.
To log into the Request Portal:
- Using a web browser, navigate to your Quantify Web URL, as configured in the Global Options dialog. Refer to the Configuring Quantify for Quantify Web section of Installing and Setting Up Quantify Web.
ex. https://yourcompany.com/quantify
The Quantify Web Login page appears. - Click the Go to the Request Portal link.

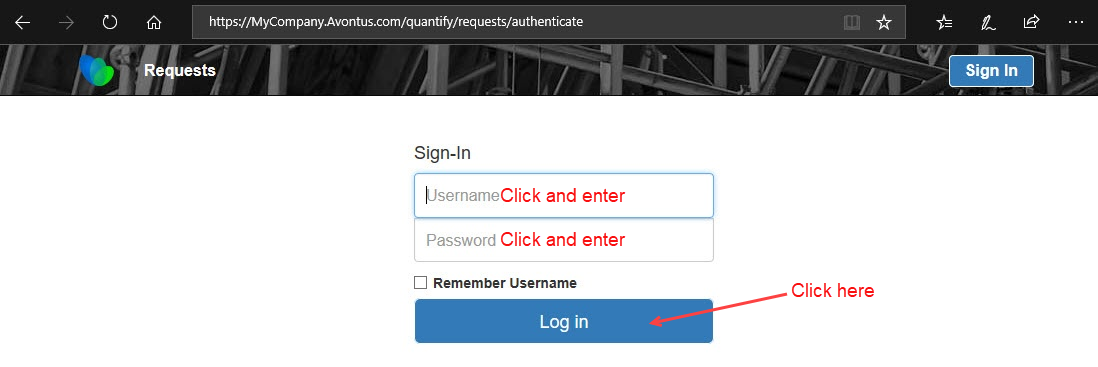
The Request Portal login page appears.
Note: Alternatively, you can navigate directly to the Request Portal Login page by navigating to:
ex. https://yourcompany.com/quantify/requests - Click in the Username field and enter your Quantify username.
- Click in the Password field and enter your Quantify password.
- Click Log in.
The Quantify Request Portal appears.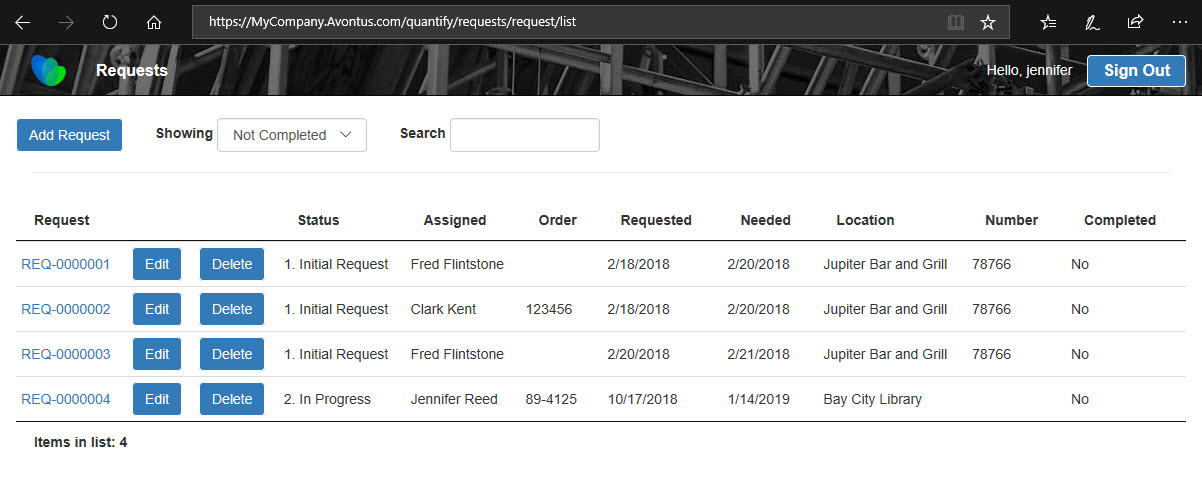
The Request Portal page displays existing Requests for all Job Sites to which you are assigned to a Job Sites' Request Users list.
Adding Requests in the Request Portal
The Request Portal enables you to use a web browser to add a Quantify Request, no matter where you are.
To add a Request in the Request Portal:
- Log in to your Quantify Request Portal. (Refer to Accessing the Request Portal above.)
- Click Add Request.
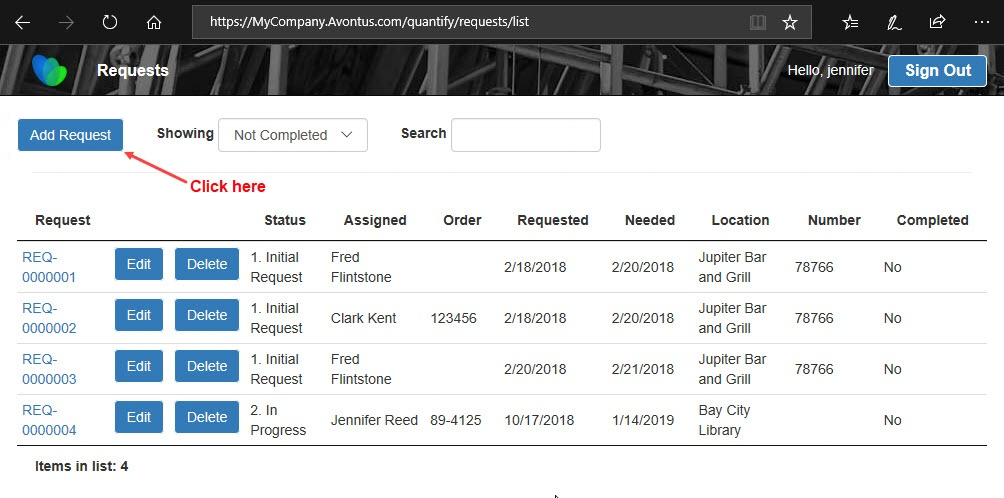
The Request Edit page appears.
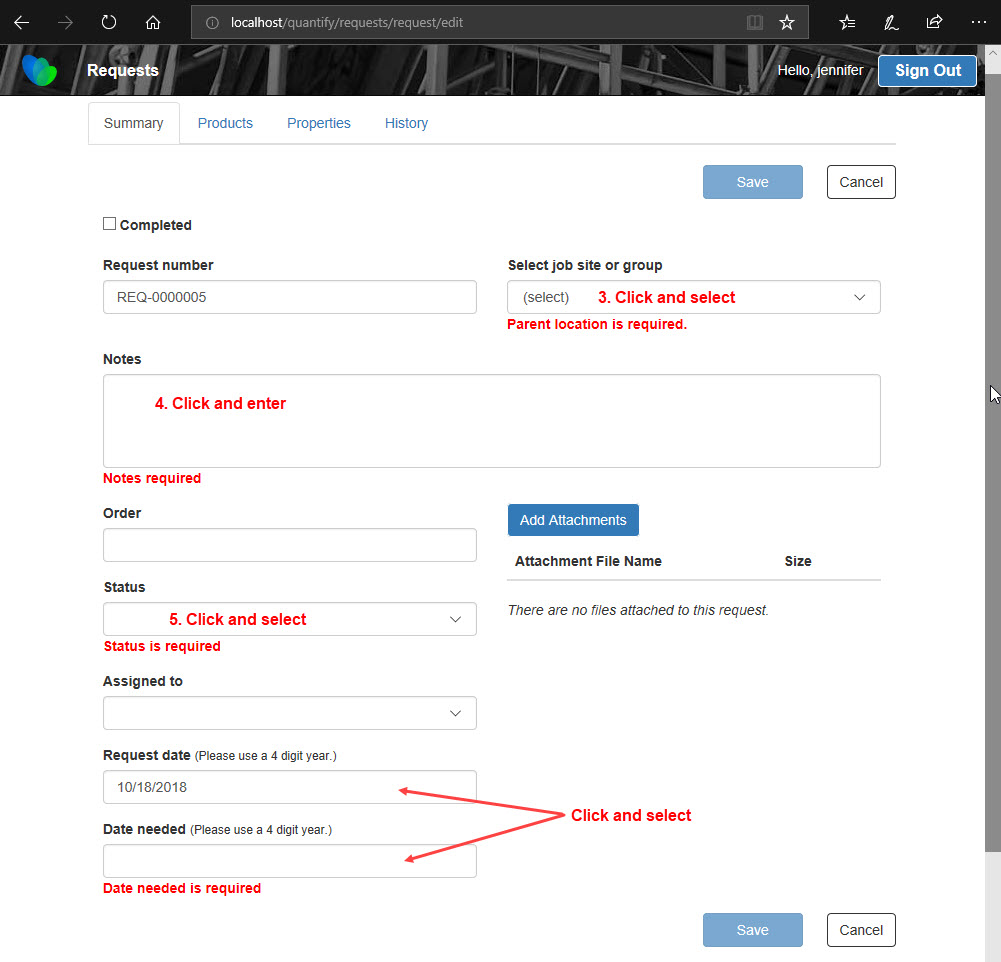
Note: The procedures below only contains required fields. - Click the Select job site or group dropdown and select the appropriate Job Site.
- Click in the Notes text field and add a note.
- Click the Status dropdown and select the appropriate status.
- Click in the Request date date field and select the appropriate request date from the calendar popup that appears.
- Click in the Date needed date field and select the appropriate date needed from the calendar popup that appears..
- If you do not need to add Products to the Request, click Save. If you do, proceed to step 9.
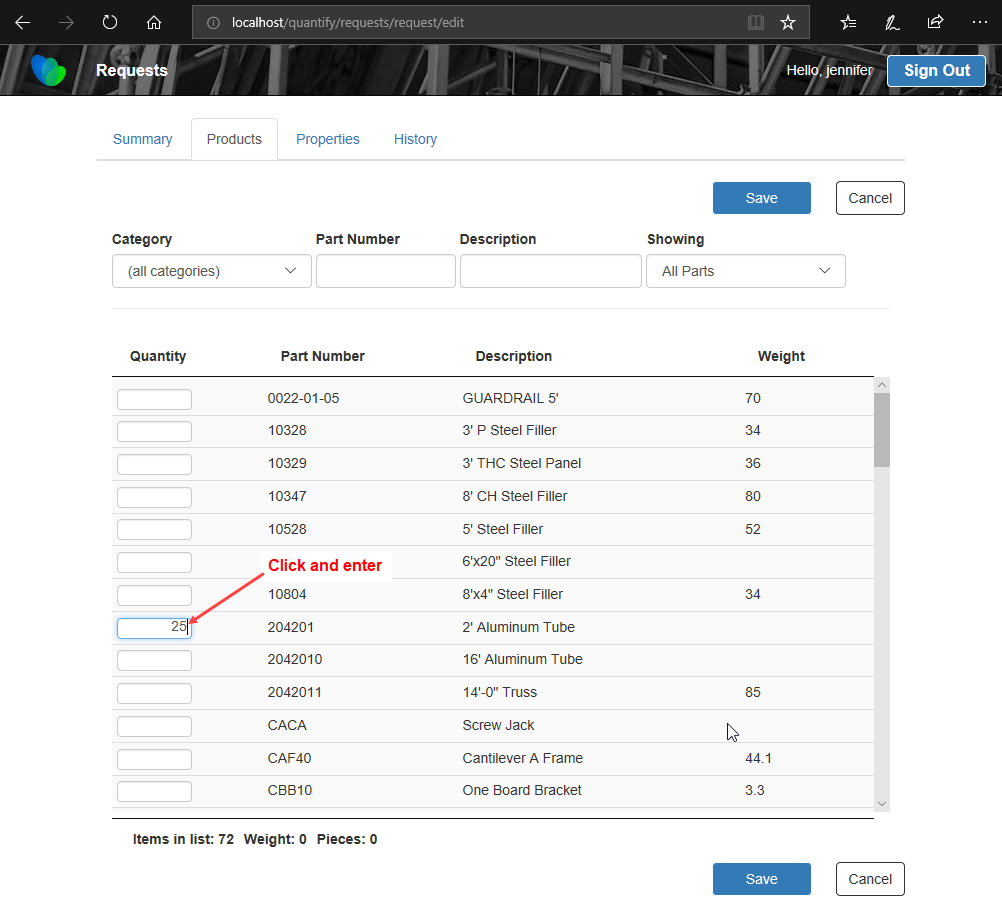
- Click the Products tab.
The Request Edit page refreshes. - Locate the item you want to request. click in the cell in its Quantity column and enter the number of items you want to request.
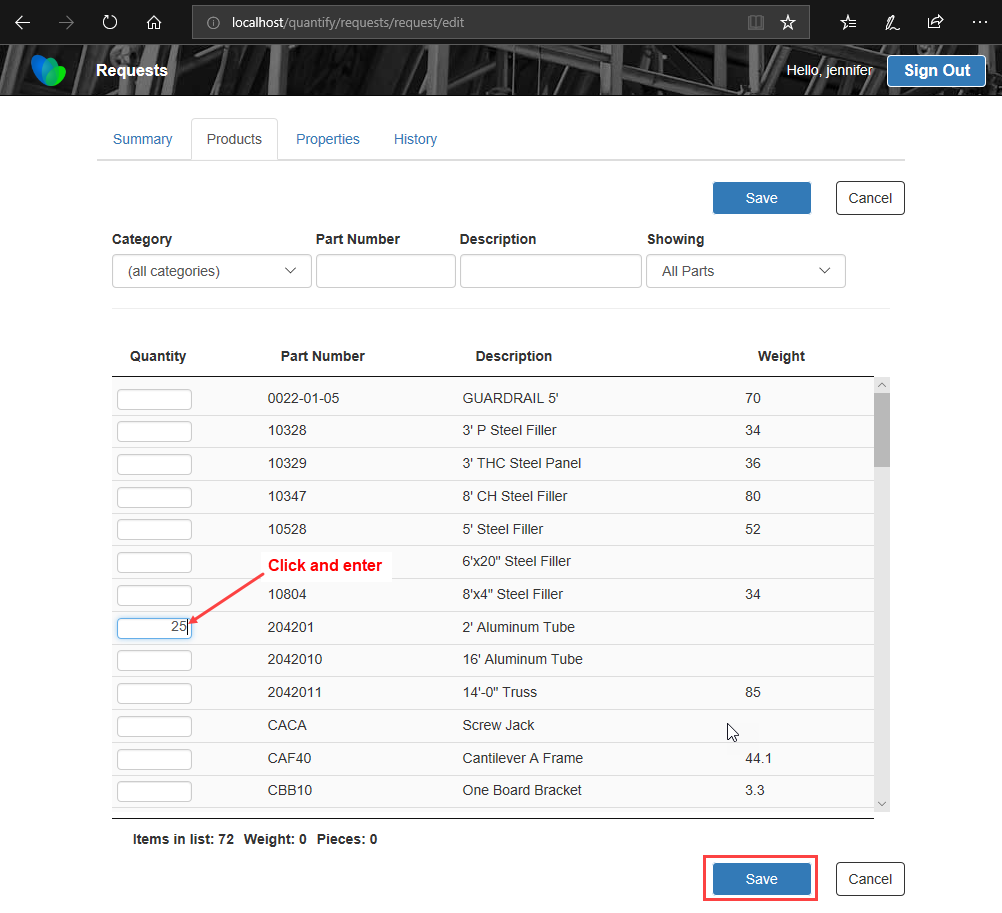
- Repeat the above step as many times as necessary.
- Click Save.
The new Request appears in the Request List for the Request Portal, as well as the Quantify application Requests tab.
Preview Request Report on Request Portal
The Request Portal enables you to use a web browser to preview and/or print Request details.
To preview a Request from the Request Portal:
- Log into the Request Portal. (Refer to Accessing the Request Portal above.)
- Click the appropriate the Request # link.
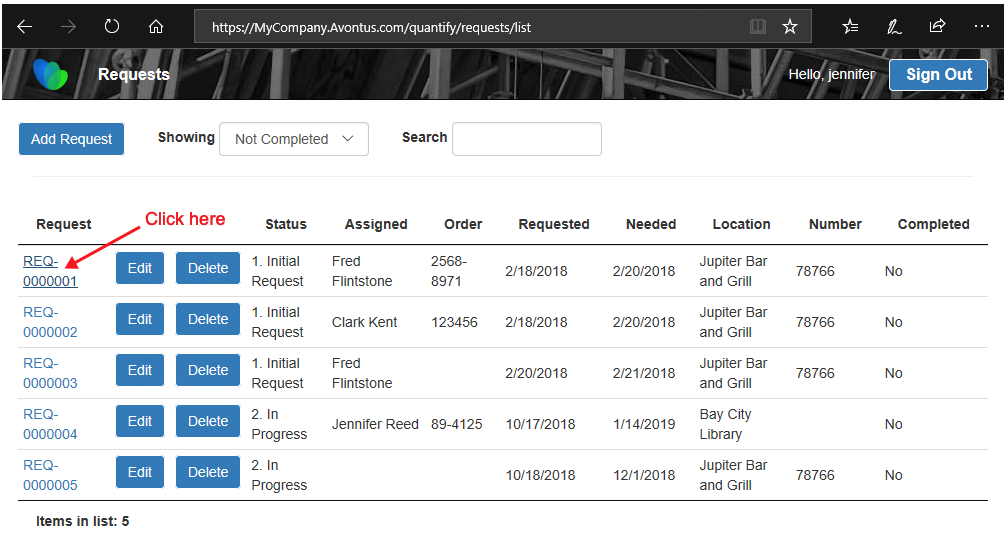
The Request Report Preview appears.
The Request Report Preview includes all details for the selected Request.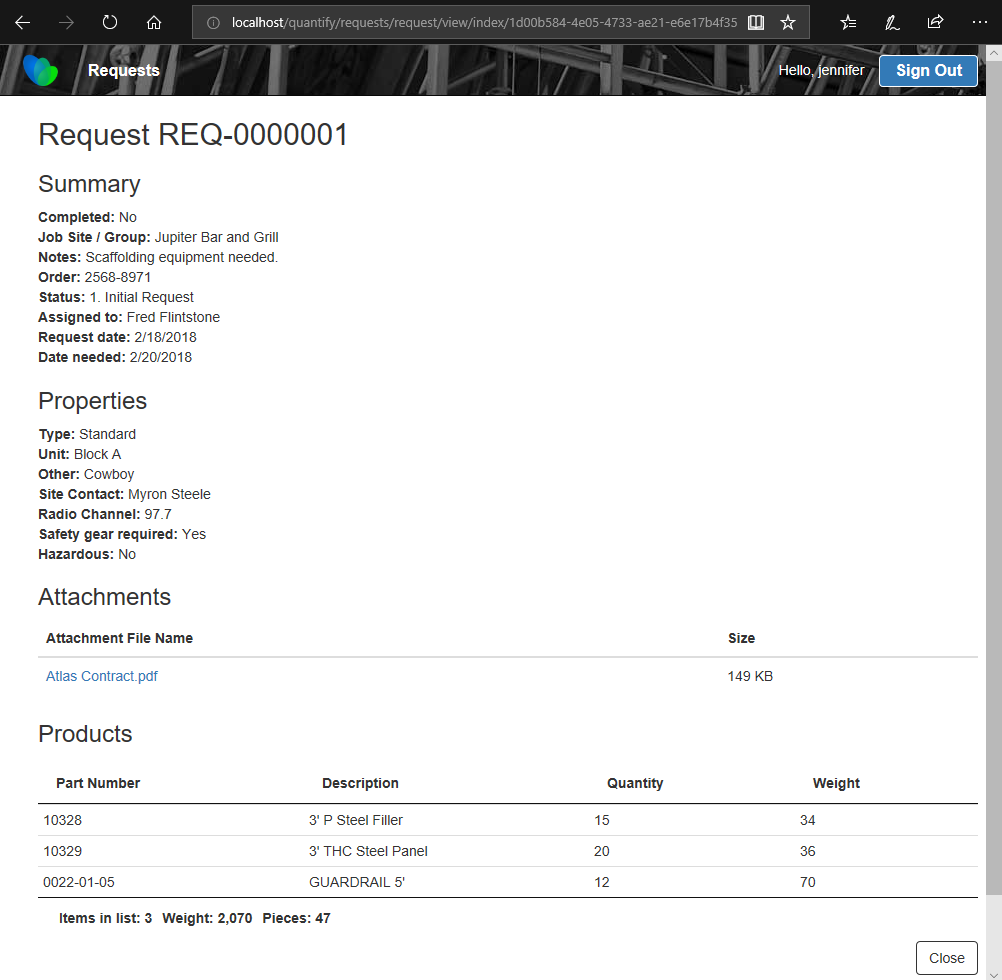
- As necessary, use your browser's print functionality to print this this report.
Note: You can view Request attachments by clicking the attachment name. - When done, click Close.
Editing Requests in the Request Portal
The Request Portal enables you to use a web browser to edit an existing Quantify Request, no matter where you are.
To edit a Request using the Request Portal:
- Log into your Quantify Request Portal. (Refer to Accessing the Request Portal above.)
- Navigate to the Request you want to edit.
- Click its Edit button.
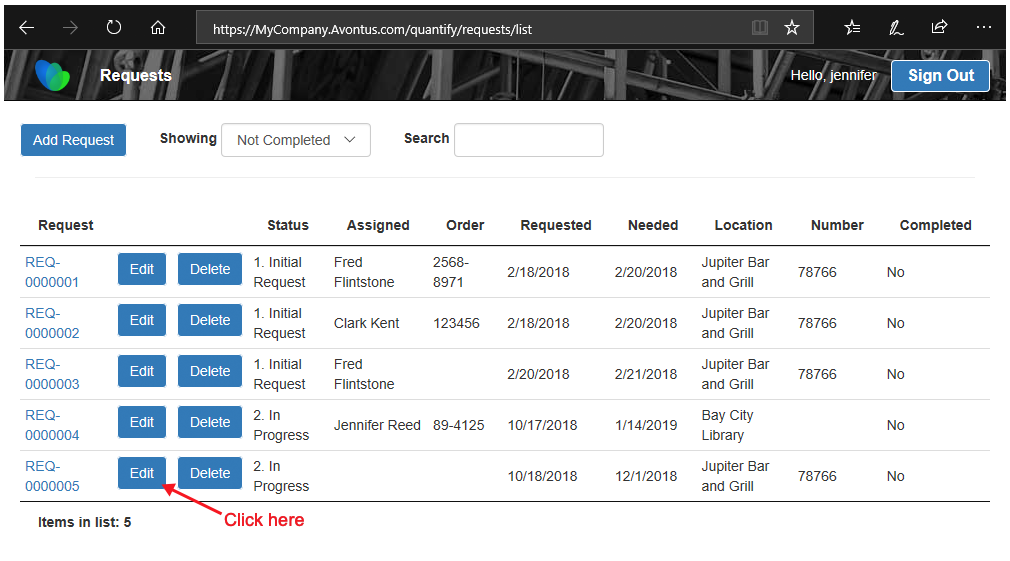
The Request Edit page displays. - Make the necessary edits. (In the below example, the Assigned to was changed.)
- When done, click Save.
Delete Request in the Request Portal
The Request Portal enables you to use a web browser to delete a Quantify Request, no matter where you are.
To delete a Request using the Request Portal:
- Log into your Quantify Request Portal. (Refer to Accessing the Request Portal above.)
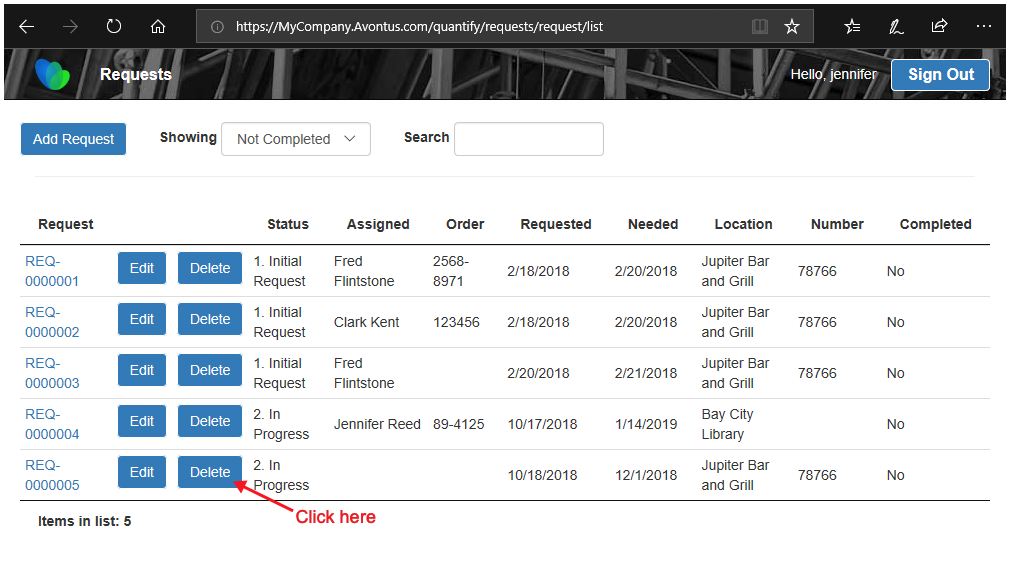
- Navigate to the Request you want to delete.
- Click the Request's Delete button.
The Request Portal displays a delete confirmation dialog.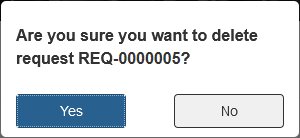
- Click Yes to delete the Request.