Avontus Designer enables you to add a raking tie to a Scaffold tower.
Add a Scaffold Tower
To add a raking tie, you need a Scaffold tower.
To add a Scaffold tower:
Add a Bay to the Drawing Page.
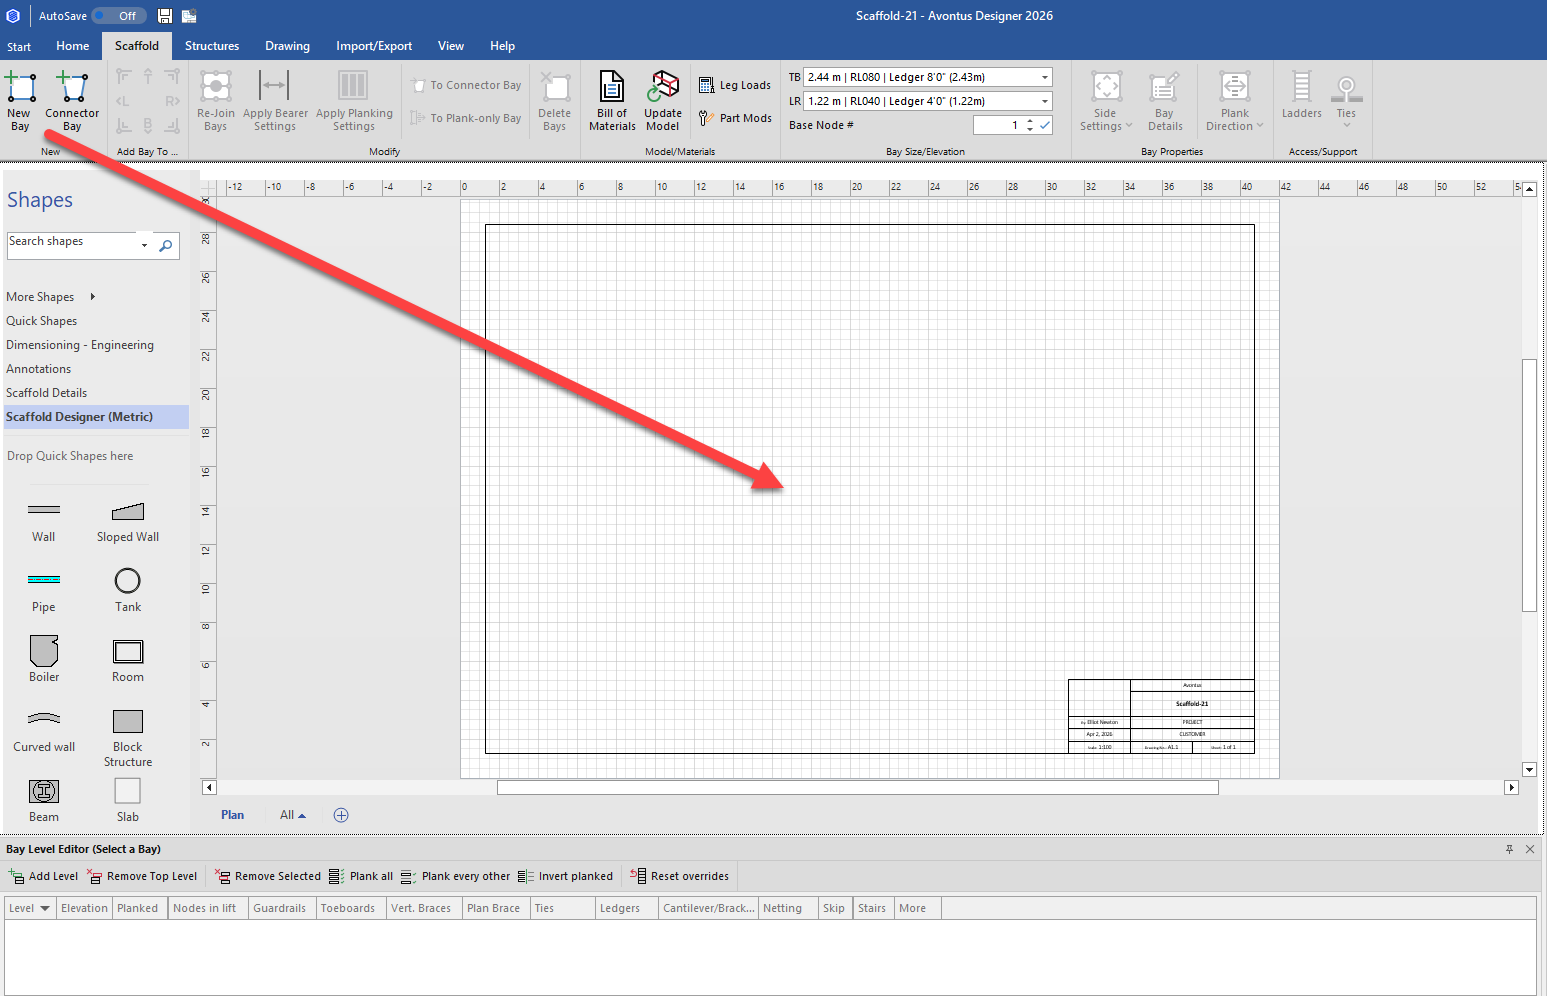
The Bay Level Editor appears.In the Bay Level Editor, click Add Level as many times as necessary. We will add two more levels.
.gif)
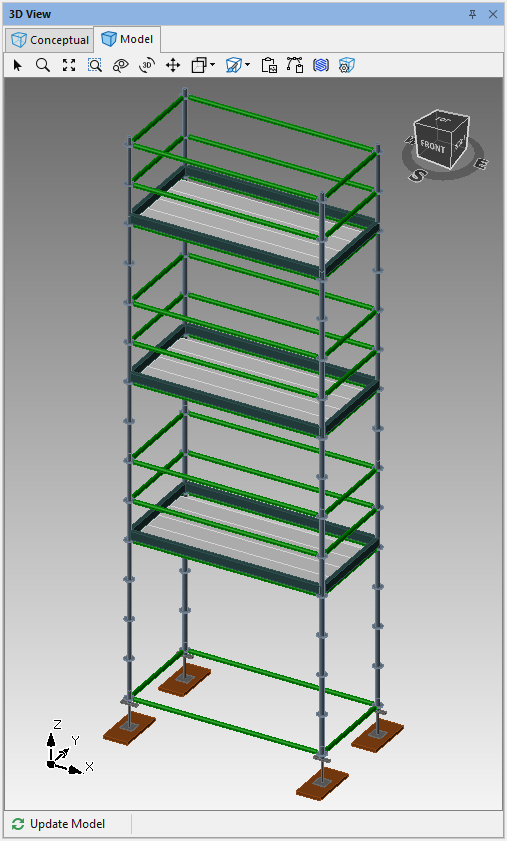
Avontus Designer adds the levels.
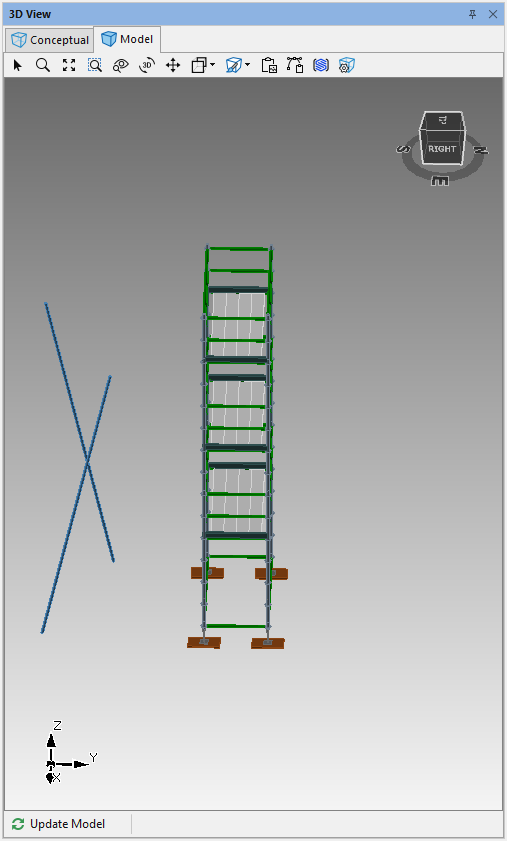
The result should look something like this:
Add a Brace-Only Bay
The next step in adding a raking tie is to add a brace-only Bay. This involves creating a Bay, removing most of its components and adding braces.
To create a brace-only Bay:
Add a Bay next to the new Scaffold tower.

Click the new Bay (to select it), then click the Bay Details dropdown.
Click the Verticals tab, click the All checkbox in the Skip row and then click Apply
Click the Sides tab, click two appropriate Skip Side checkboxes (to put a check in them).
In this case, T and B are checked.Click Apply
Select the Brace only bay
Click the top Planked checkbox, to remove its check.
Click in the Nodes in Lift text field, enter the appropriate number of nodes and click the check to the right of the text field.
.gif)
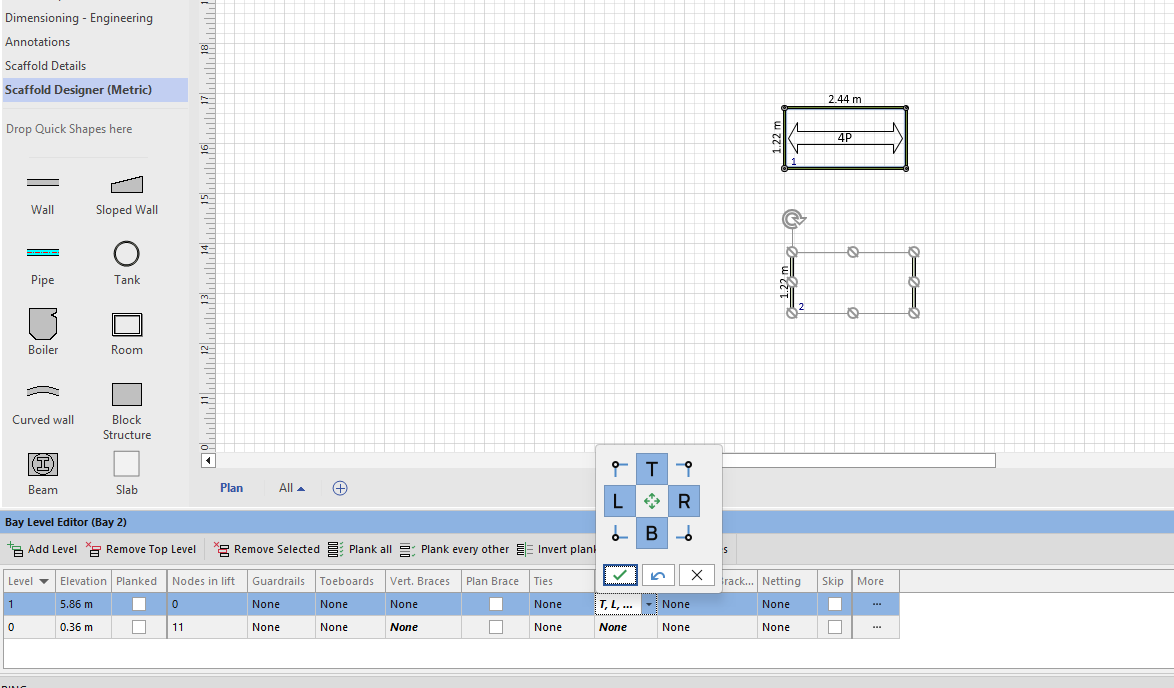
Click the bottom Ledgers dropdown
Click the center button (to de-select all ledgers)
Click the tick icon
.gif)
Repeat the above step for the top Ledgers dropdown.
Select the Vertical Braces dropdown
Click the L and R checkboxes in the Vertical Braces row
Click the tick icon.
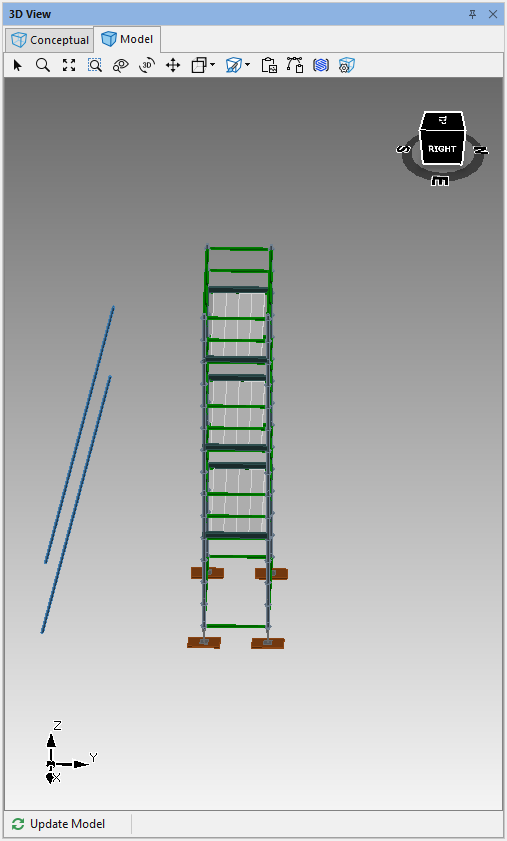
The result will look like this, with the Bays facing different directions
Select More
In the Sides tab, change the appropriate Base Direction to Backwards/Forwards. In this example, we will change the Left Brace to backwards.
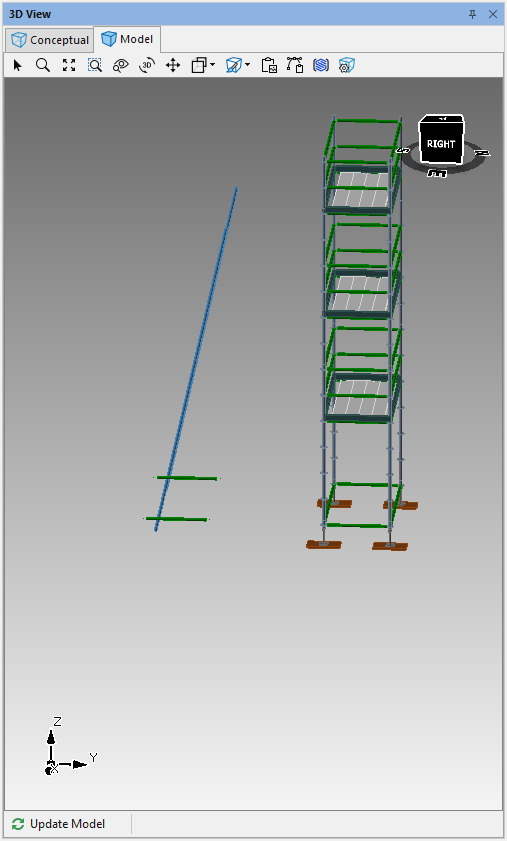
The result should look something like this:
Next, add horizontal ties from the braces to the Bay.
Add a Ledger-Only Bay
The next step is to add horizontal ties from the braces to the Bay. To do this, add a ledger-only Bay.
To add a ledger-only Bay:
Add a Bay next to the brace-only Bay.
Click the new Bay (to select it), then click the Bay Details dropdown.
Click the Verticals tab and click the All checkbox in the Skip Vertical row to put a tick in it and click Apply.
Click the General tab, click in the Base Node Elevation text field, enter the height at which you want the ledgers to connect to the Bay tower and click Apply.
Click Remove Top Level.
Unplank the bay,
Disable the T and B ledger leaving the L and R ledgers enabled
/
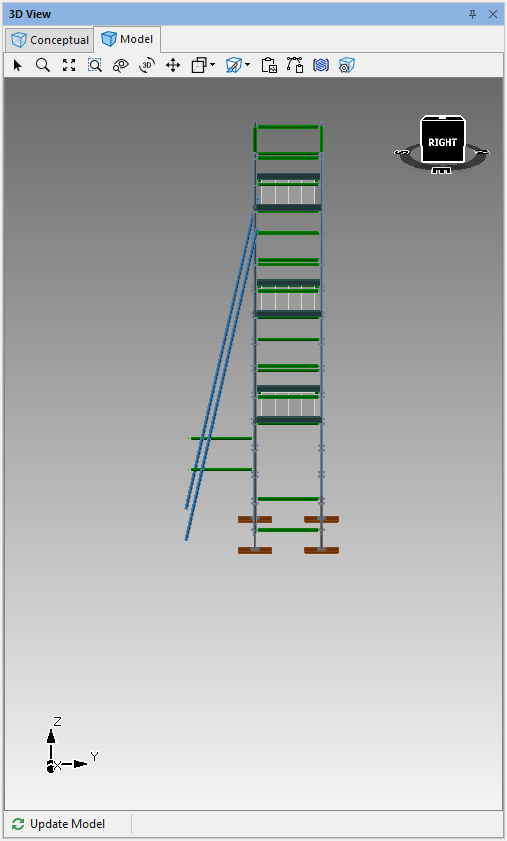
The result should look something like this
Put it all Together
The last step is to move the brace-only Bay and ledger-only Bay into place next to your Scaffold tower.
To put it all together:
Click the brace-only Bay and drag it to the side of the Bay tower, so that it glues to the Bay tower.
Click the ledger-only Bay and drag it to the side of the Bay tower, so that it sits on top pf the brace-only Bay and overlaps slightly into the Bay tower.
The result should look something like this: