Scaffold custom properties are available to Scaffold Tracking Job Sites. The custom properties enabled on a Scaffold Tracking Job Site will only be visible on Scaffolds assigned under that Job Site. The following types of custom properties are available on the Job Site:
NOTE: The features mentioned in this article are only available in the Industrial and Enterprise editions of Quantify.
List | List fields enable users to select from a list of items. List items are unique to each list and are added using the field level Edit option located on the Scaffold. |
Date | Date fields enable users to enter a date and include the calendar feature for date selection. |
Text | Text fields enable users to enter up to 50 characters. |
Yes/No | Yes/No fields enable you to enable or disable a custom labeled Yes/No checkbox. A check in the checkbox means the answer is Yes. For example, the Scaffold dialog can ask a user if safety equipment is required on that particular Scaffold. A check in the checkbox means that, yes, safety equipment is required. Use the text field beside the Yes/No checkbox to configure the appropriate label/question for the custom Yes/No checkboxes. |
Required | When this checkbox is checked, users must use the custom property in order to create a Job Site. |
To configure Scaffold custom properties for a Job Site:
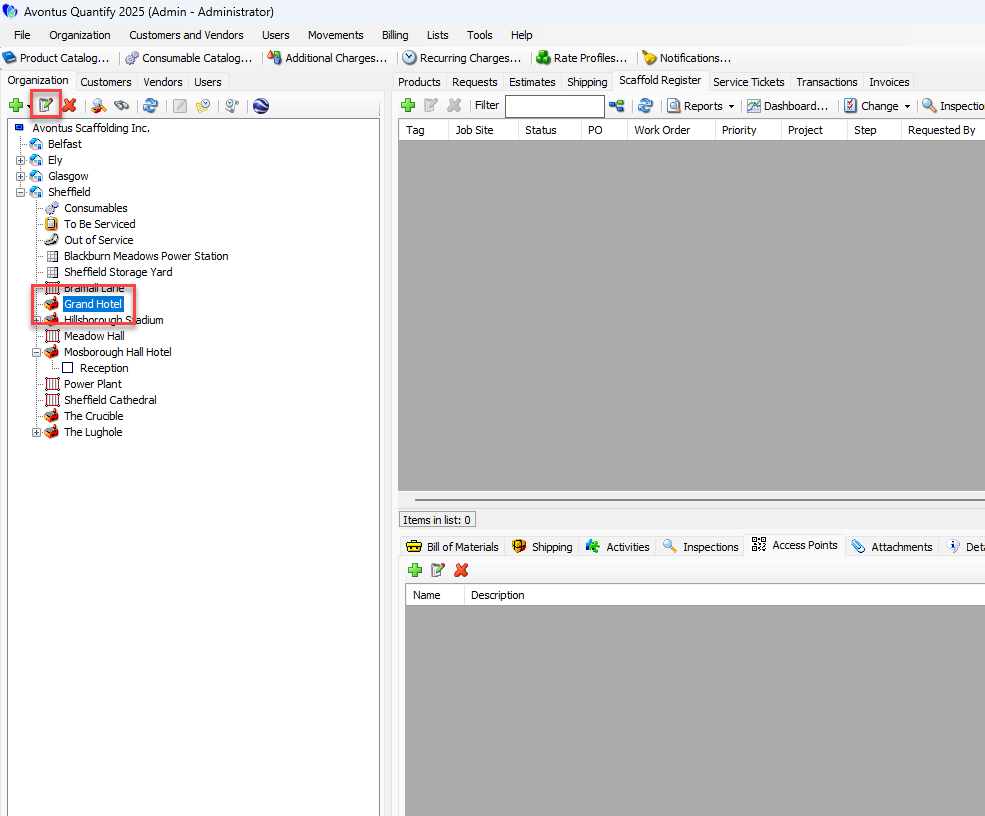
Locate and select the appropriate Job Site, then click the Edit Selected Item button (
 ).
).
You can also double-click on the Site.
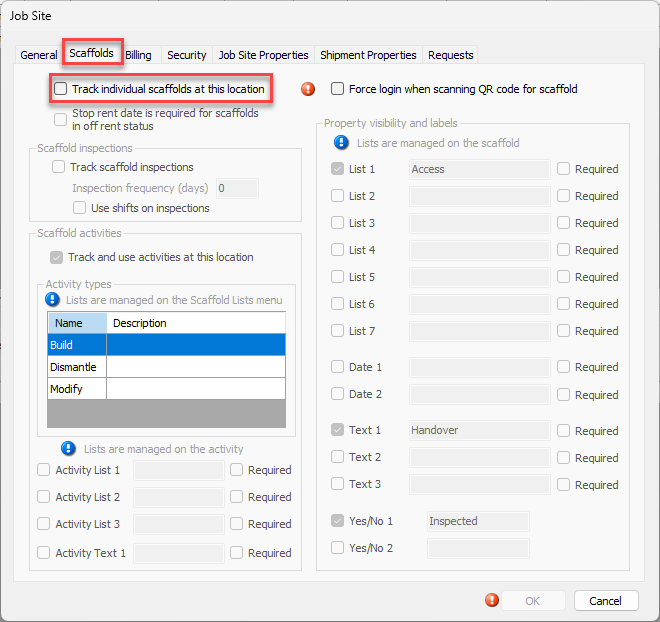
The Job Site dialog appears.Click the Scaffolds tab.
As necessary, click the Track individual scaffolds at this location checkbox (to put a check in it).
The Property visibility and labels area becomes active.
If Scaffold Tracking is already enabled for the selected Job Site, custom properties are enabled.
Click the List 1 checkbox, to put a check in it.
Click in the List 1 text field and enter the appropriate label for this list entry.
As necessary, click the List 1 Required checkbox.
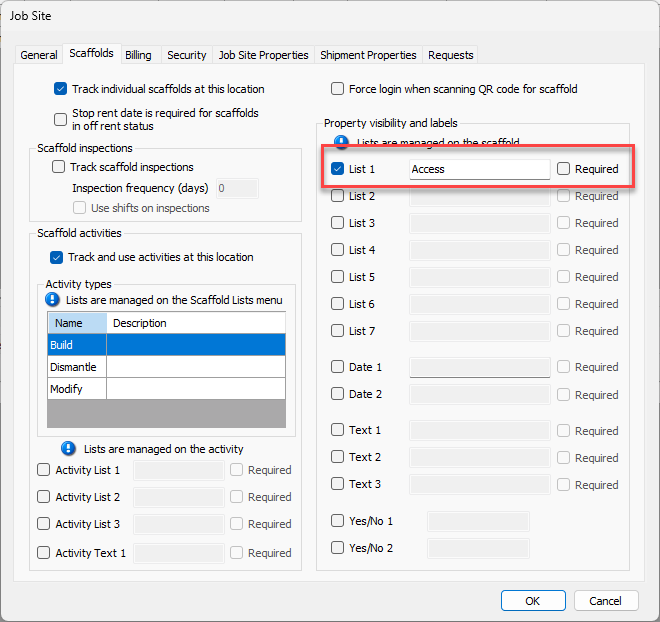
As necessary, repeat the above three steps for any other List items.
Click the Date 1 checkbox, to put a check in it.
Click in the Date 1 text field and enter the appropriate label for this list entry.
As necessary, click the Date 1 Required checkbox.

As necessary, repeat the above three steps for the Date 2 item.
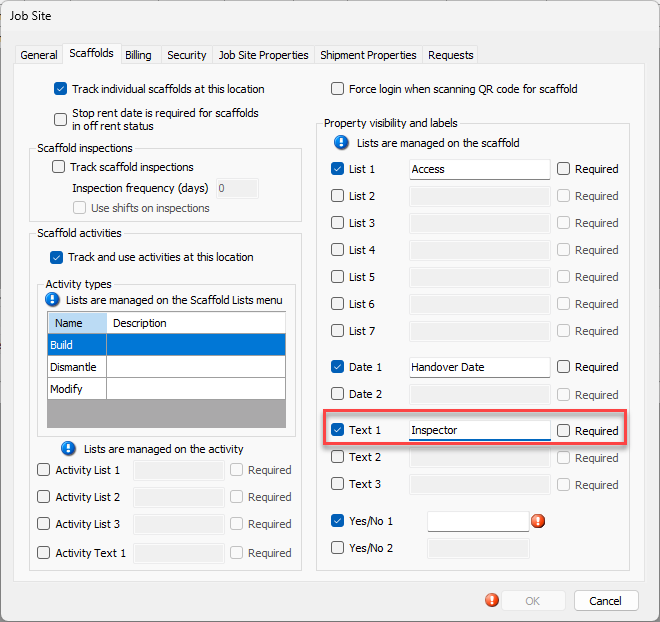
Click the Text 1 checkbox, to put a check in it.
Click in the Text 1 text field and enter the appropriate label for this list entry.
As necessary, click the Text 1 Required checkbox.
As necessary, repeat the above three steps for the Text 2 and Text 3 items.
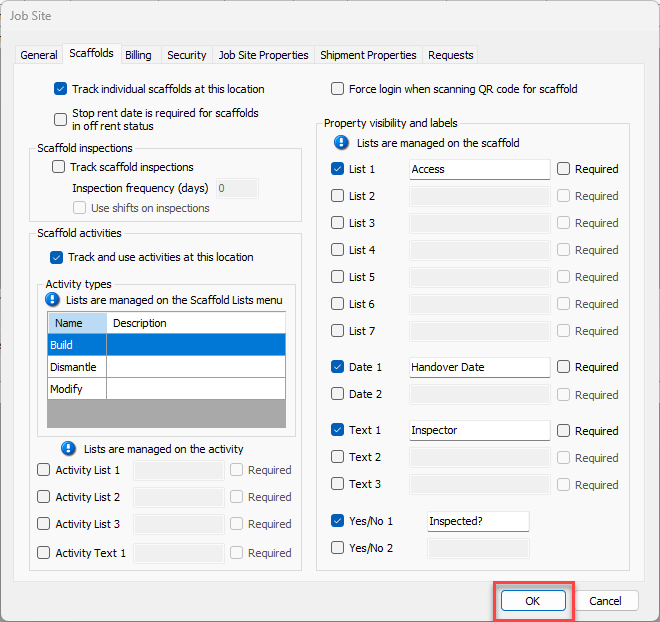
Click the appropriate Yes/No 1 checkbox.
Click in the Yes/No 1 text field and enter a label for that property.
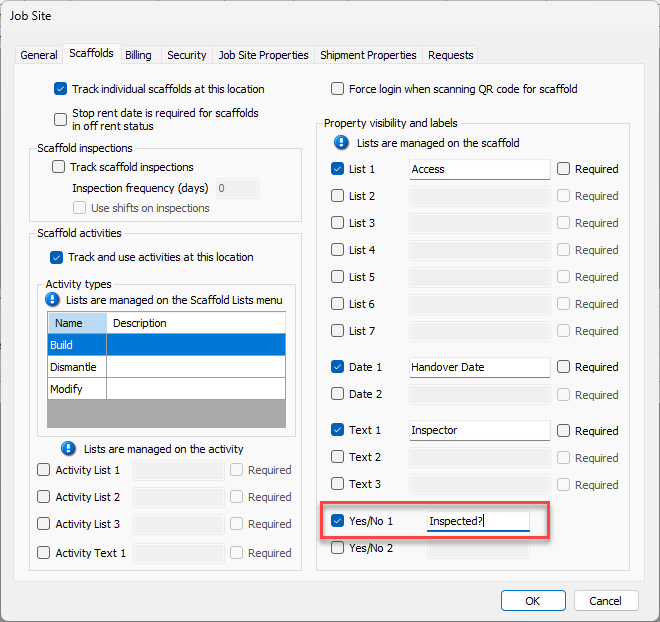
As necessary, repeat the above two steps for the Yes/No 2 custom property.
Click OK.