ou can import Product quantities into Estimates using two import features (see below). An import matches the part number in the import file with the part number for the Product in Quantify to add quantities in an Estimate.
This article contains the following:
Importing Product Quantities from Another Avontus Program
Quantify enables you to import Product quantities into an Estimate from other Avontus programs, including Avontus Designer, Handset Designer and Scaffold Counter.
To import Product quantities from another Avontus program:
Click the appropriate location in the Organization Tree, then click the Estimates tab.
Click the Import button.
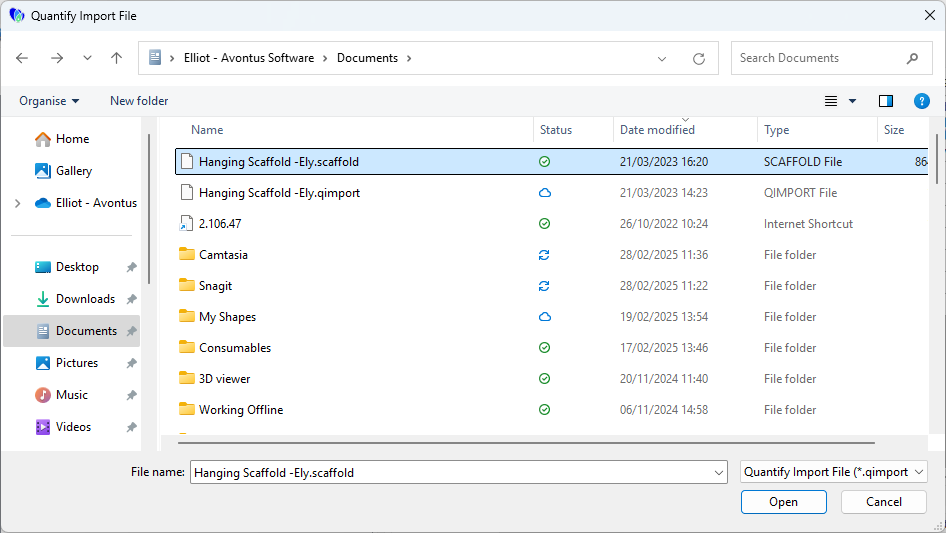
The Quantify Import File dialog appears.
Locate and select the Quantify Import File (.qimport file format) and click Open.
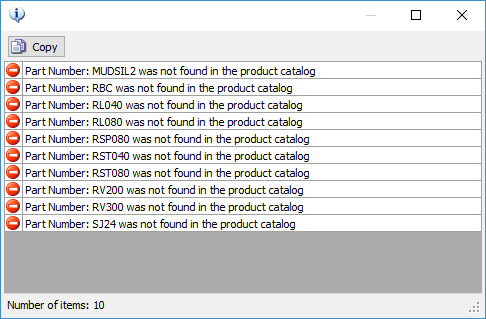
If there any unmatched parts, a warning message will appear.

Click Yes to view the errors, and see the missing parts.
If you click no, the Estimate dialog appears, with the Summary tab pre-selected.

(If you view the Products tab, you will see that it displays quantities for the part numbers included in the import file.)Click the Assigned dropdown and select the appropriate Branch Office or Sub-Branch.

Click the Customer dropdown and select the appropriate customer.

Click the Delivery calendar icon.

A calendar appears.

Locate and click the appropriate delivery date.
Click the Return calendar icon.

A calendar appears.Locate and click the appropriate return date.

Click in the Label text field and enter the appropriate label.
Note: If the same part number is referenced more than once in the import file, the quantities for this item will be combined on the Estimate.

Click OK to create the Estimate

If Quantify cannot find part numbers, they will not be included in the import. The unmatched part numbers will be displayed in View Errors.
Import from a Tab Separated File
You can import Product quantities into a Quantify Estimate using a tab-separated file. This is a common file type saved in programs like Microsoft Excel.
This should be a tab separated file with two columns (no header row). The first column should contain part numbers. The part numbers must exactly match the desired part numbers as they appear in Quantify, including spaces and symbols. The second column should contain quantities. These should be whole numbers without decimals or other characters.
To import from a Tab Separated file:
Click the appropriate Branch Office, click the Estimates tab and click the Add Estimate button.
.gif)
The Estimate dialog appears.Click the Customer dropdown and select the appropriate customer.

Click the appropriate radio button in the Estimate Price is For section: Rent, Sell Available, or Sell New.

Click in the Rent Discount % text field and enter any applicable rent discount percentage.

Click the Delivery calendar icon.

A calendar appears.
Locate and click the appropriate delivery date.

This date will appear on the printed estimate.Click the Return calendar icon.

A calendar appears.Locate and click the appropriate return date.

Note: The next two fields are required, but may be set by the Rate Profile you select in the Products tab. They also set up the length of the rental and effect the Estimate total.
Click in the Label text field and enter the appropriate label.
Click in the No. Periods fields the length of the rental.
Note: The label and days may be overwritten when copying rates from a Rate Profile, if the Rate Profile uses a different Rental Days setting.

Click the Products tab.

The Estimate dialog refreshes.Click Import.

The Import Quantities dialog appears.Click the Import button.
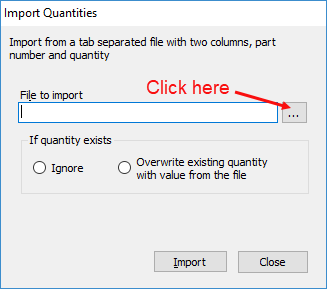
The Import From Tab Separated Value File dialog appears.

Locate and select the file you want to import, then click Open.
The Import Quantities dialog returns.As necessary, click the appropriate If quantity exists radio button. Your options are: Ignore and Overwrite existing quantity with value from the file.
This determines what Quantify will do if a quantity exists for a part number that is also in the import file.

Click Import.
If Quantify cannot find part numbers, they will not be included in the import. Quantify will display the unmatched part numbers in the View Errors dialog.
Note: If the same part number is referenced more than once in the import file, the quantity for this item will be set to the last entry in the import file.