Request Lists are custom lists that help you define the properties of Requests (in the Properties tab of a Request dialog). Before configuring the lists, first enable Requests. You will then define what lists will appear in the Requests dialog and define what will appear in each list.
Important: Before you can perform these procedures, the Requests feature must be enabled in Global Options.
Configuring Request Lists and Properties
Configuring Request Lists means enabling the lists and properties you want users to have access to and use, and creating labels for those items, so your users have a context for what they select and enter. You can also determine whether selecting from a list or entering a property is required. If any items are required, a request cannot be completed until the required information is provided.
To configure Request Lists:
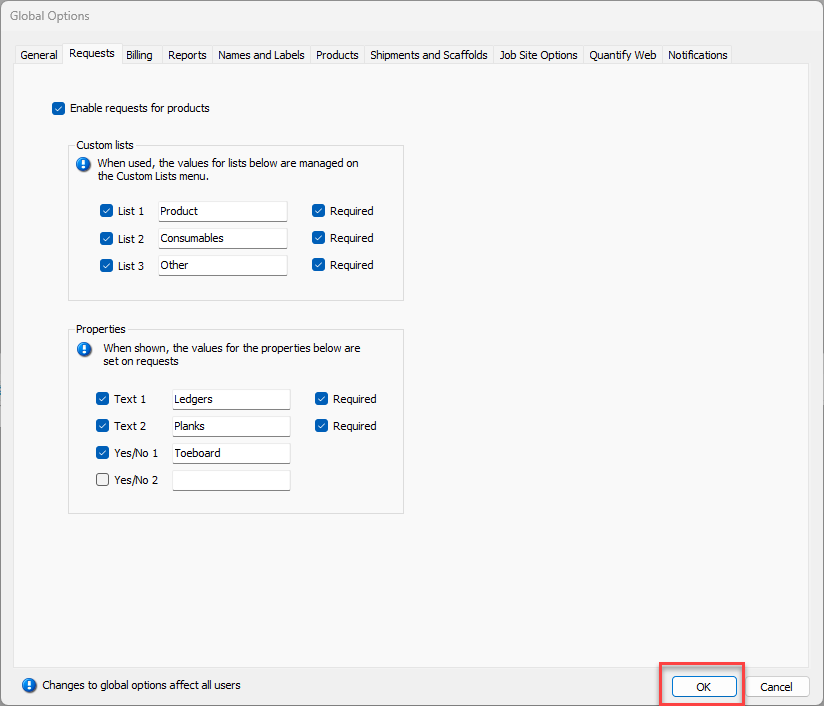
Click the Tools menu and select Global Options.
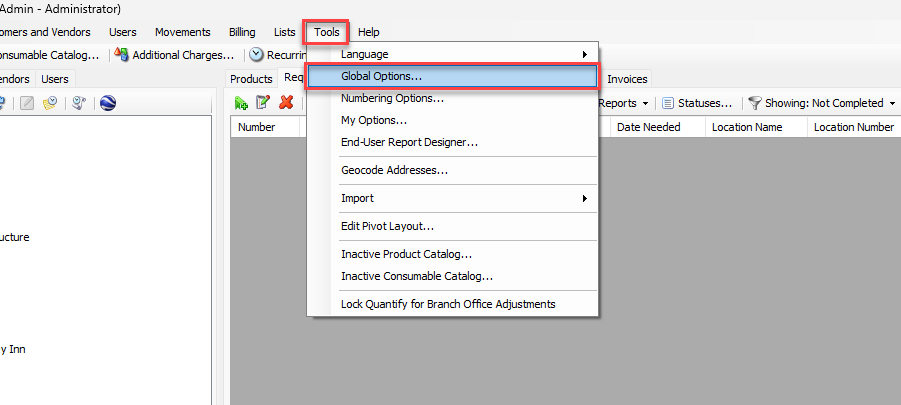
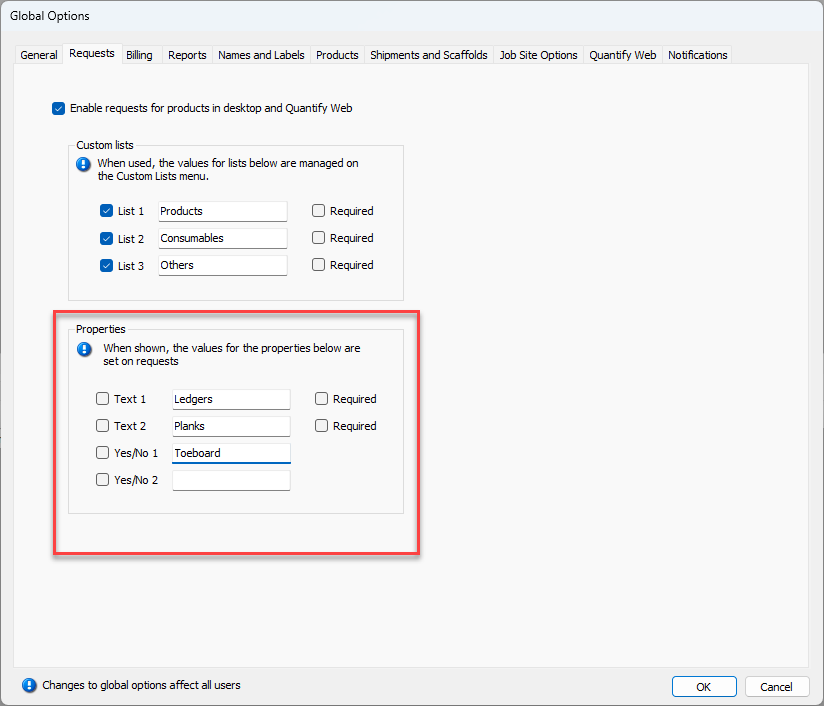
The Global Options dialog appears.Click the Enable request for products checkbox
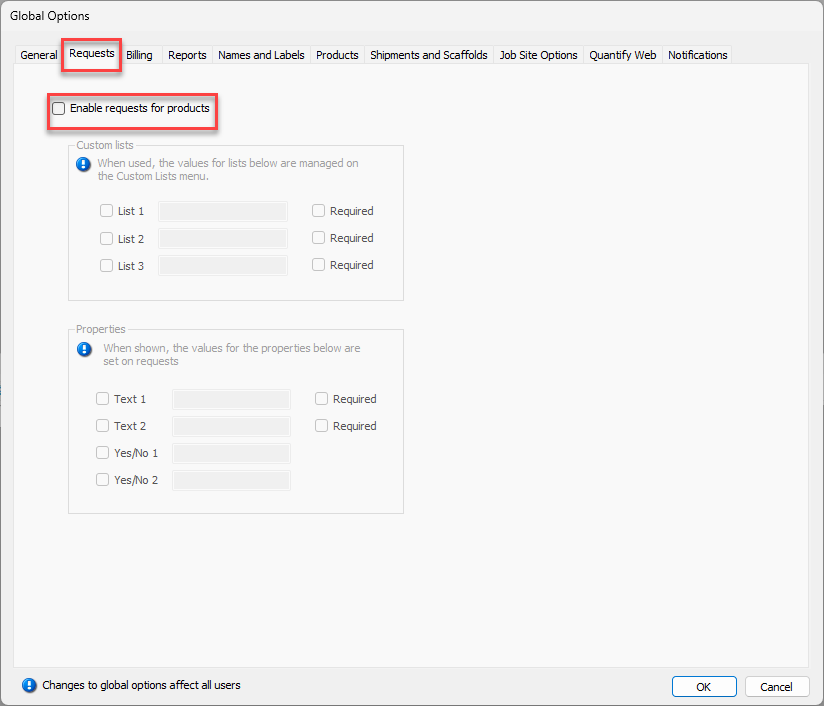
Select the appropriate Custom List checkbox.
Click in the list's text field and enter a name for the Request List.
If you want to require users to select an item from the list when they configure a Request, click the list's Required checkbox.
Repeat the last three steps for each of the other lists you want to enable.

Click the appropriate Properties checkbox.
Click in the Property text field and enter a name for the Property.
If you want to require users to make an entry when they configure a Request, click the list's Required checkbox.
Click in the Yes/No checkbox for each Yes/No item you want to enable.
Click OK.
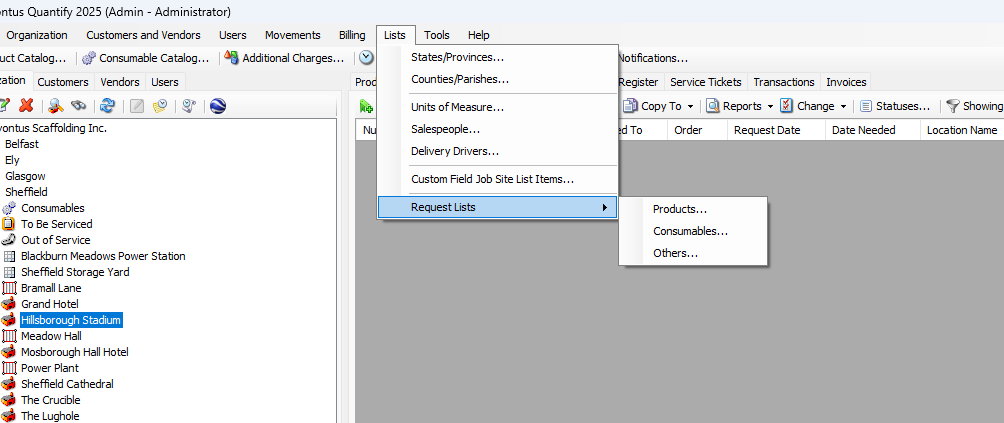
Quantify makes the lists available in the Lists menu. List item entries can be added from this menu, refer to Adding an Item to a Request List below.
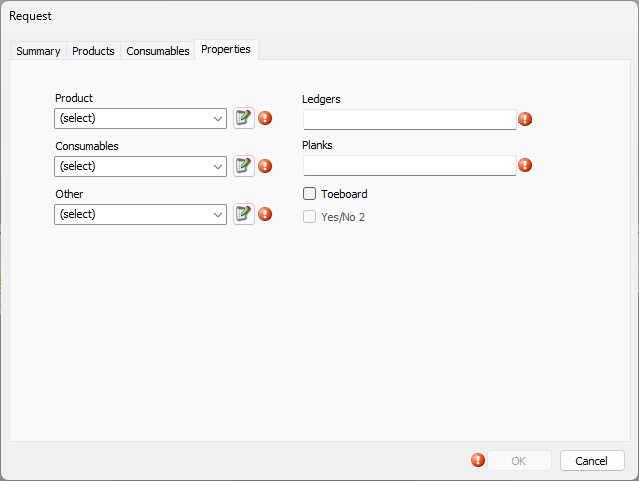
It also makes the lists available in the Properties tab in the Request dialog.
Adding an Item to a Request List
Once you have enabled and labeled any necessary Request Lists, you must populate those lists with appropriate selections. The procedures in this section show you how to do that.
To add an item to a Request List:
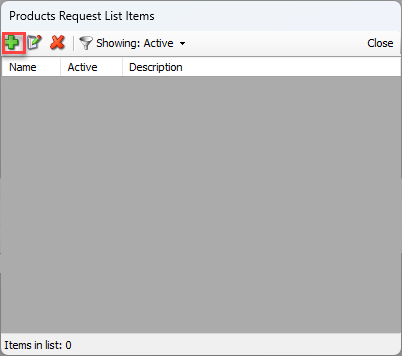
Click the Lists menu and select the appropriate list from the Request Lists sub-menu.
The List Items dialog appears.Click the Add button (
 ).
).
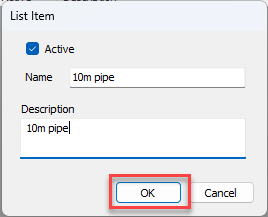
The List Item dialog appears.Click in the Name text field and enter a name for the new Request List item.
Click in the Description text field and enter a short description of the new request list item.
Click OK.
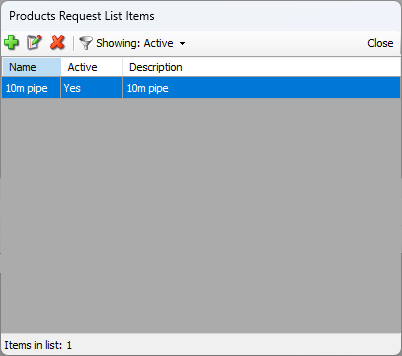
The List Items dialog returns, with the new item in the list of items.
Deleting Items from a Request List
Sometimes one or more items must deleted from a Request List. The procedures in this section show you how to do that.
To delete an item from a Request List:
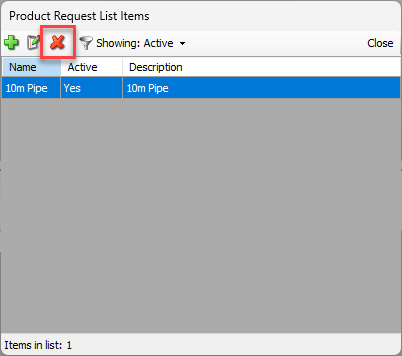
Click the Lists menu and select the appropriate list from the Request Lists sub-menu.
The appropriate List Items dialog appears.Click the list item you want to delete, then click Delete button (
 ).
).
A confirmation dialog appears.
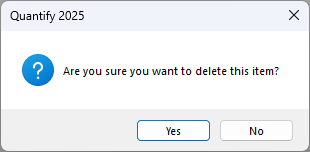
Click Yes.
The List Items dialog returns, minus the deleted item.Click Close.

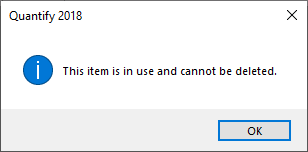
Note: If the item is in use, you will not be able to delete the item.