After reviewing the existing data in your database, you should complete a few important preparation steps before starting the conversion process.
Backing Up the Database
Create a backup of the database. This will ensure you have a copy of the data that can be restored if needed.
For these procedures, refer to the Using Quantify's Database (DB) Tools to Back Up a Database section of Using Quantify's Database (DB) Tools.
Turning Off Notifications
If you are using Notifications, you must disable them before performing Convert a Scaffold Job Site to Billable, due to the large amount of data that this process creates. This is required to prevent the server from having to process a backlog of notifications. If you do not complete this step, you will receive a warning when attempting to convert a Scaffold Job Site and the conversion will not proceed.
To turn off notifications:
Click the Tools menu and select Global Options.
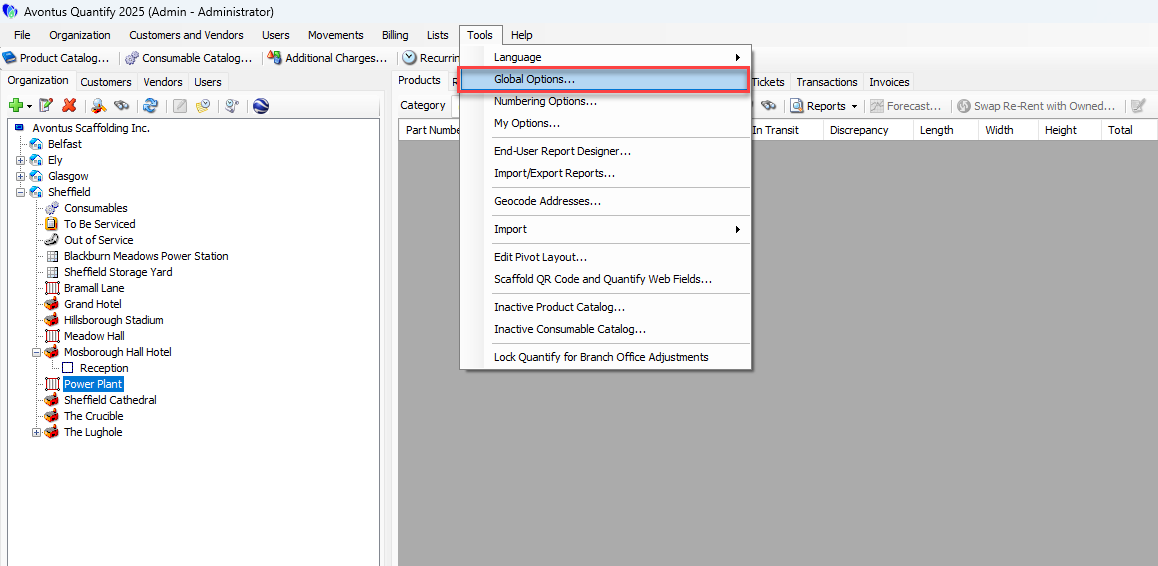
The Global Options dialog appears.Click the Notifications tab.
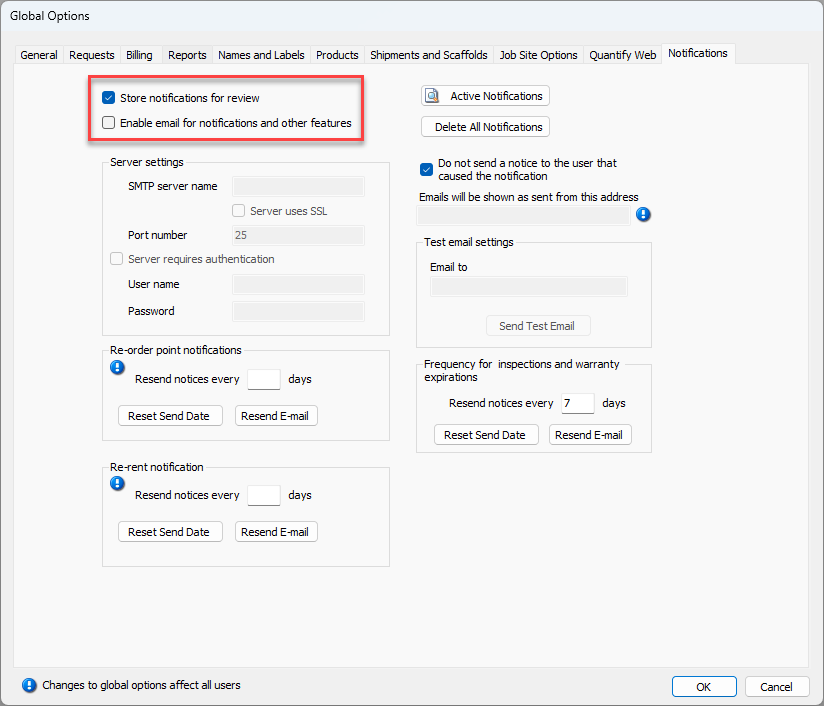
If required, click the Store Notifications for Review checkbox (to remove its check).
If required, Click the Enable Email for Notifications and Other Features checkbox (to remove its check).
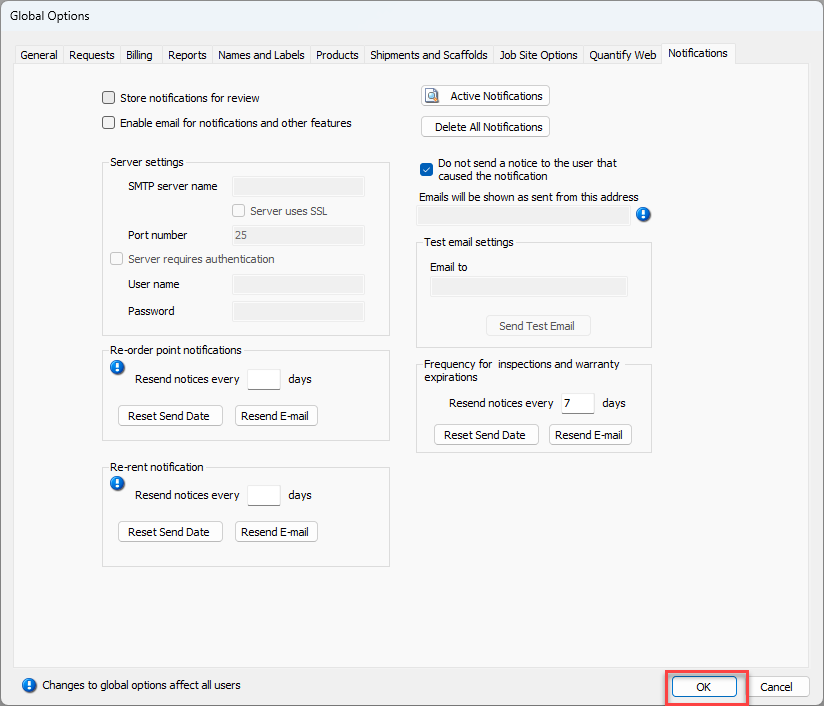
Click OK.
Remember to turn Notifications back on, once you have completed converting scaffold tag Job Sites to billable.
Verifying/Configuring User Permissions
Any user performing this conversion must have the following permissions to perform this conversion:
Invoices: Add/Create Invoices
Locations: Billing Options (for Group and/or Job Site)
For databases with Location-Based Security enabled, the user doing the conversion must be assigned to the Security list for the Job Site being converted.
Confirming Permissions
The next step is to verify that the user doing the conversion has the Add/Create Invoices and Billing Options permissions enabled.
To confirm permissions:
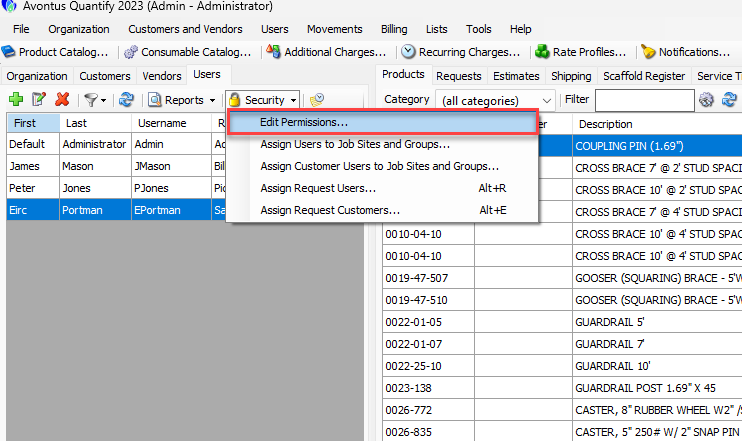
Click the Users tab, then click the Security dropdown and select Edit Permissions.
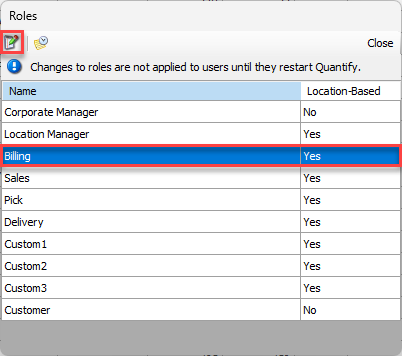
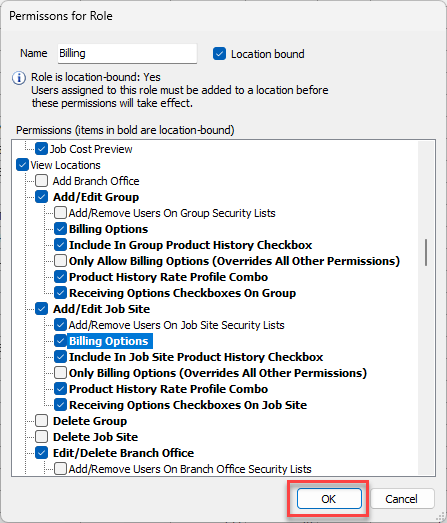
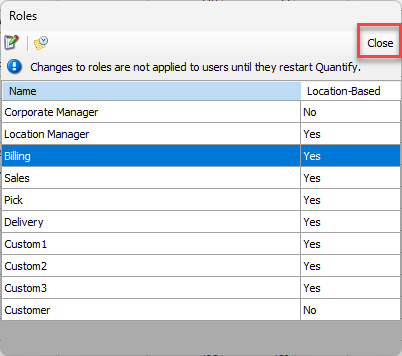
The Roles dialog appears.Locate and click the appropriate role, then click the Edit button.
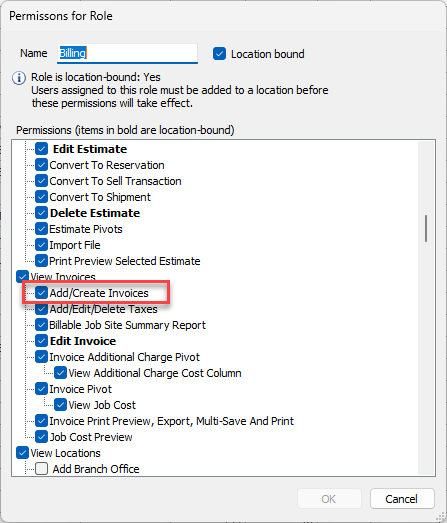
The Permissions for Role dialog appears.Verify that the Add/Create Invoices checkbox has a check in it.
If it doesn't, click it to put a check in it.
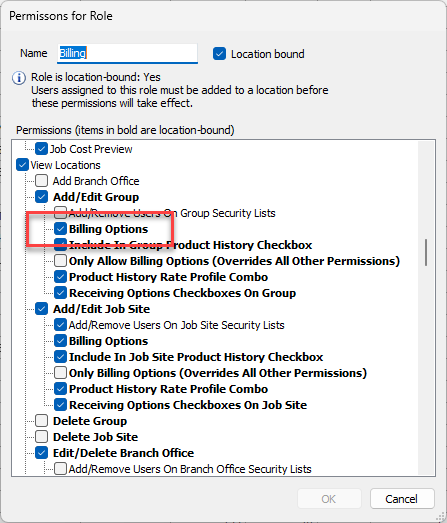
Verify that the Billing Options checkbox has a check in it.
If it doesn't, click it to put a check in it.
Click OK.
The Roles dialog returns.Click Close.
Confirming/Assigning User Role Assignments
Based on the results of the procedures in Confirming Permissions above, you may need to reassign the role of a user, to ensure that the user performing the conversion has appropriate permissions.
To confirm user role assignments:
Click the Users tab and review the assigned roles.
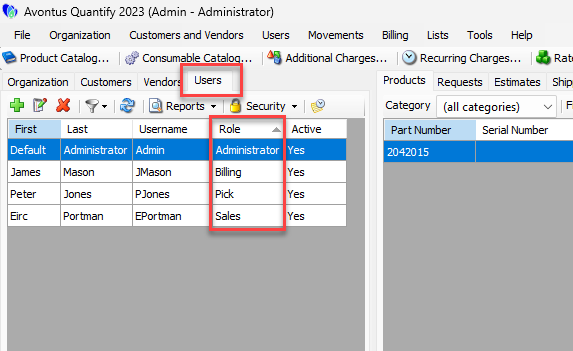
If you must assign a new role to a user, click the user's row and click the Edit User button.
Note: You can also double-click the user.
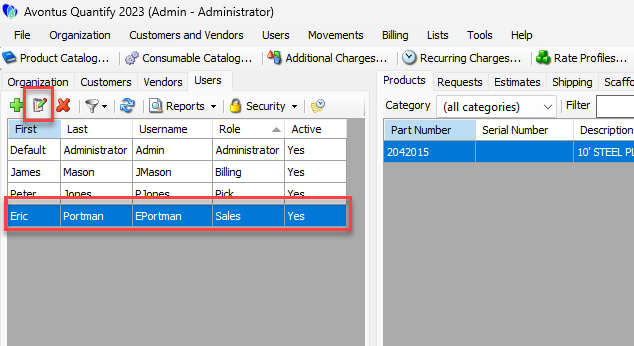
The User dialog appears.Click the Role dropdown and select the appropriate role.
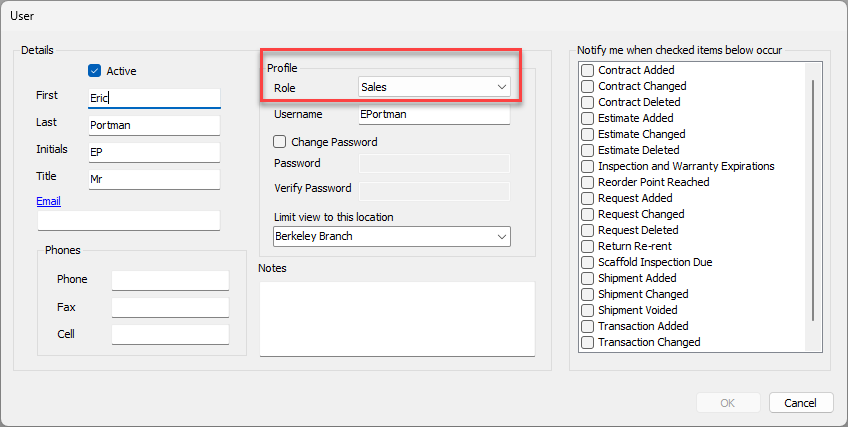
Click OK.

Repeat the above steps for all appropriate users.
Confirming/Configuring Location-Based Security
If your installation of Quantify has Location-Based Security enabled, you must be assigned to the Security list for the Job Site being converted.
To confirm/configure location-based security:
Locate and click the appropriate Job Site, then click the Edit Selected Item button. You can also double-click the item.
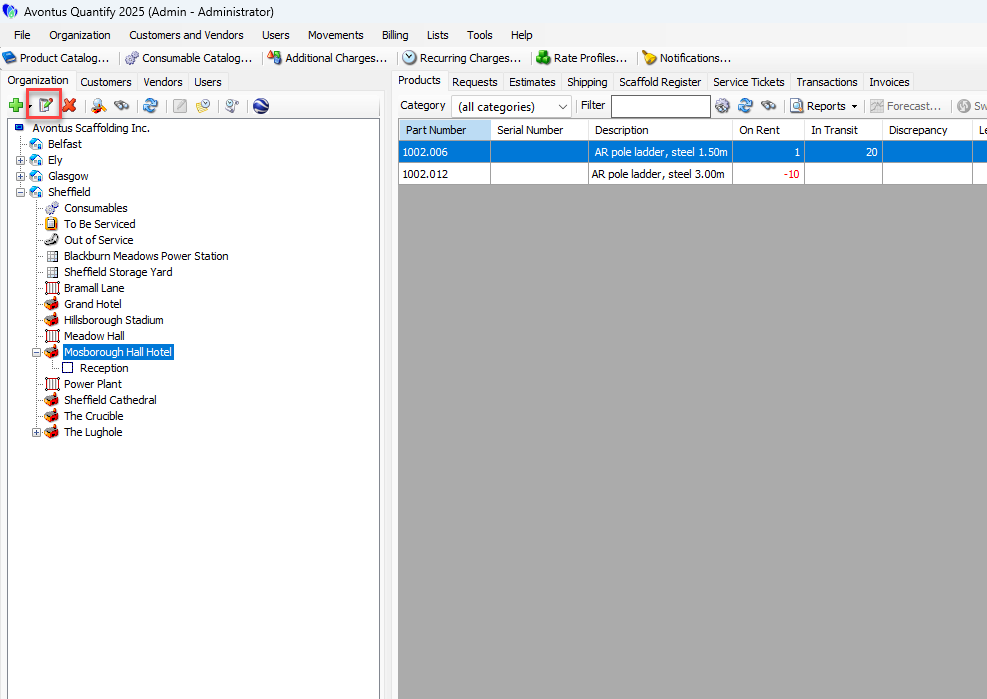
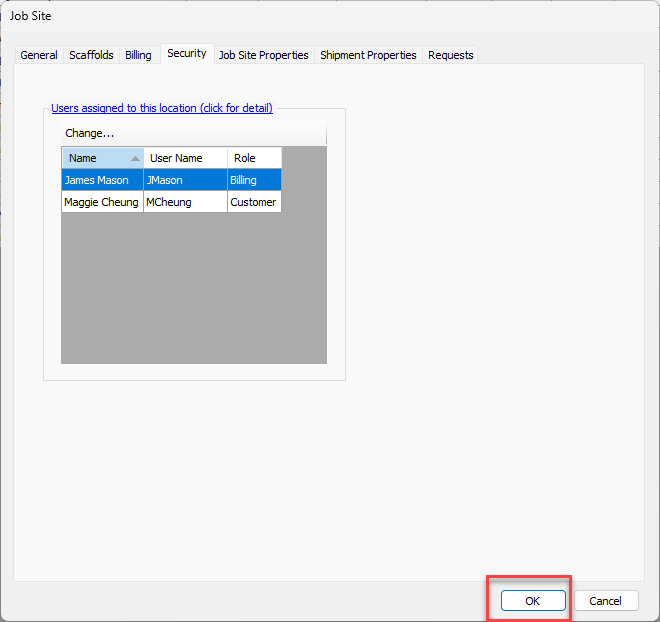
The Job Site dialog appears.Select the Security tab.
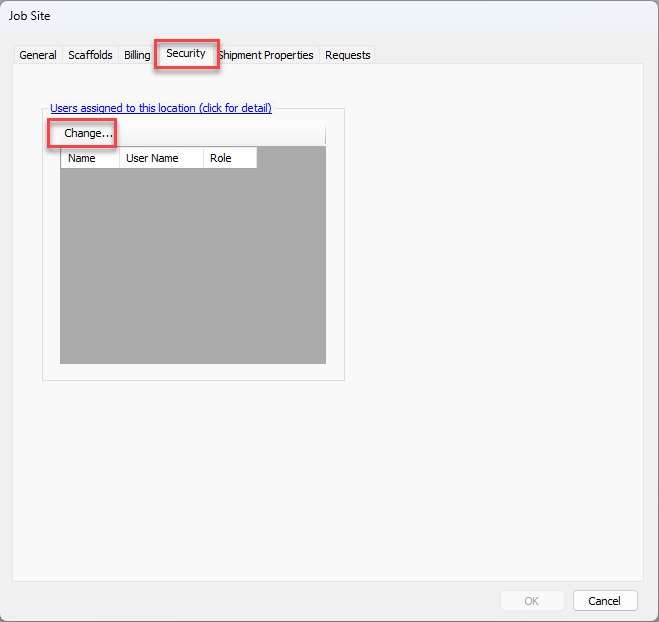
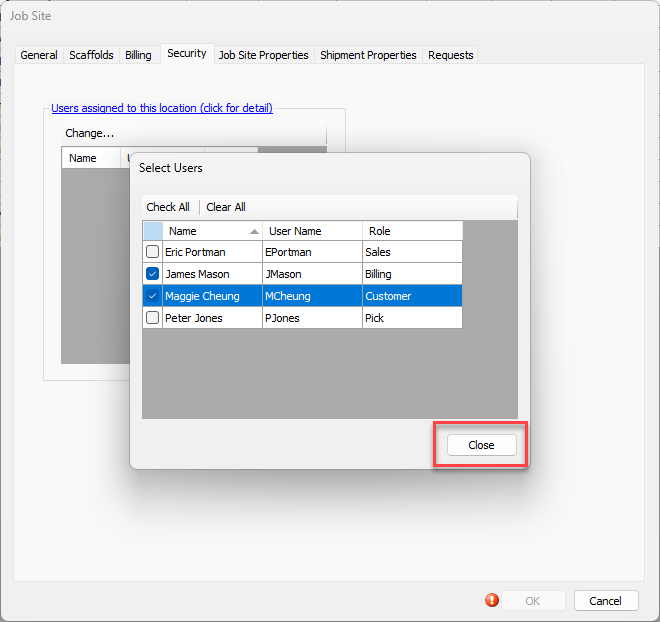
To add a user to this Job's Security list, click Change.
The Select Users dialog appears.Click the checkbox beside the name of each User you need to add to the Job Site Security list.
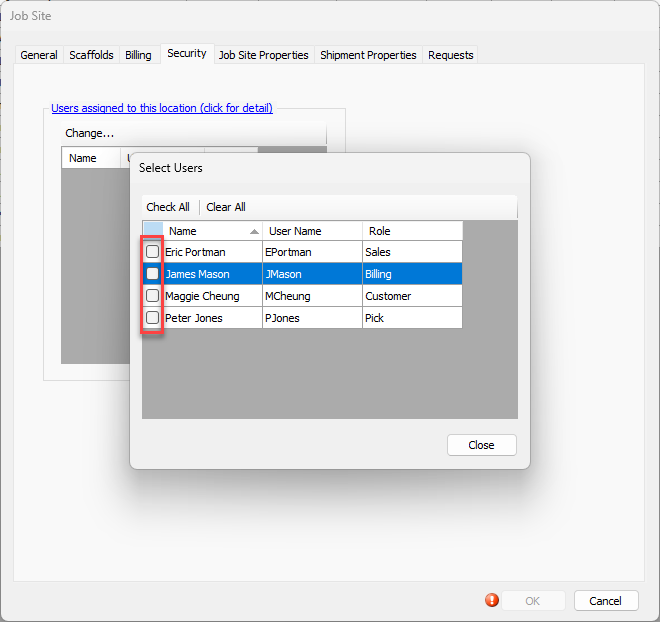
Click Close.
The Job Site dialog returns.Click OK.
For more information on using Job Site Location-Based Security, refer to Assigning Users to Job Site Location-Based Security.