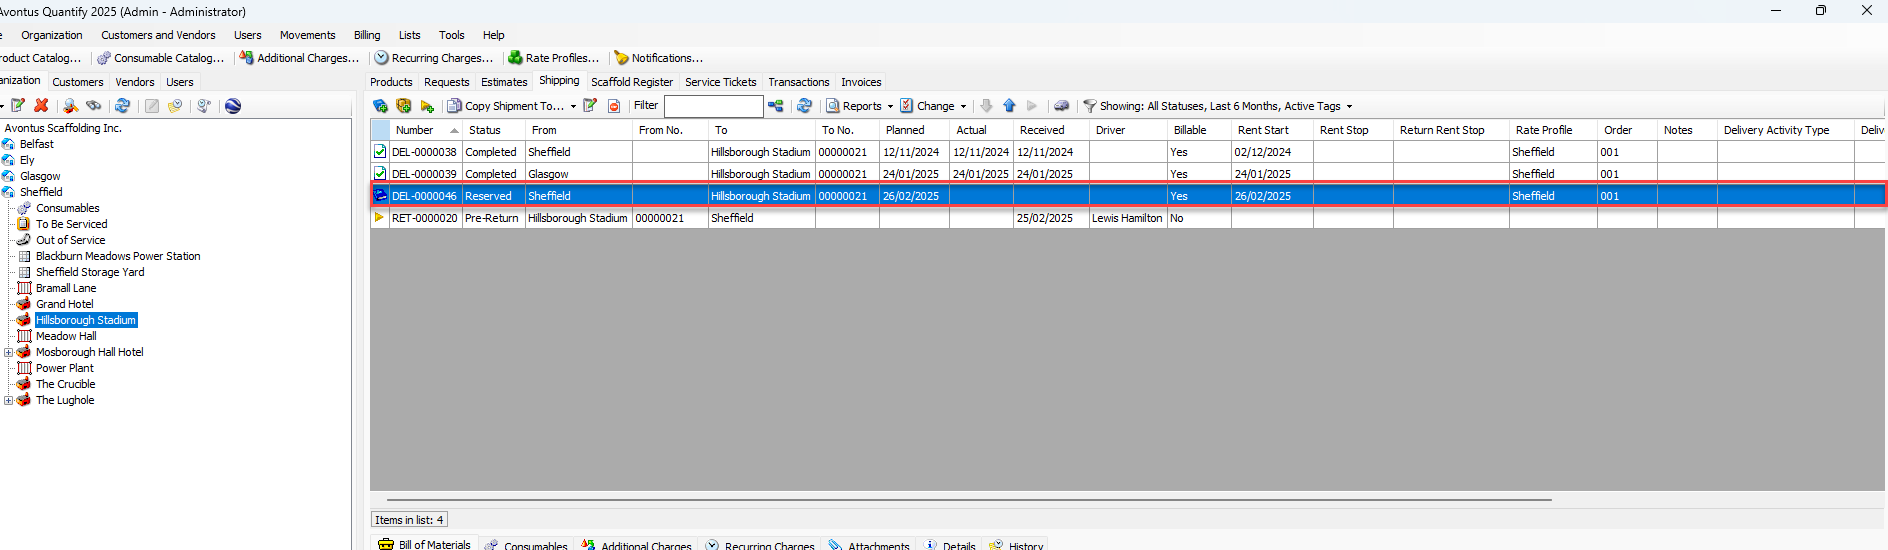
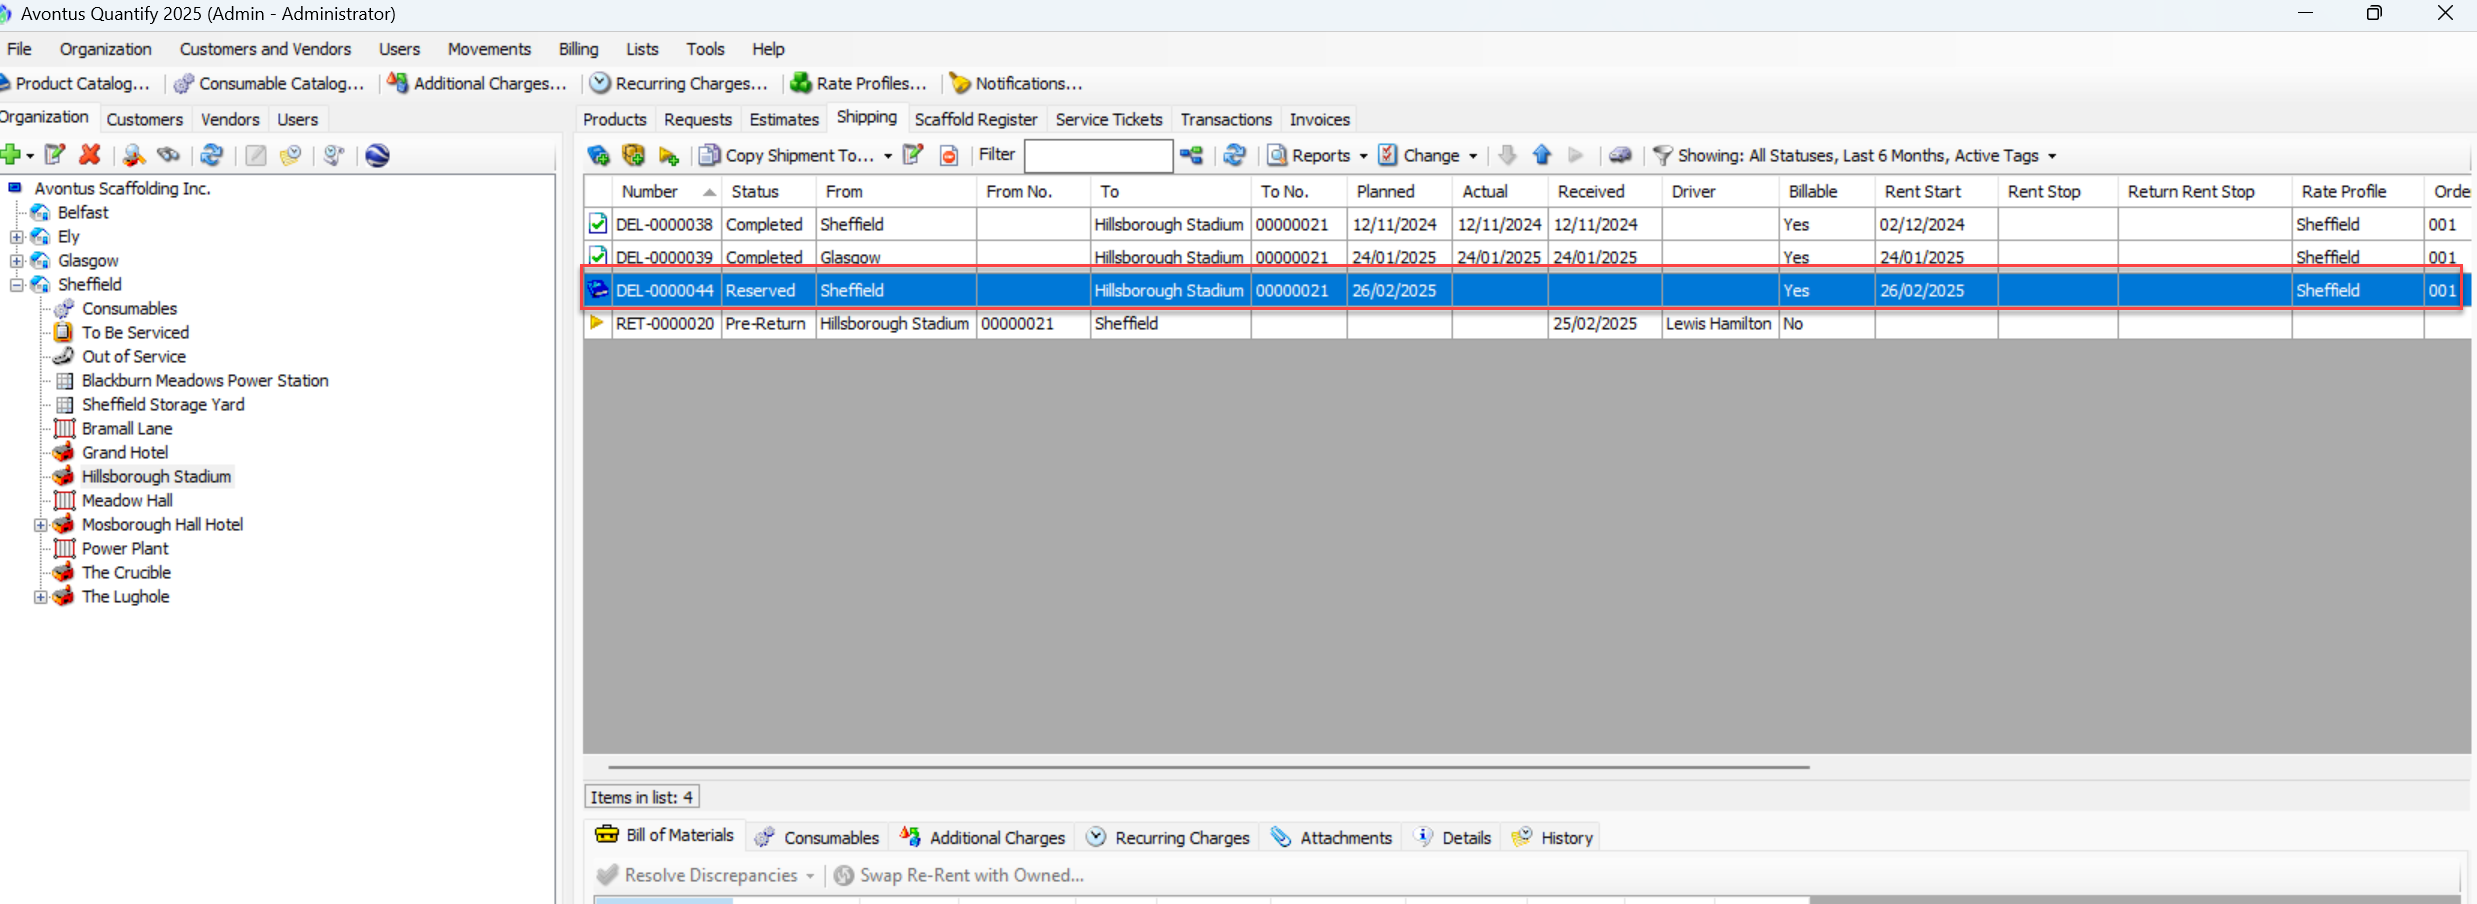
Quantify enables you to reserve equipment to be shipped later to specific Job Sites. Quantify identifies Reservations in the grid with the reservation book icon (![]() ), to distinguish them from other types of Shipments.
), to distinguish them from other types of Shipments.
You can ship items directly from a Reservation without creating a separate Shipment. For more information, refer to Converting a New Reservation to Delivery.
Rental rates may be calculated to equal a specific amount, rather than use the rental rates provided by Rate Profile(s) (or the Product Catalog if the Single Rate mode is being used). You can also prorate the rent amount to make it equal a specific amount.
If you void a Reservation, Quantify returns the reserved equipment to inventory.
Creating a Reservation
Quantify provides a simple process for reserving equipment to ship later.
To create a Reservation:
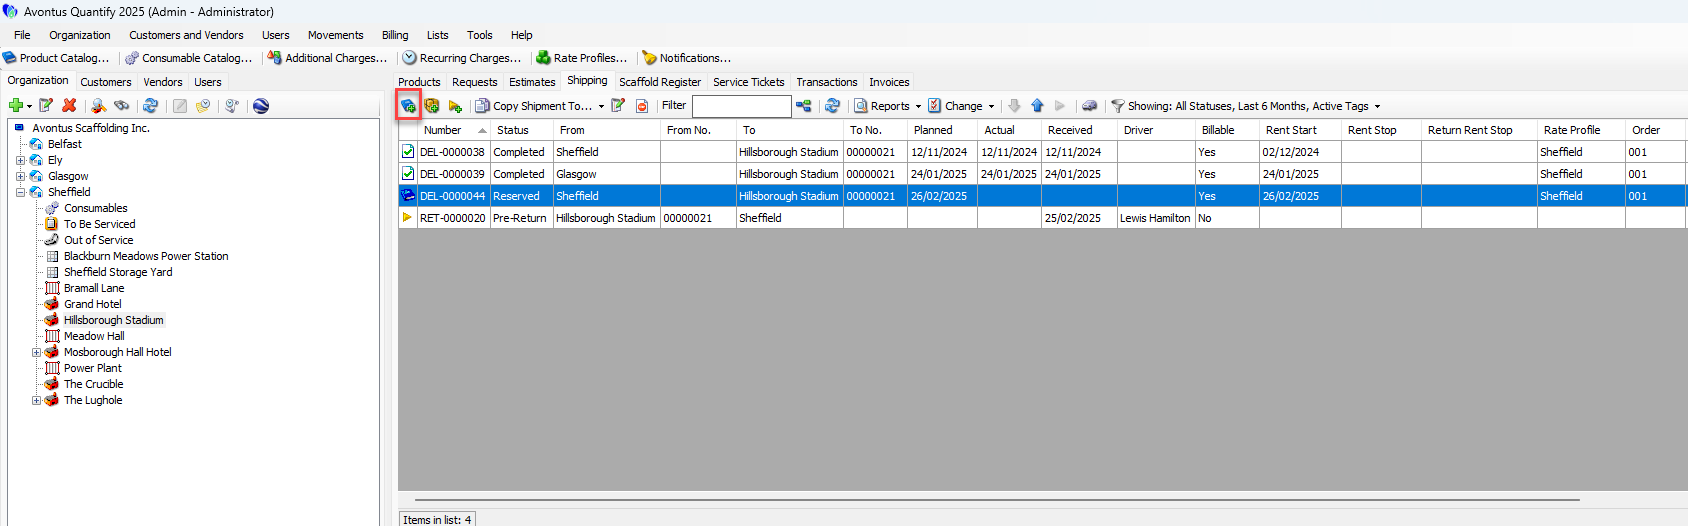
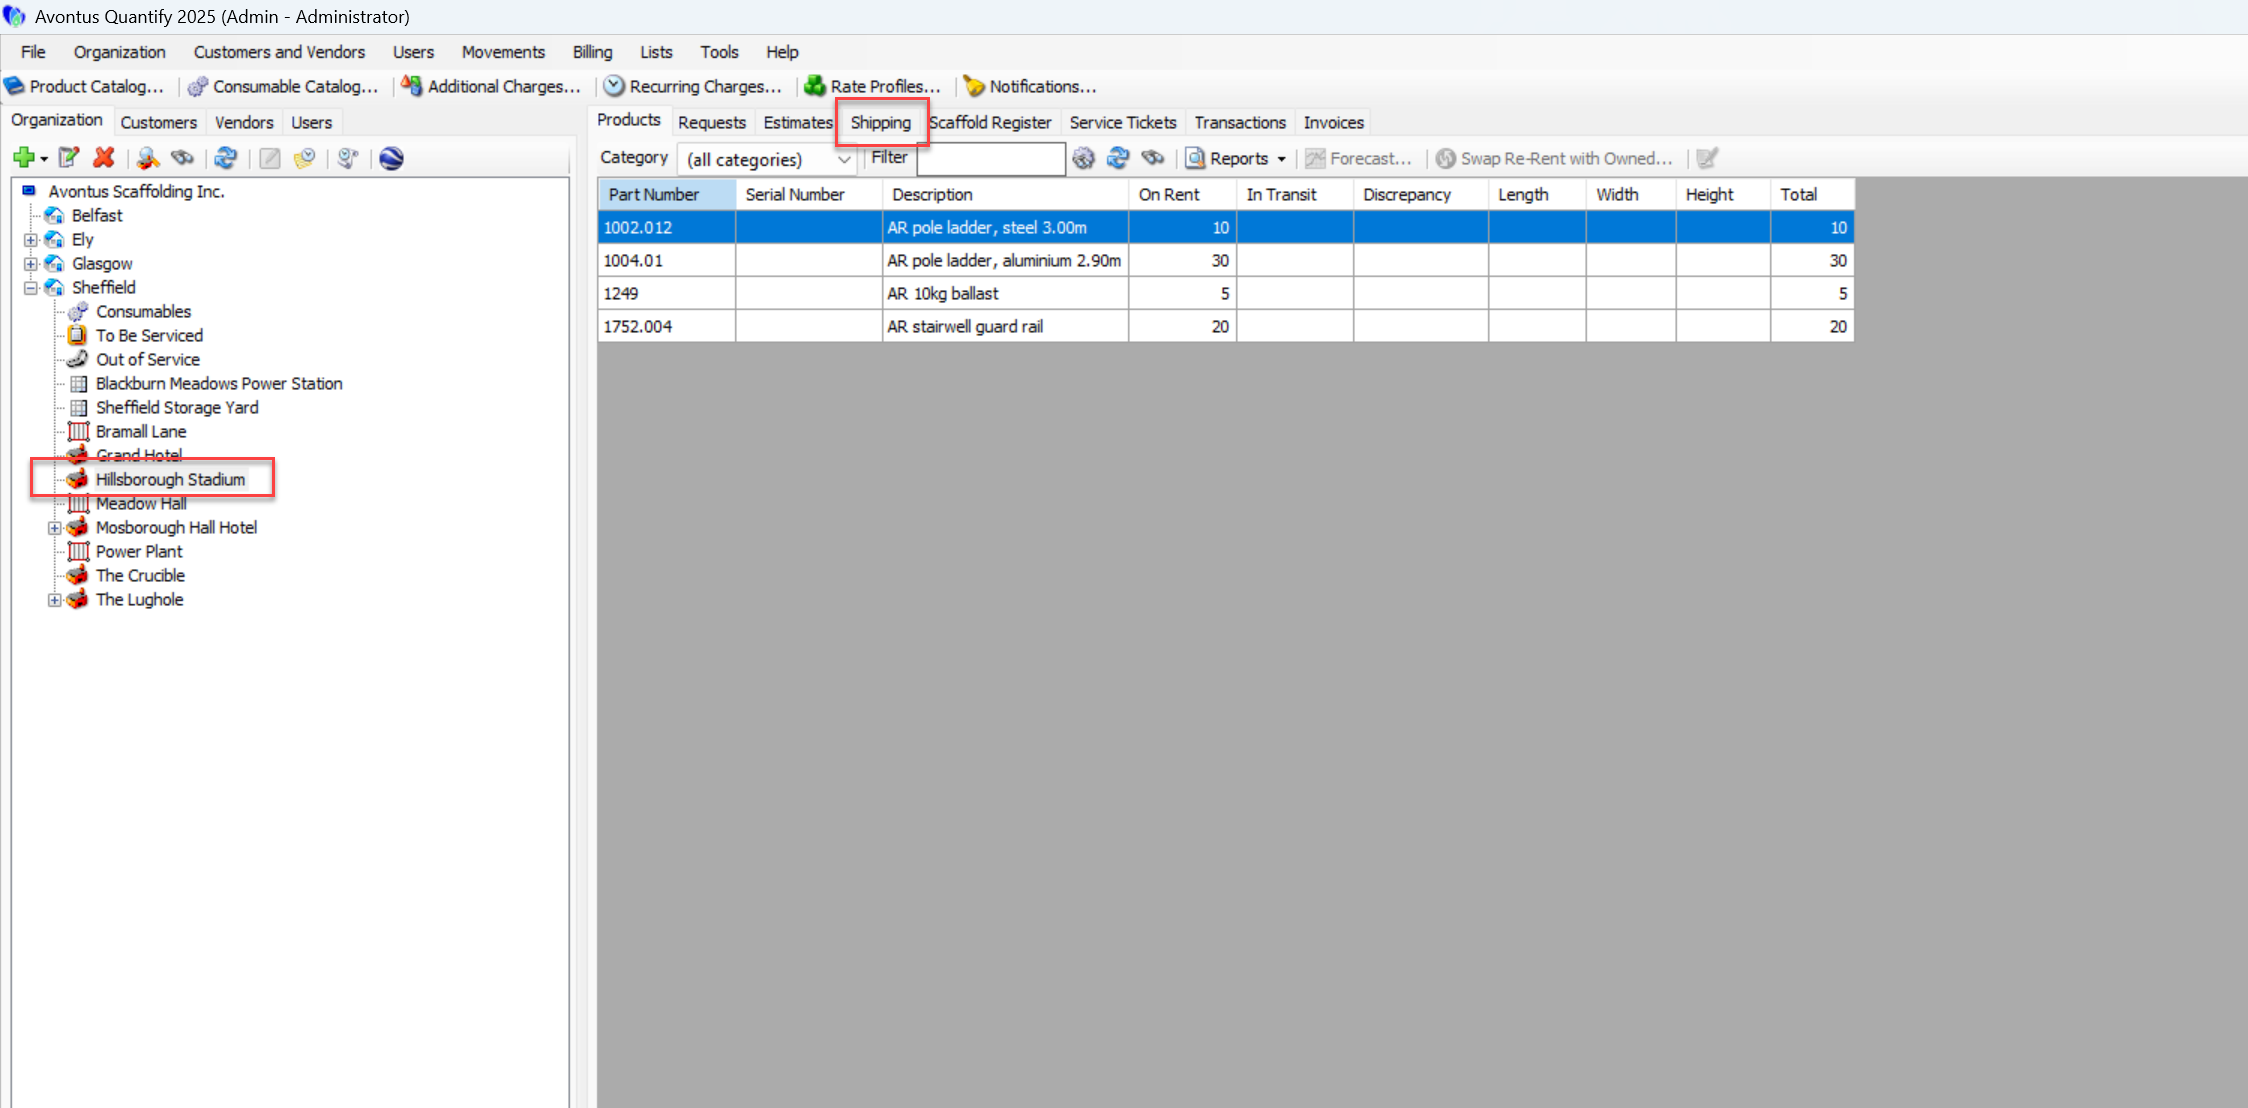
Click the appropriate location in the Organization Tree, then click the Shipping tab.

Click the Reserve Items to be Shipped at a Later Time button.
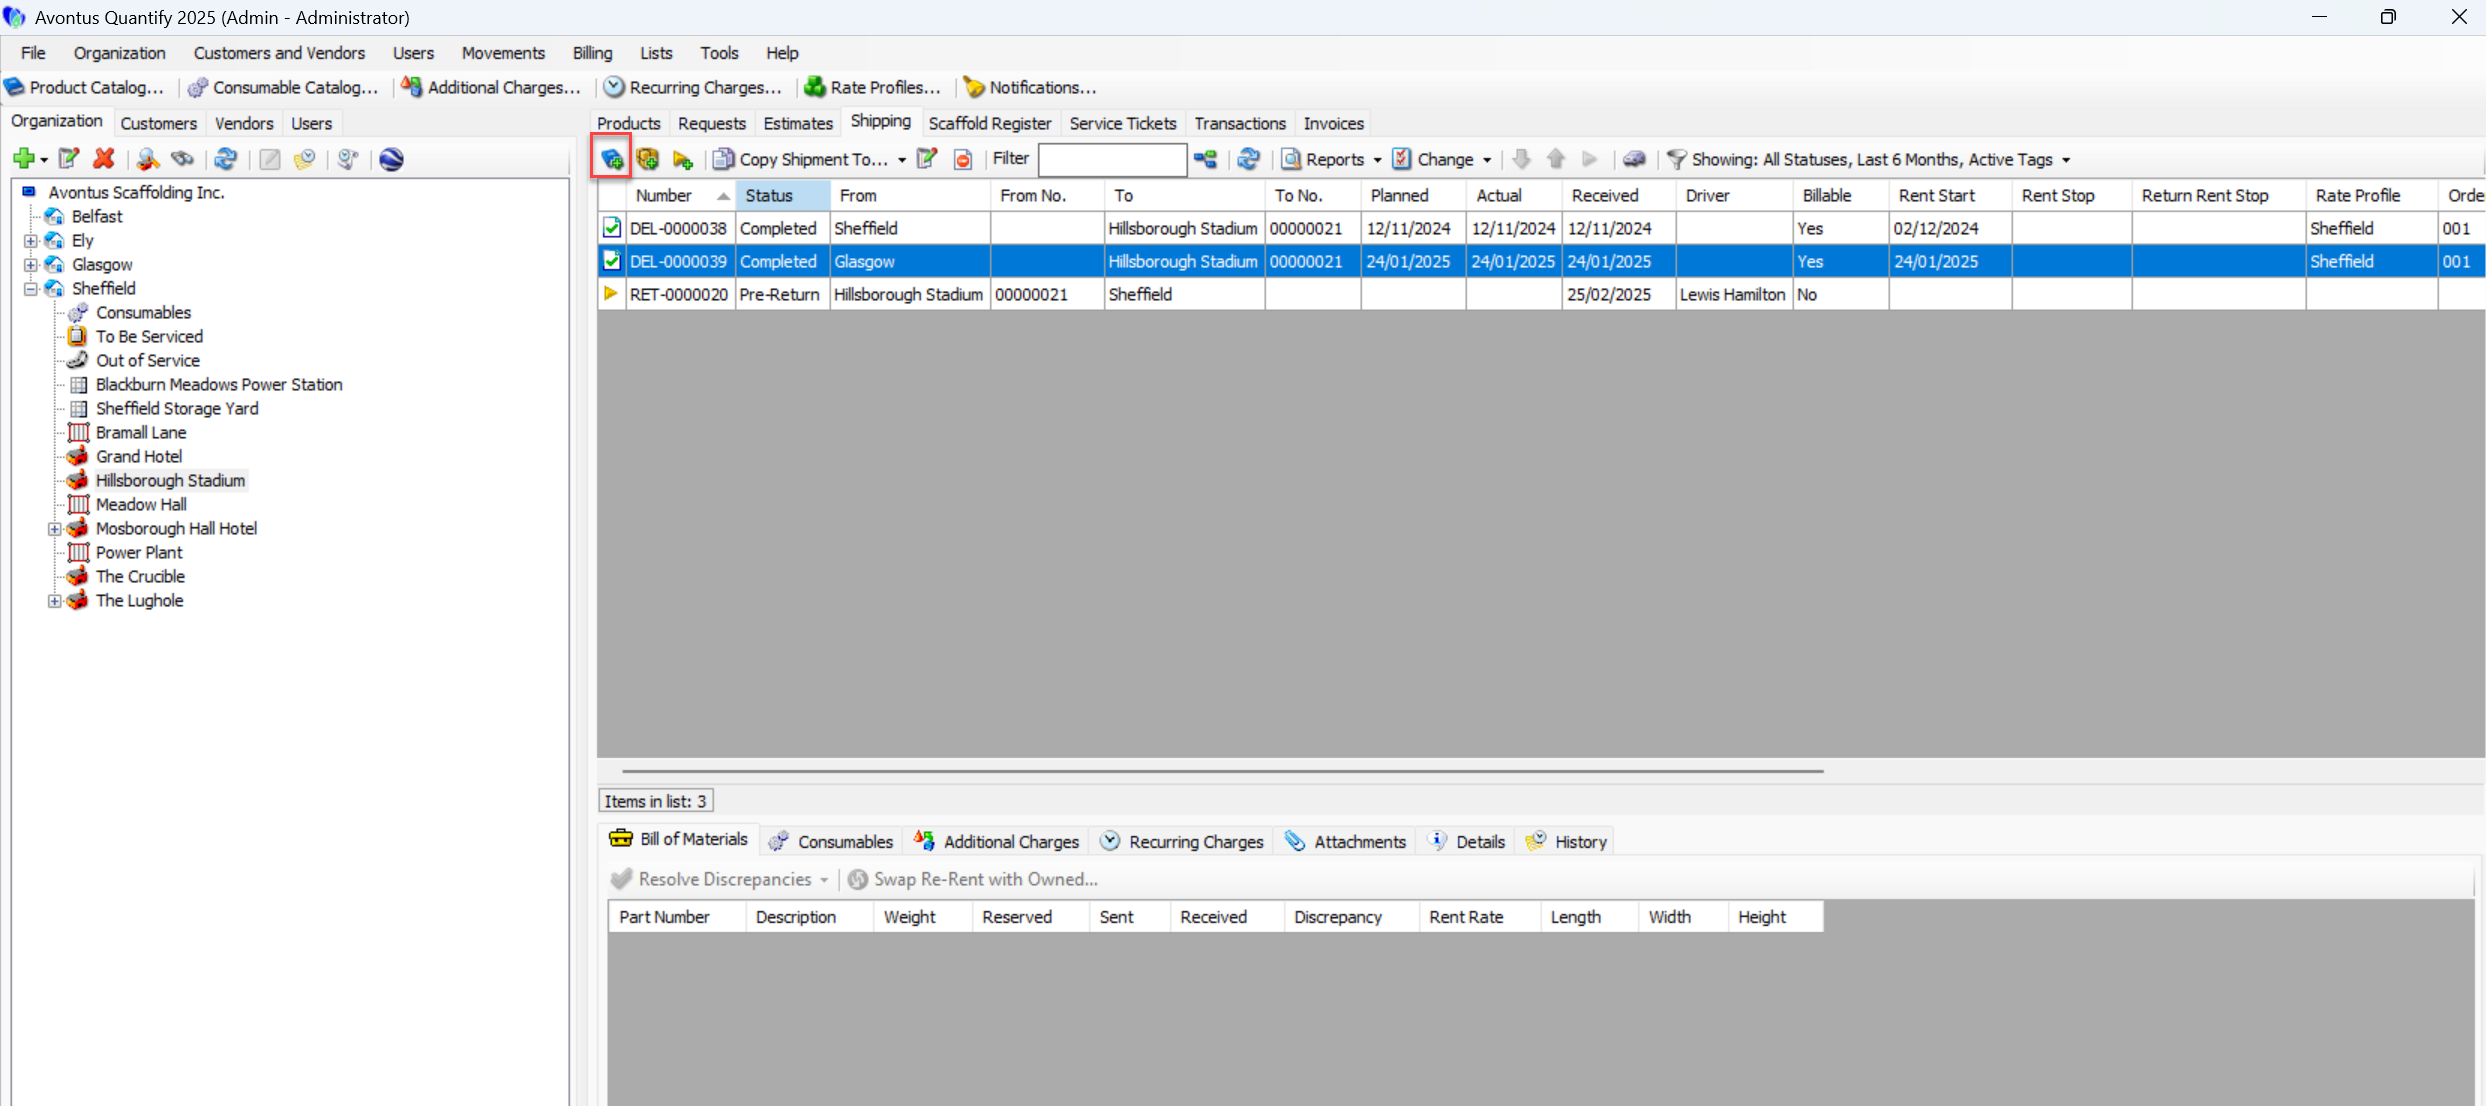
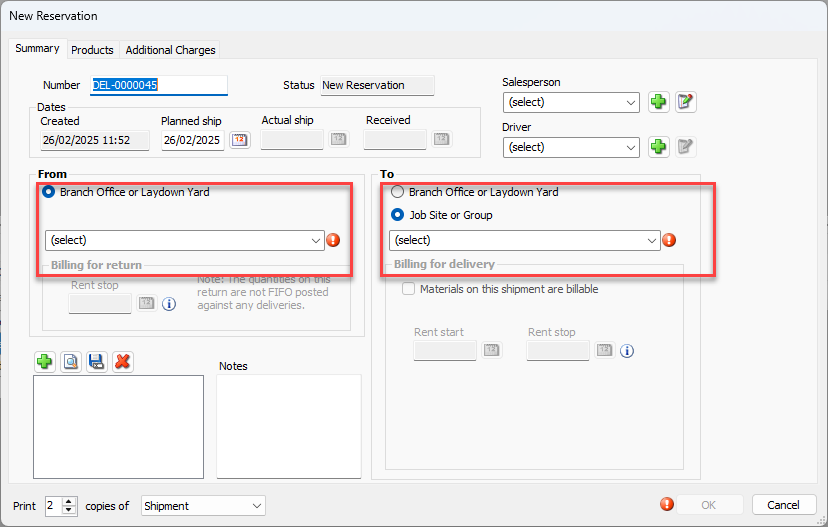
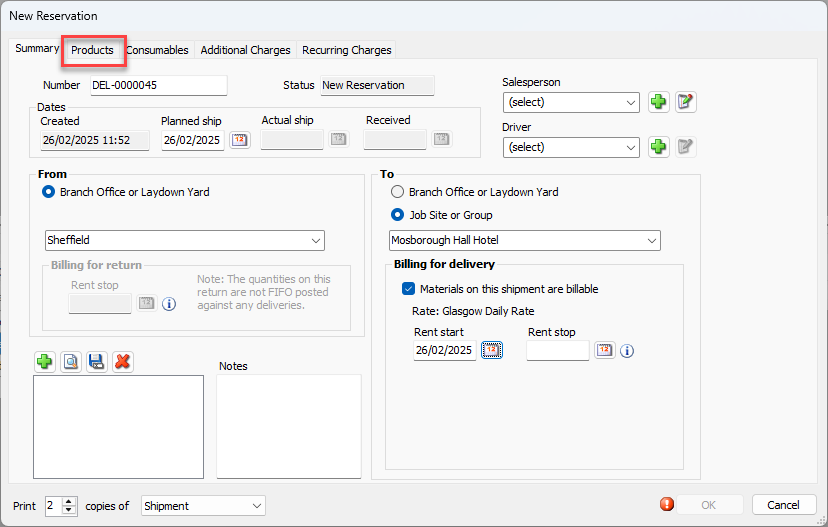
The New Reservation dialog appears. The Reservation is assigned a sequential DEL number with a status of New Reservation.
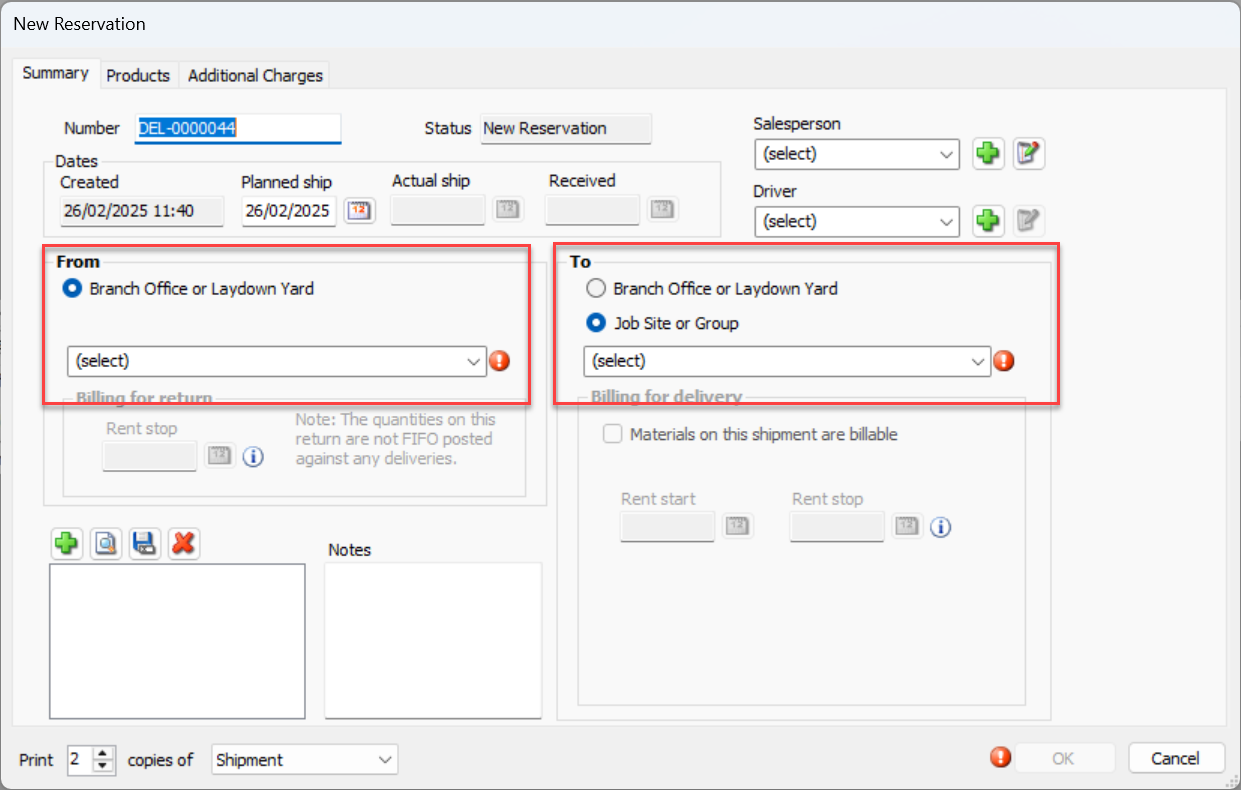
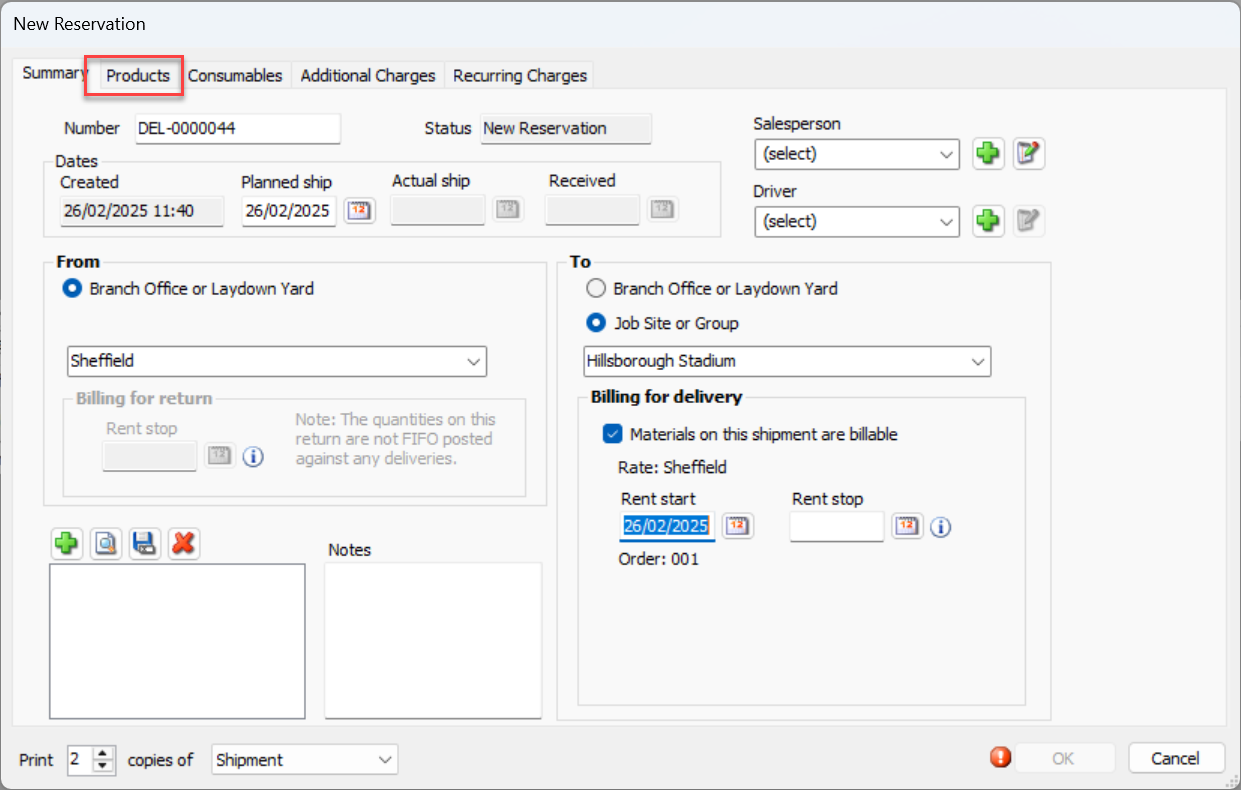
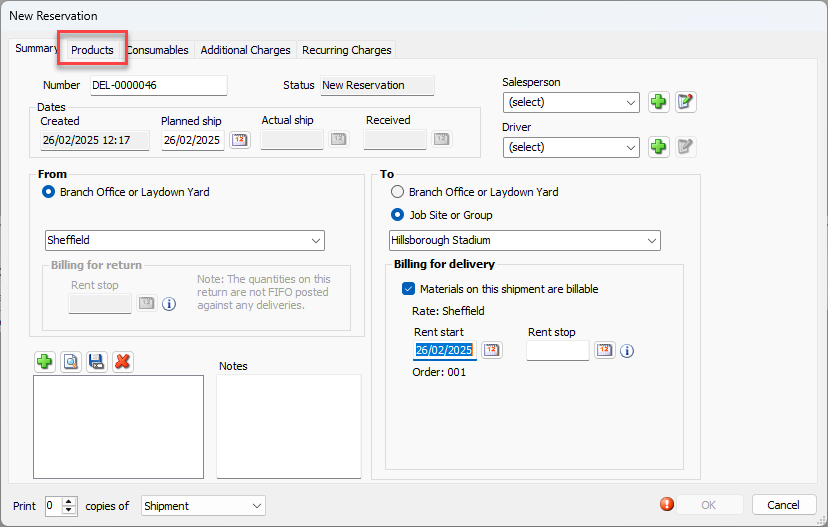
The From location will default to the Branch Office selected in the Organization Tree.Click the From dropdown and select the appropriate Branch Office or Sub-Branch, if the Branch Office must be changed.
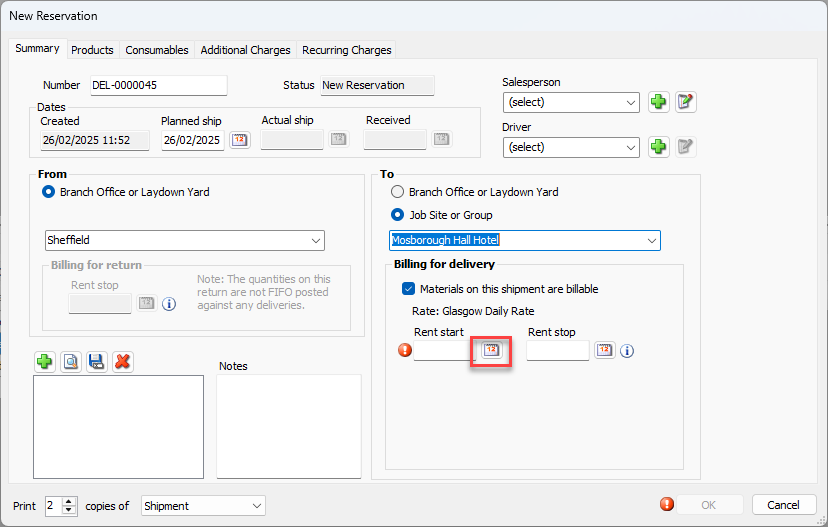
Click the To dropdown and select the appropriate Job Site.
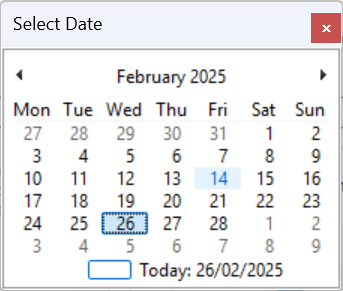
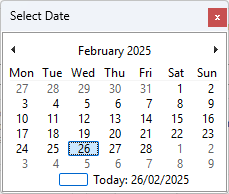
If the selected Job Site is billable, the Rent Start field becomes active.Click the Rent Start calendar icon (
 ).
).
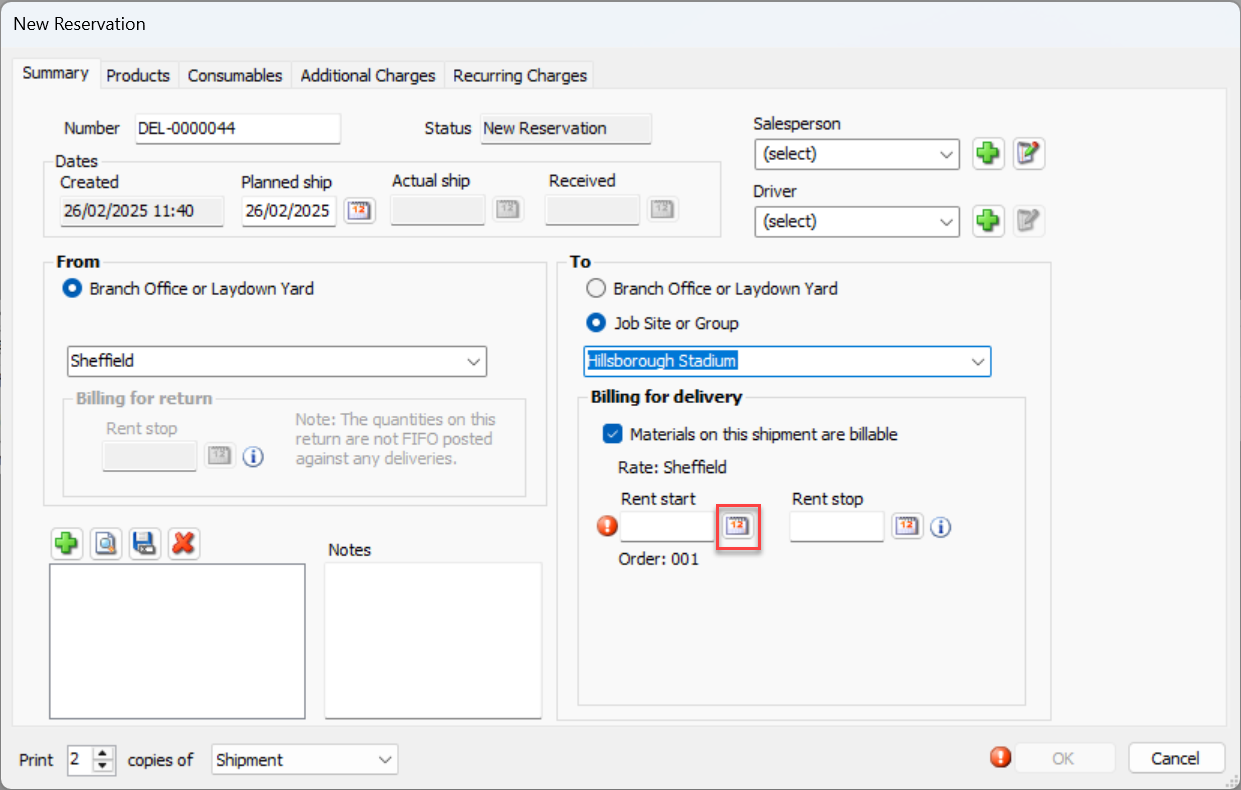
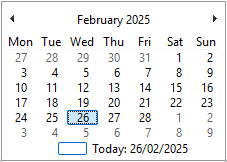
A calendar appears.Locate and click the appropriate rent start date.
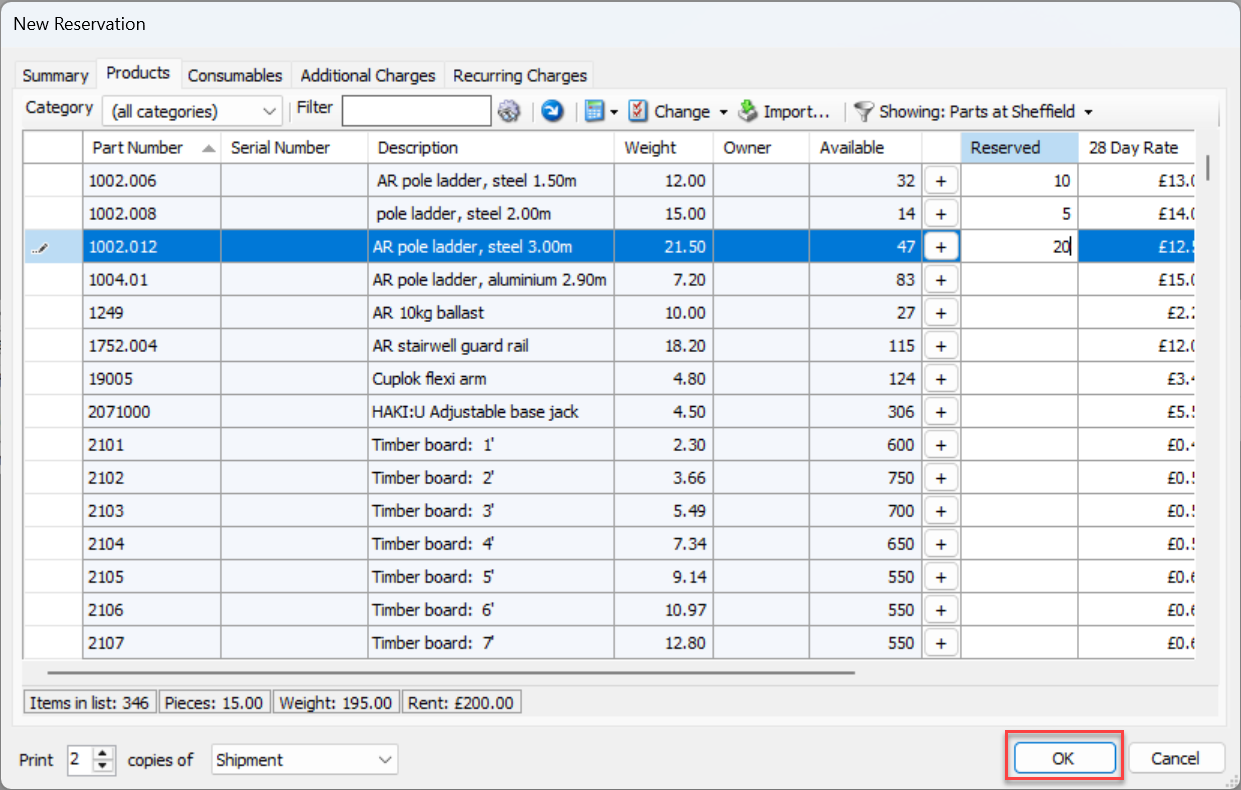
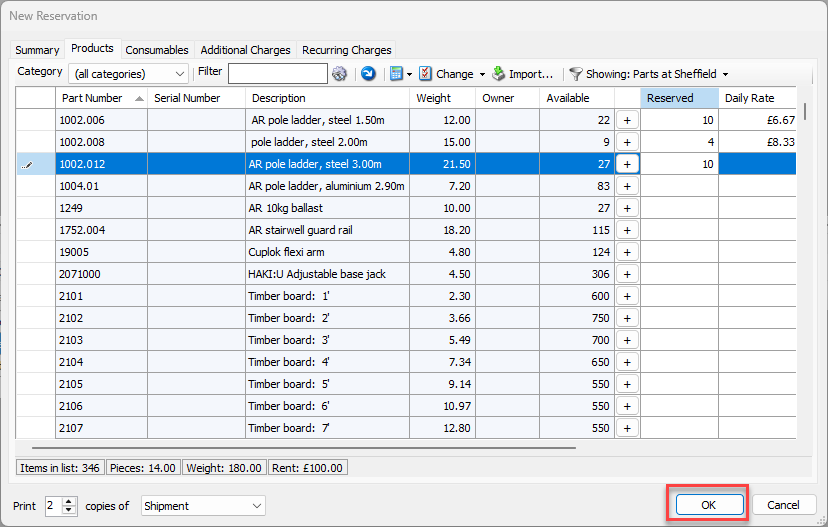
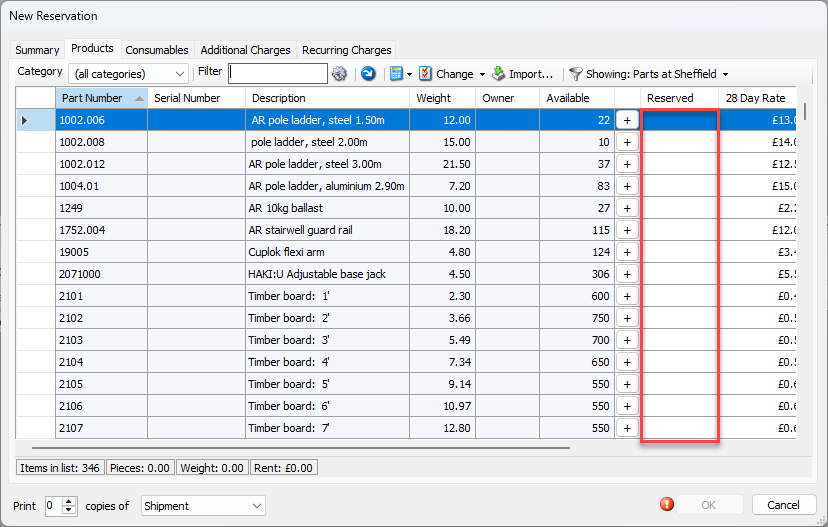
Click the Products tab.
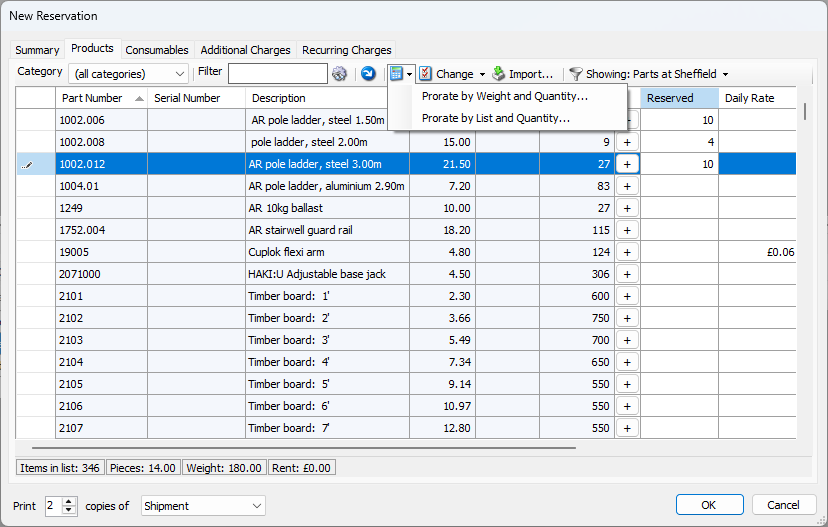
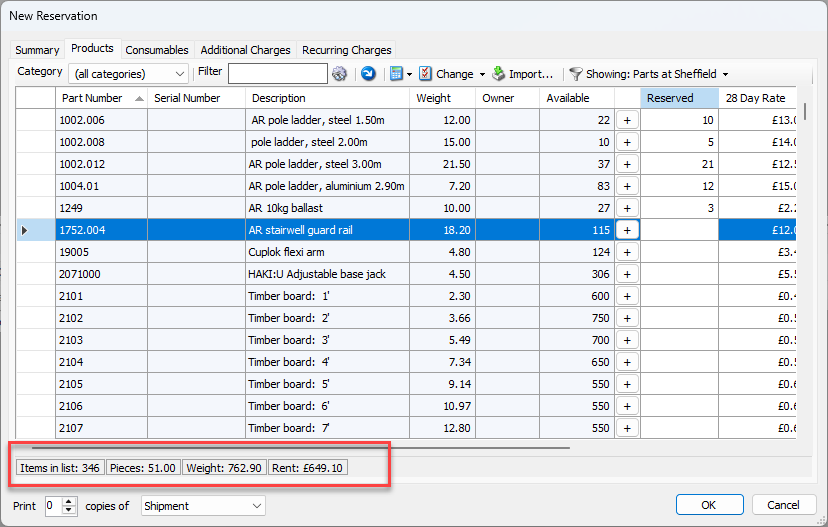
The New Reservation dialog refreshes.Locate the item(s) you want to reserve, click itheir cell in the Reserved column and enter the appropriate amount.

Repeat the above step as many times as necessary,
The status line at the bottom of the Product tab updates as you add or remove items.

Click OK to complete the Reservation.
It is now visible in the Shipping tab for the Job Site.
Prorating Rents
Rental Rates may be calculated to equal a specific amount, rather than use the rental rates provided by Rate Profile(s) (or the Product Catalog if the Single Rate mode is being used). Use the Prorate button to prorate the rent amount to make it equal a specific amount.
Note: You can enable the Prorate feature in the Shipments and Scaffolds tab in the Global Options dialog.
To prorate rents:
Click the appropriate location in the Organization Tree, then click the Shipping tab.

Click the Reserve Items to be Shipped at a Later Time button.
The New Reservation dialog appears. The Reservation is assigned a sequential DEL number with a status of New Reservation.Click the From dropdown and select the appropriate Branch Office or Sub-Branch.
Click the To dropdown and select the appropriate Job Site.
The Rent Start date field becomes active.Click the Rent Start calendar icon (
 ).
).
A calendar appears.
Locate and click the appropriate start date.
Click the Products tab.
The New Reservation dialog refreshes.
Locate the item(s) you want to reserve, click the cell in the Reserved column and enter the appropriate amount.

Repeat the above step as many times as necessary,
Click the Prorate button (
 ) and select to Pro-Rate by Weight and Quantity or List and Quantity.
In this example, we will Prorate by Weight and Quantity.
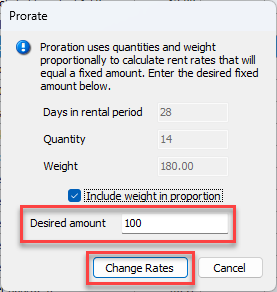
The Prorate dialog appears.Click in the Desired Amount text field and enter the prorated rent amount, as needed for the Reservation.
Click Change Rates.
The New Reservation dialog returns. The status bar in the bottom of the dialog reflects the prorated rent amount.
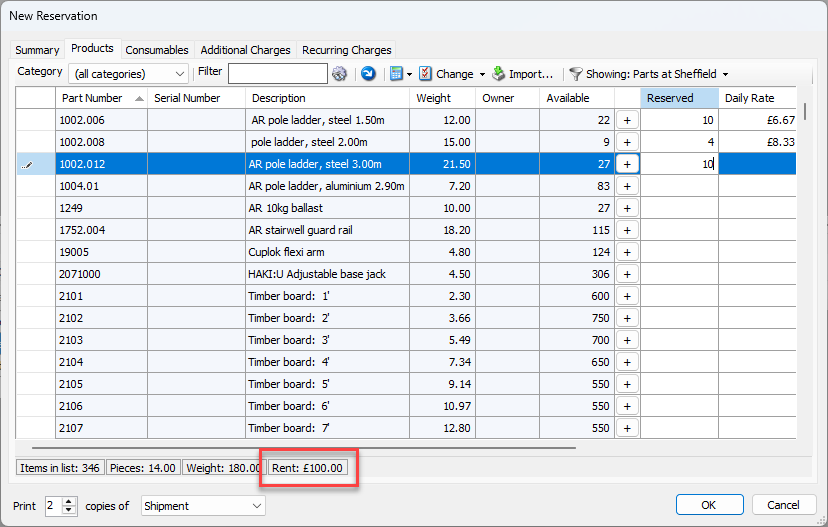
Click OK.
Voiding a Reservation
Quantify enables you to void Reservations and return the reserved equipment to inventory.
To void a Reservation:
Click the appropriate location in the Organization Tree, then click the Shipping tab.
Select the appropriate Reservation and click the Void shipment button (
 ).
). 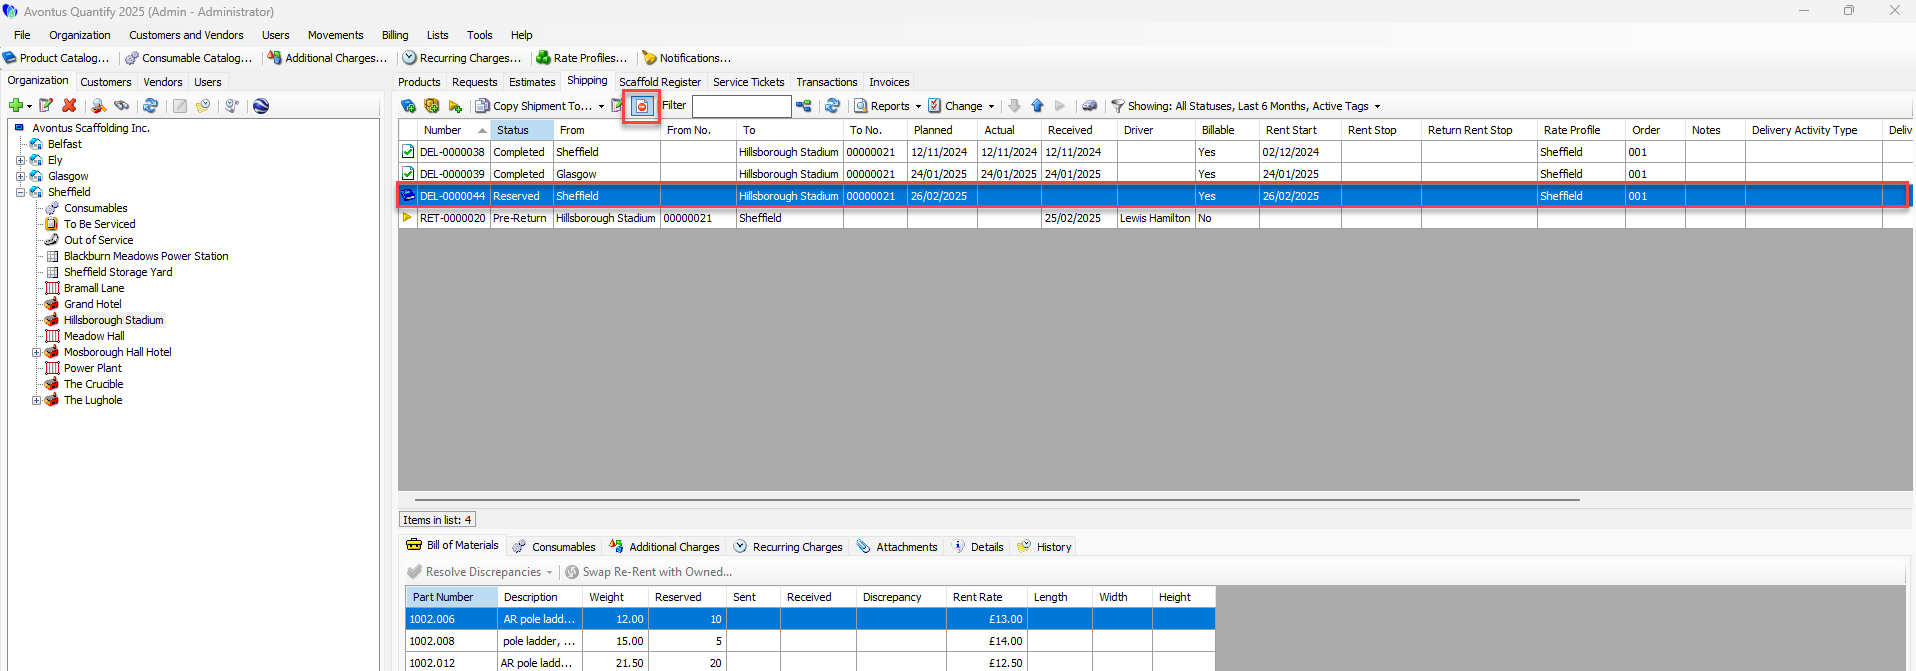
The Confirm Void dialog appears.If you are sure you want to void this Reservation, click Void.
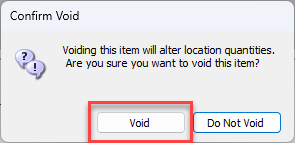
Otherwise, click Do Not Void.
Quantify changes the status of the Reservation to Voided Reservation and returns the previously reserved equipment to inventory.
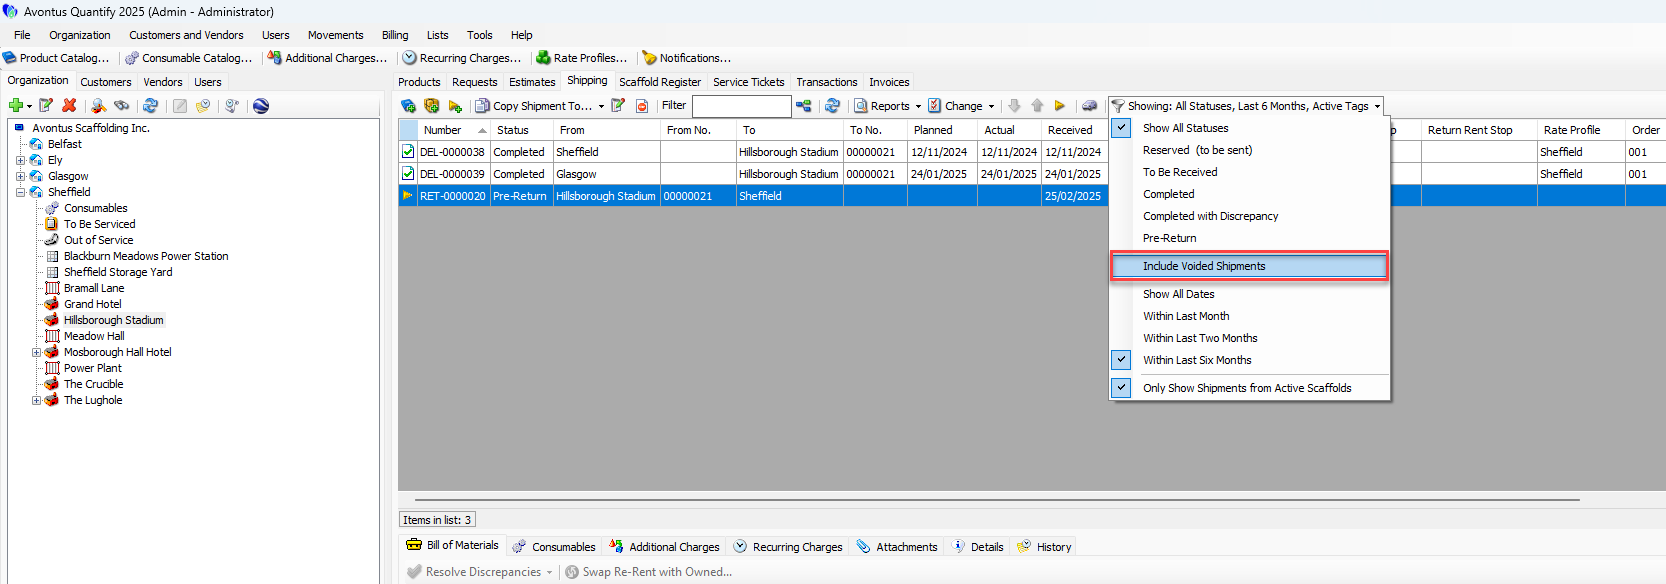
You can see voided shipments by including Voided Shipments in the filter.
Creating a Reservation for a Job Site
Quantify enables you to create a Reservation for a Job Site from the right-click menu on the Job Site.
To create a Reservation for a Job Site:
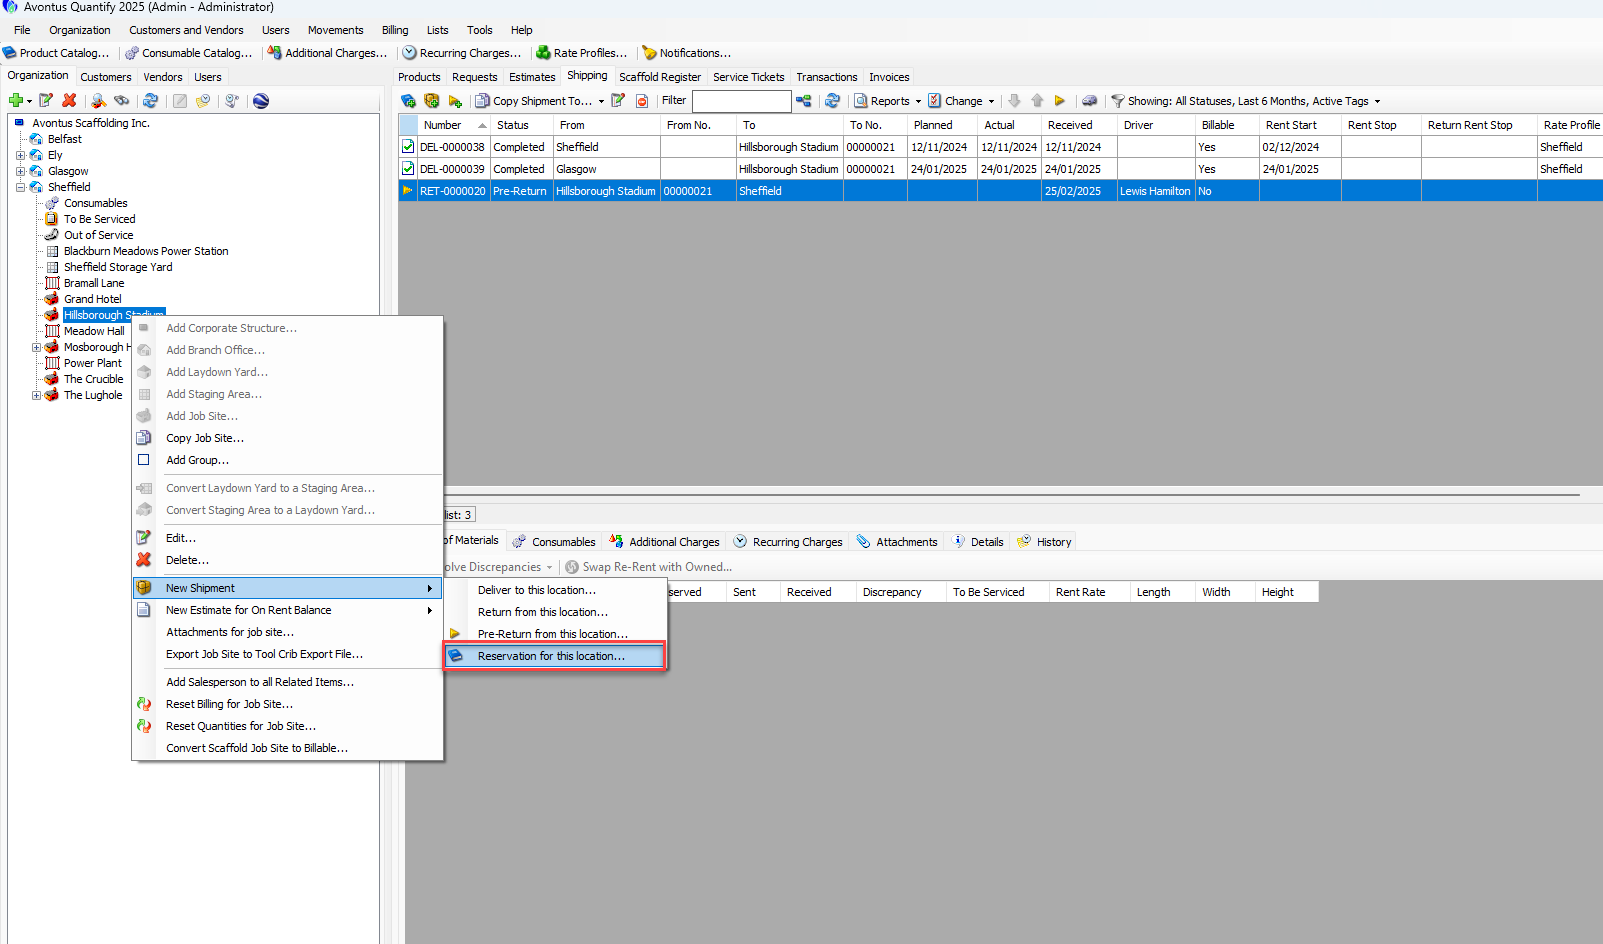
Locate and right-click the appropriate Job Site, then select Reservation for this Location from the New Shipment sub-menu.
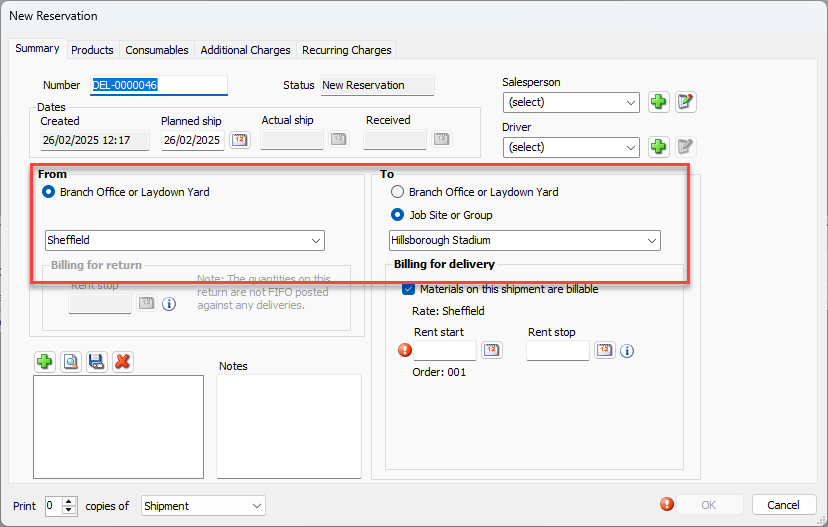
The New Reservation dialog appears. The Reservation is assigned a sequential DEL number with a status of New Reservation.If required, click the From dropdown and select the appropriate Branch Office or Sub-Branch.
If required, click the To dropdown and select the appropriate Job Site.
Note: This may be pre-filled with the selected Job Site when you started the reserveration
The Rent Start date field becomes active.Click the Rent Start calendar icon (
 ).
).
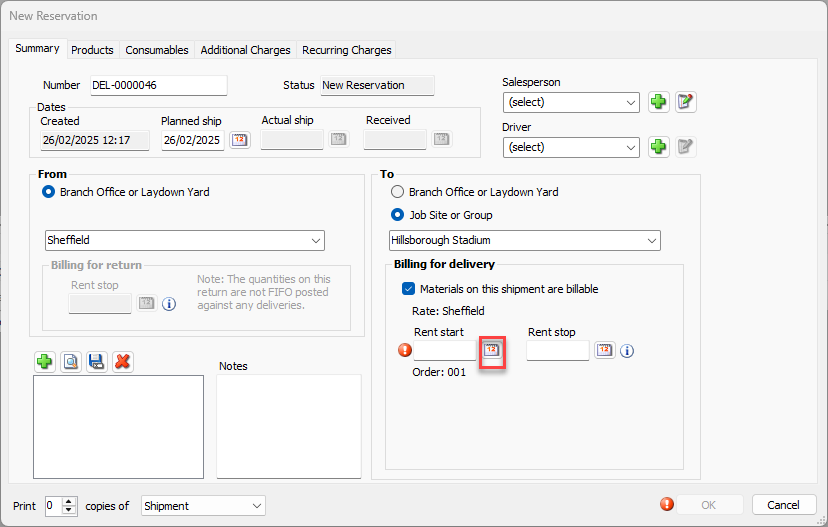
A calendar appears.
Locate and click the appropriate start date.
Click the Products tab.
The New Reservation dialog refreshes.Locate the item you want to reserve, click its cell in the Reserved column and enter the appropriate amount.
Repeat the above step as many times as necessary.
The status bar at the bottom of the Product tab updates as you add or remove items.
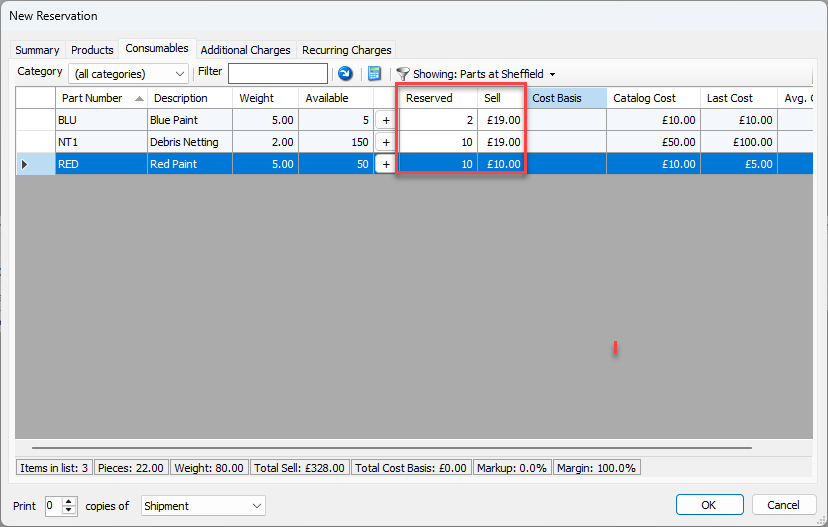
As necessary, configure Consumables.Click the Consumables tab.

Locate the item you want to reserve, click its cell in the Reserved and Sell columns and enter the appropriate amount.
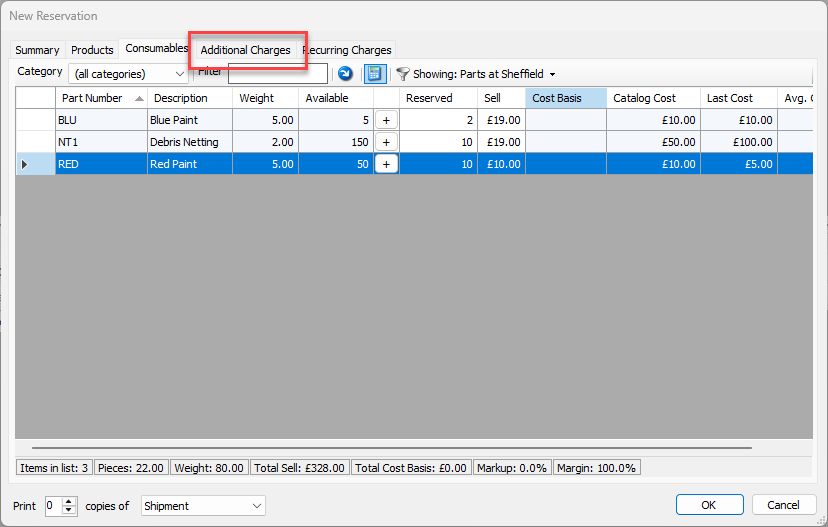
As necessary, configure Additional Charges.Click the Additional Charges tab.
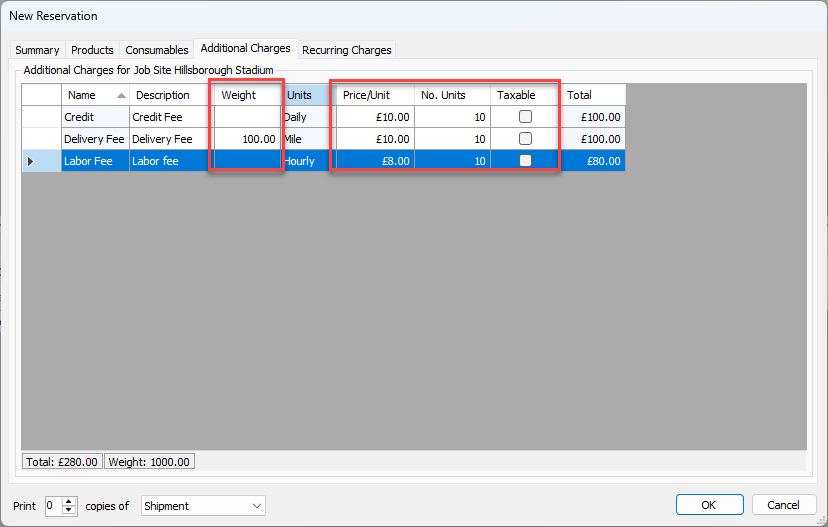
Locate and double-click the appropriate cell in the Weight column and enter the appropriate weight.
Locate and double-click the appropriate cell in the Price/Unit column and enter the unit price.
Locate and double-click the appropriate cell in the No. Units column and enter the number of units the charges apply to.
Locate and click the appropriate Taxable checkbox.
Repeat the above step as many times as necessary.
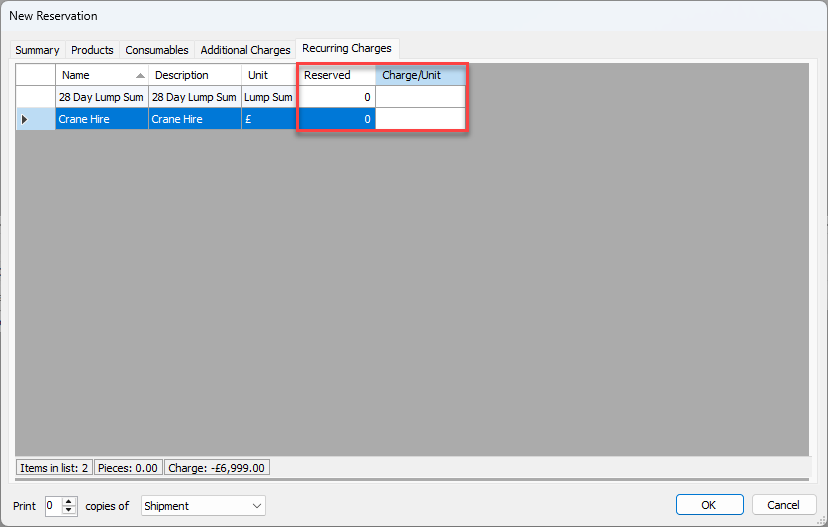
As necessary, configure Recurring Charges.Click the Recurring Charges tab.
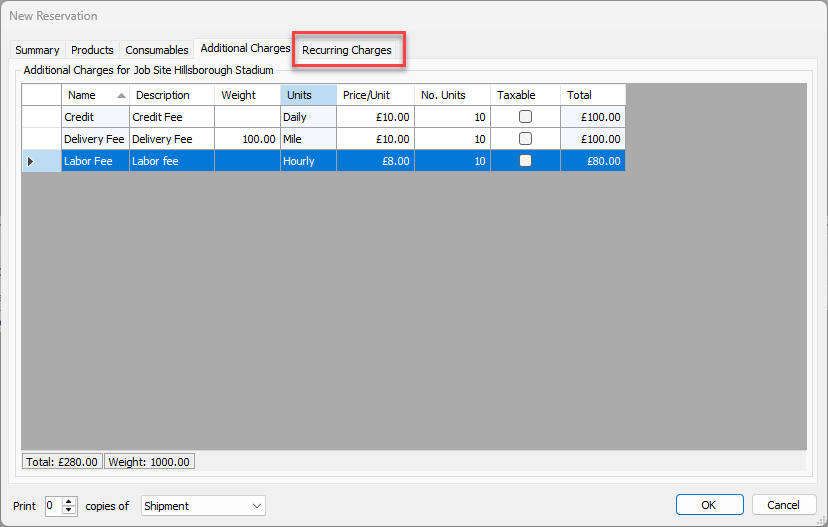
Locate the item you want to reserve, click its cell in the Reserved and Charge Unit columns and enter the appropriate amount.
Repeat the above step as many times as necessary.
Click OK to complete the Reservation.

It is now visible in the Shipping tab for the Job Site.