Once you place a Product into the To Be Serviced queue, you can create a Service Ticket for it and and charge associated service costs to the Job Site.
Creating a New Service Ticket
Before one or more items can be serviced, a Service Ticket must be created for them. The procedures below show you how to do that.
To create a new Service Ticket:
Locate and click the appropriate Branch Office, click the Service Tickets tab
Click the Add button (
 ).
).
The Service Ticket dialog appears.
Quantify has assigned a sequential ST number to the Service Ticket. By default, the Service Date text field contains the current date and the Serviced By text field contains your login role.
If the Product is serialized, Quantify has populated the Serial Number field with the item's serial number. If it is not, this is blank.As necessary, click the Service Date calendar icon (
 ).
).

The calendar appears.
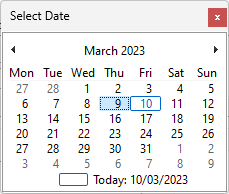
Locate and click the correct service date.
Click the Serial Number search button (
 ).
).
The Choose Product dialog appears.Click the checkbox to the left of the Product you want serviced and click OK.
7. Click OK or use the procedures below.

The Service Ticket dialog returns, displaying the Product's information in the Items to Service area.
Adding a Consumable Item to the Service Ticket
Use the Service Details tab in the Service Ticket dialog to add Consumable items used to service the Product to the Service Ticket. Quantify adds the entries you make here to the Total field in the Service Ticket dialog (bottom-right corner).
To add a Consumable item to the Service Ticket:
Click the Service Details tab, then click the Consumables Add button (
 ).
).
The Consumable for Product dialog appears.Click the Consumable dropdown and select the appropriate Consumable item.
Note: If you check the Permanently Add this Item to the List of Consumables for this Product, this consumable item will be part of the default for all future Service Tickets created for this Product. Quantify also adds this information to the Product Catalog for the item. Refer to Products that Always Require Service.
Click OK.
Quantify adds the item to the Consumables section of the Service Details tab.
As necessary, double-click the Quantity text field and enter the quantity of the Consumable item used for this Service Ticket.
As necessary, double-click the Price text field and enter the customized price of the Consumable item used for this Service Ticket.

Repeat the above steps as many times as necessary for this ticket.
Note: Quantify updates the Total text field, which tracks and displays the total on the ticket.
When you are done, use the procedures below to add Additional Charges.
Adding Additional Charges to the Service Ticket
Use the Service Details tab to add any Additional Charges needed to service the Product in the Service Ticket. Quantify adds the entries you make here to the Total field in the Service Ticket dialog (bottom-right corner).
To add an Additional Charge item to the Service Ticket:
Click the Additional Charges Add button (
).
The Additional Charge for Product dialog appears.Click the Additional Charge dropdown and select the appropriate charge.
Note: If you check the Permanently Add this Item to the List of Additional Charges for this Product, this charge will be the part of the default for all future Service Tickets created for this Product. Quantify also adds this information to the Product Catalog for the item. Refer to Products that Always Require Service.
Click OK.
Quantify adds the item to the Additional Charges section of the Service Details tab. Quantify pulls the price shown from the Rate Profile, but it can be overwritten if necessary.
As necessary:Double-click the Quantity text field and enter the quantity of the Additional Charge used for this Service Ticket.
Double-click the Price text field and enter the customized price of the Additional Charge used for this Service Ticket.
Repeat the above steps as many times as necessary for this ticket.
Note: Quantify updates the Total text field tracks the total on the ticket.
When you are done, use the procedures below to set service results.
Setting the Service Result
Use the Service Result section, in the bottom of the Service Details tab of the Service Ticket dialog, to indicate the result of servicing the Product.
To set the service result;
Click the appropriate Service Result radio button.
Your options are:Normal (return to stock)
You can add Additional Charges and Consumables and charge them back to the Job Site through the Service Ticket. Quantify returns the Product to available stock at the Branch Office.
Damaged (not billable)
Quantify may add Additional Charges and Consumables and charge them back to the Job Site through the Service Ticket. Quantify moves the Product to the Out of Service queue.
Scrap (billable)
Quantify may add Additional Charges and Consumables and charge them back to the Job Site through the Service Ticket. Quantify moves the Product to the Out of Service queue.
If you select Damaged or Scrap, Quantify moves the Product(s) to the Out of Service queue. Both allow entries for Additional Charges and Consumables to be added to the Service Ticket and charged back to the job site.
If a selection also is Billable or Not Billable, then:Billable
Quantify charges the replacement cost of the Product as defined in the Rate Profile as a damage charge. The Damage Charge text field becomes active and displays the damage charge.
Not Billable
The Damage Charge text field is disabled.

If you selected a Billable option, click in the Damage Charge text field and enter a customized damage charge.

Click OK.

You can then find the Service ticket in the Service ticket column.
Creating a Service Ticket for a Product in the To Be Serviced Queue
If a Product is already assigned to the To Be Serviced queue, Quantify enables you to create a Service Ticket for it. The procedures below show you how to do that.
To create a Service TicketService Ticket for a Product in the To Be Serviced queue:
Locate and click the To Be Serviced node in the appropriate Branch Office, then click the To Be Serviced tab.
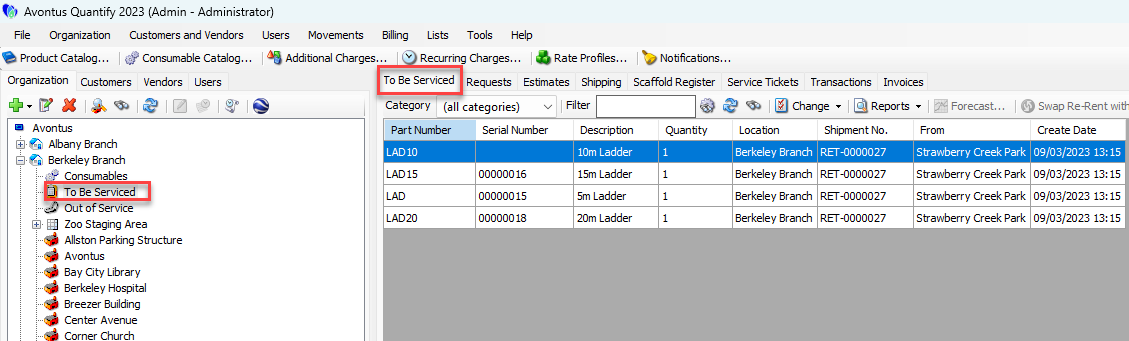
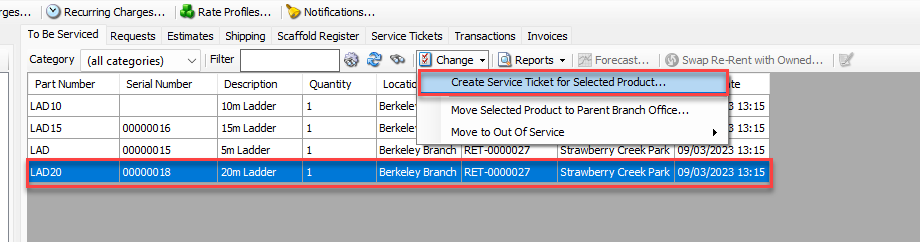
Locate and click the appropriate product, then click the Change dropdown and select Create Service Ticket for Selected Product.
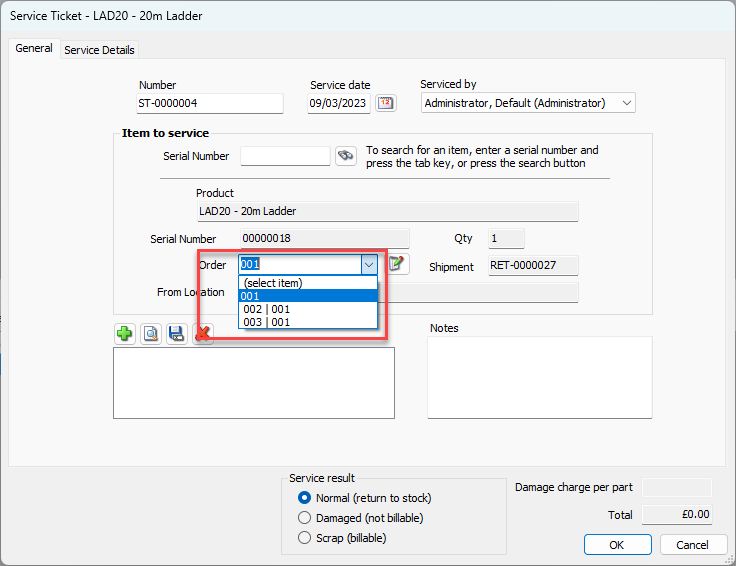
The Service Ticket dialog appears, with the General tab active.
Quantify has assigned a sequential ST number to the Service Ticket. By default, the Service Date text field contains the current date and the Serviced By text field contains your login. If the product is serialized, Quantify has populated the Serial Number field with the item's serial number. If it is not, this is blank. The Qty text field displays the quantity of the Product, the Shipment text field displays the Shipment number and the From Location text field displays the location from which the shipment originated.Click the Order dropdown and select the order number that must be associated to the Service Ticket for the customer.
To complete the ticket, refer to The following sections above:
Adding a Consumable Item to the Service Ticket
Adding Additional Charges to the Service Ticket
Setting the Service Result