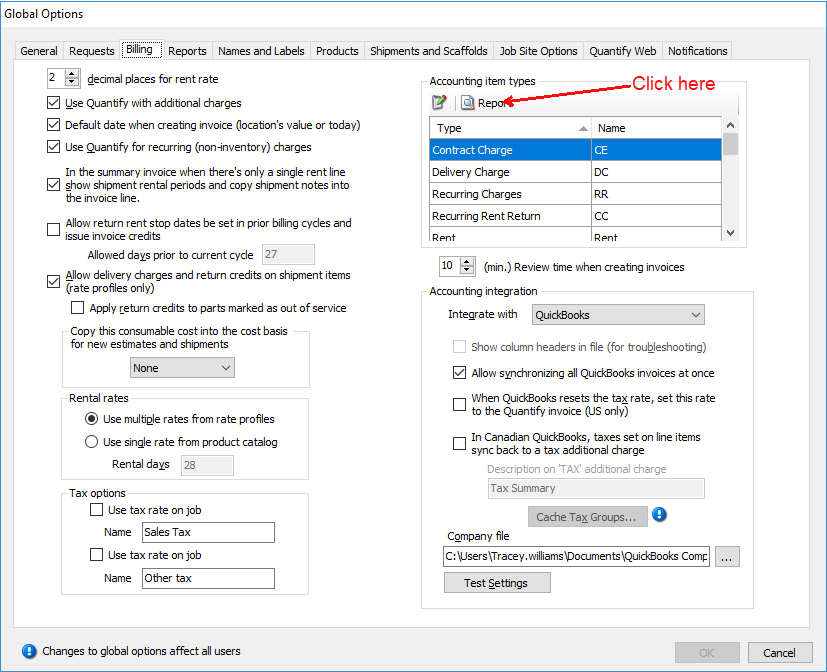
When you synchronize a Quantify Invoice with QuickBooks, Quantify adds a single Invoice item to the QuickBooks Invoice for the total of the rent as well as for each item code, as shown in the Accounting Item Types in the Billing tab in the Global Options dialog. The Report button enables you to view an Item Accounts report that you can print.

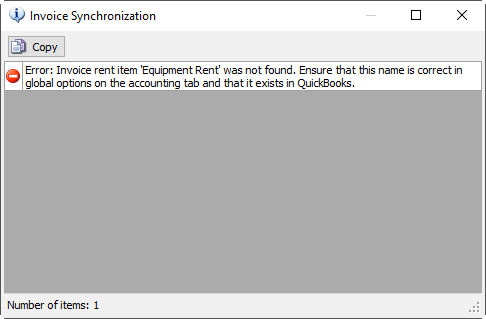
If an Accounting Item Type does not exist in QuickBooks, Quantify displays the Invoice Synchronization dialog. In this example the item Equipment Rent does not exist in QuickBooks and must be resolved before successful synchronization can occur.
Catalog Accounting Item Codes for Quickbooks
When Quantify is integrated with QuickBooks, Product and Consumable Catalog Categories include the ability to enter QuickBooks accounting item codes, enabling synchronizing rent charges to individual accounts in QuickBooks. When Product Catalog Categories are coded with QuickBooks accounting item codes, the Summary Invoice separates rental charges by Catalog Categories. When synchronizing with QuickBooks, the rent lines synchronize to the matching QuickBooks accounting item(s).
Coding Catalog Categories for QuickBooks Integration
You can add QuickBooks accounting item codes to both Product and Consumable Catalog Categories, to facilitate synchronizing rental and consumable charges by categories.
Note: When Invoices are synchronized with QuickBooks, Quantify will total rent for parts that are not in coded categories on a single Rent line, and synchronize the total using the Global Options Accounting Item Type for Rent. Refer to Accounting Item Types.
To code Product Categories with QuickBooks accounting codes:
Click Product Catalog.

The Product Catalog appears.In the upper left of the Products Catalog, click the Add button (
 ) and select Parent Category.
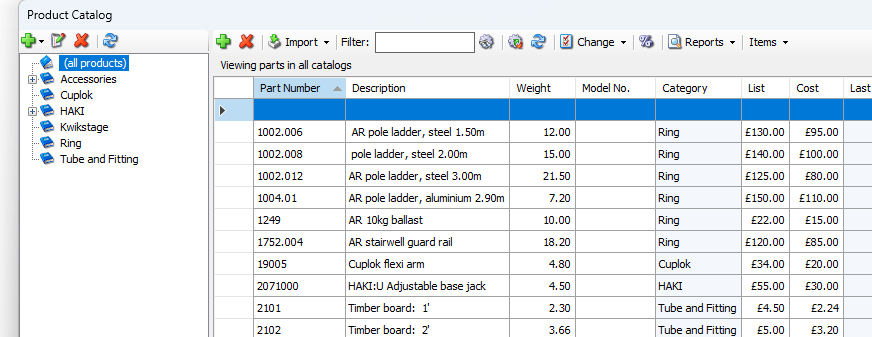
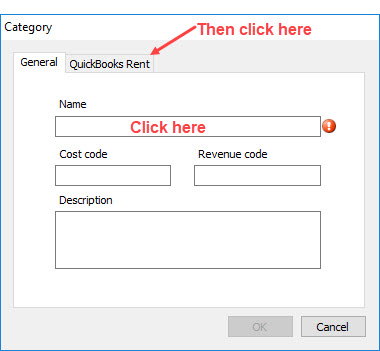
The Category dialog appears.Click in the Name text field and enter the name of the new Product Category.
Click the QuickBooks Rent tab.
The Category dialog refreshes.Click in the Rent accounting item code text field and enter a code that matches the QuickBooks accounting item code for this category.
Click in the Description text field and enter a description.
This description will appear on the Invoices when viewed in Summary format.
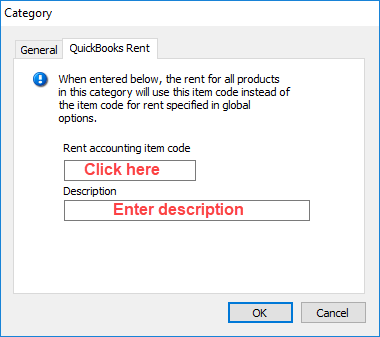
Click OK.
Quantify adds the new category to the Catalog. Assign parts to this catalog category as appropriate.
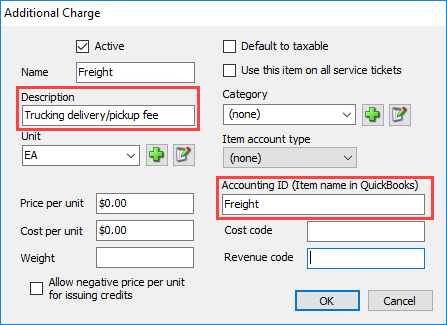
Additional Charges and Accounting IDs
Additional Charges are mapped by the Accounting ID (Item name in QuickBooks). Equivalent QuickBooks Accounting ID’s are set up for each individual Quantify Additional Charge entry in the Additional Charges section. In this example the Additional Charge item Freight has Freight entered into the Accounting ID text field, which maps to the Freight item in QuickBooks. The Description text field contains Trucking delivery/pickup fee. This description will appear in the Quantify Summary Invoice and the QuickBooks Invoice.
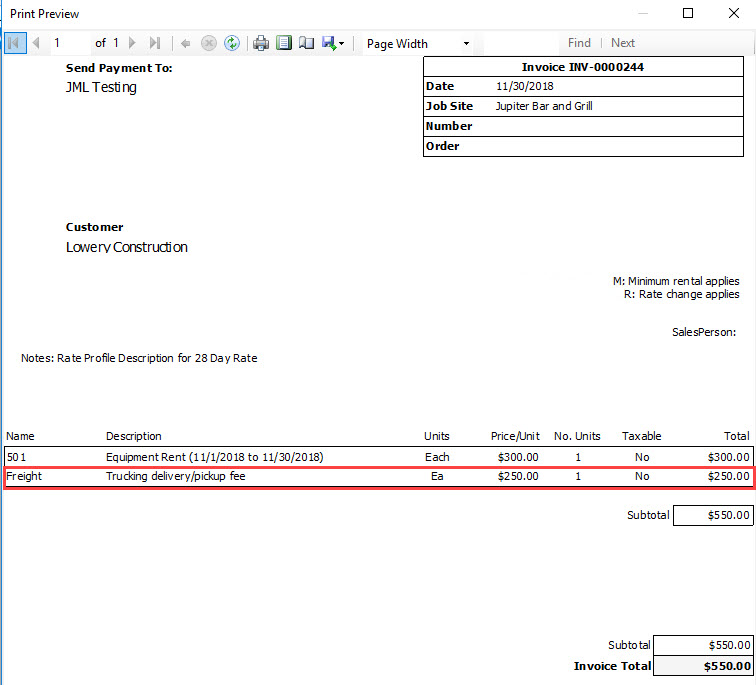
Example of this freight charge in the Quantify Summary Invoice.
Example of this freight charge in a synchronized QuickBooks invoice.

Editing Accounting Item Types
When you synchronize a Quantify Invoice with QuickBooks, the synced Invoice will include rent items, as well as line items for other Invoice charges that match QuickBooks item codes. In Quantify, the accounting items are defined in the Accounting Item Types in the Billing tab in the Global Options dialog.
Quantify will sync rent to the Global Options Accounting Item Type for rent, unless QuickBooks accounting item codes have been added to Product Catalog Categories.
To edit Accounting Item Types:
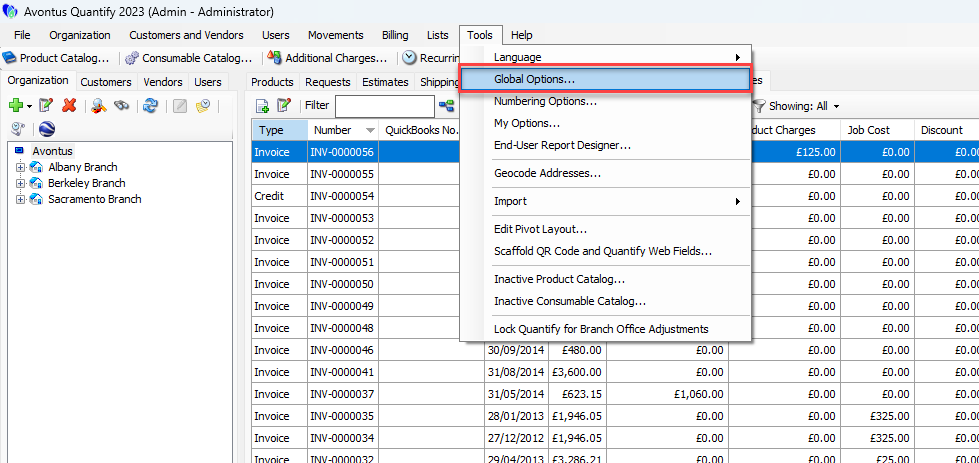
Click the Tools menu and select Global Options.
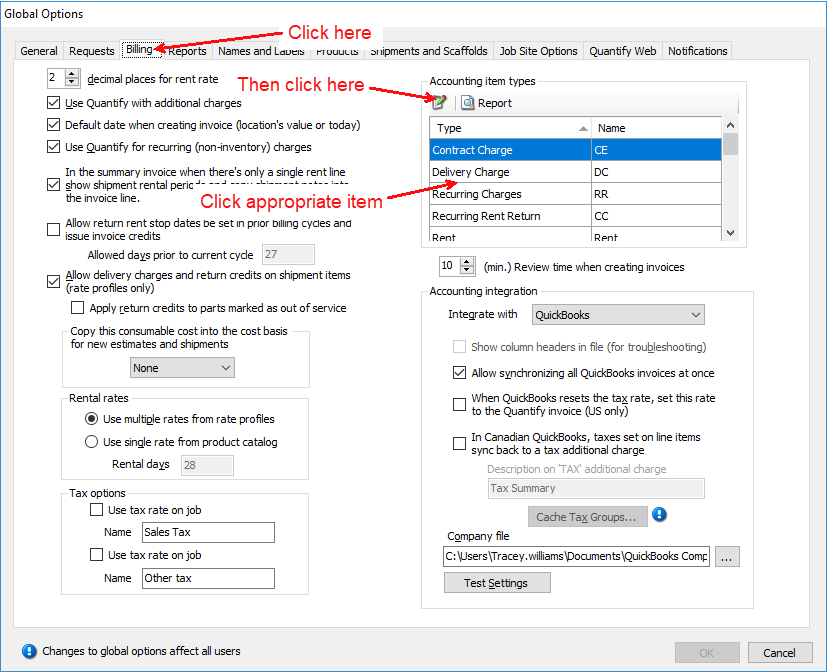
The Global Options dialog appears.Click the Billing tab.
Note: You can also access this tab by clicking the Quickbooks menu and selecting Accounting Options.Click the appropriate Accounting Item Type and the Edit button (
 ) in the Accounting Item Types area.
The Item Type dialog appears. The name (Rent in this case) is mapped to the equivalent item in QuickBooks.
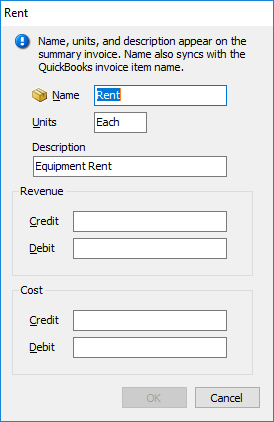
Edit the contents as necessary:
Click in the Name text field and enter a new name for the item type.
Click in the Units text field and enter a new type of unit that applies to the item. For example: each, linear foot, etc.
Click in the Description text field and enter a new description of the item.
Click in the Credit text field in the Revenue section text field and enter XXX.
Click in the Debit text field in the Revenue section text field and enter XXX.
Click in the Credit text field in the Cost section text field and enter XXX.
Click in the Debit text field in the Cost section text field and enter XXX.
Click OK.
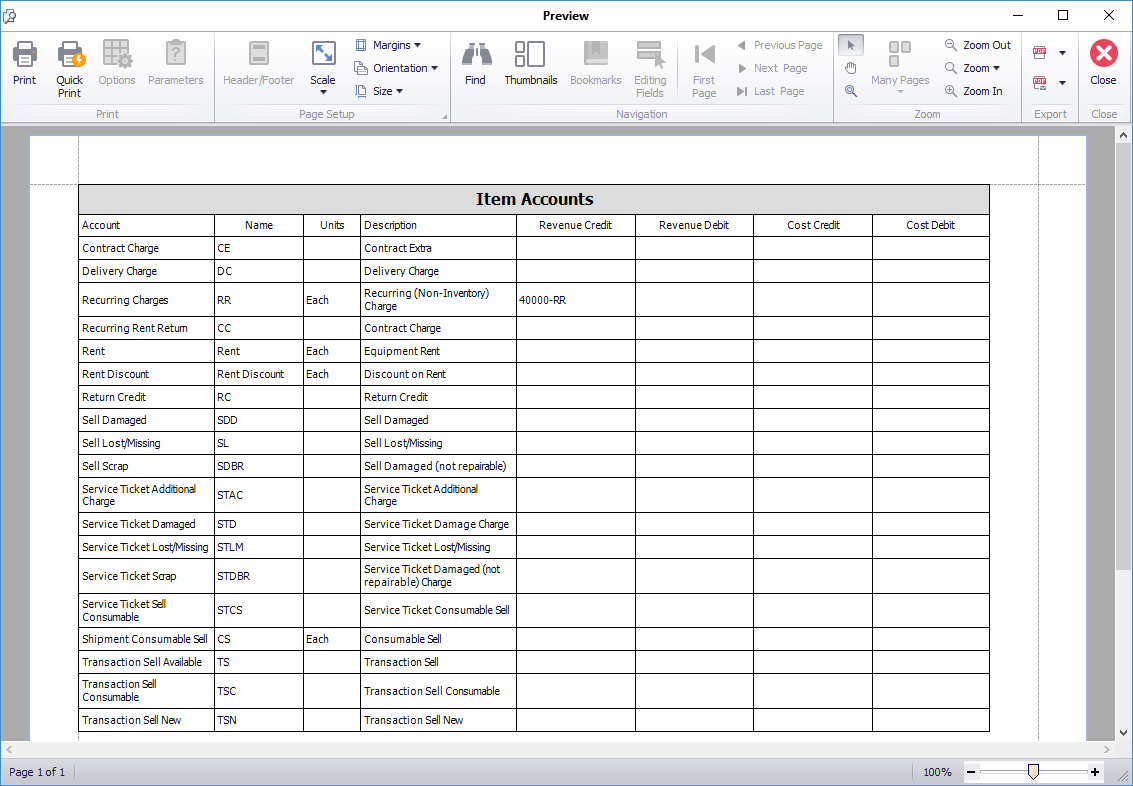
To view an Item Accounts report that may be printed, click the Report button (
 ).
).
The Item Accounts report appears.
If an Accounting Item Type does not exist in QuickBooks, Quantify displays the following Invoice Synchronization error.

In this example the Item ‘Equipment Rent’ does not exist in QuickBooks and must be resolved before successful synchronization may occur.Click OK.