The procedures on this page show you how to convert a non-billable Job Site into a billable Job Site and follow up by configuring the new billable Job Site's deliveries so they can be invoiced.
Changing a Non-Billable Job Site into a Billable Job Site
Quantify allows changing a non-billable Job Site into a billable Job Site. After the Job Site billing settings are changed, any existing Shipment deliveries must be updated with Rate Profile data.
To change a non-billable Job Site into a billable Job Site:
Locate and select the appropriate Job Site, then click the Edit Selected Item button (
 ).
).Note: You can also double-click on the Site
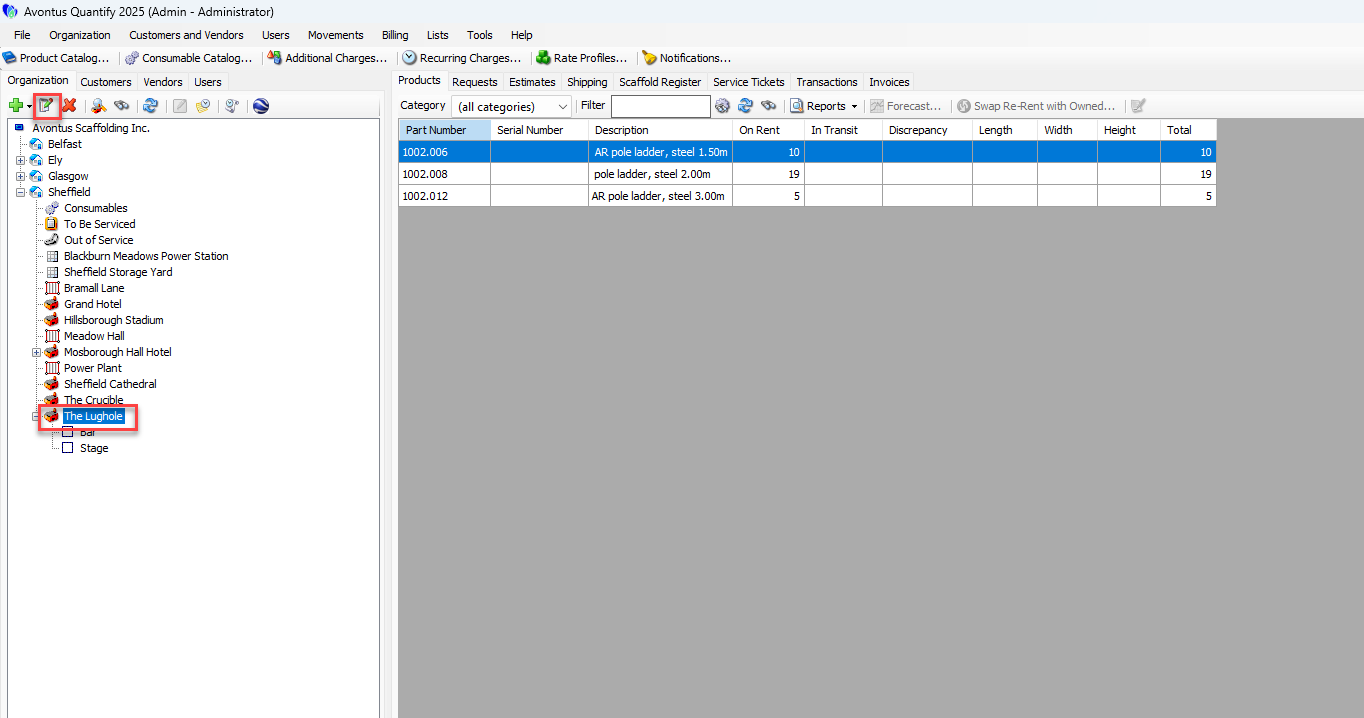
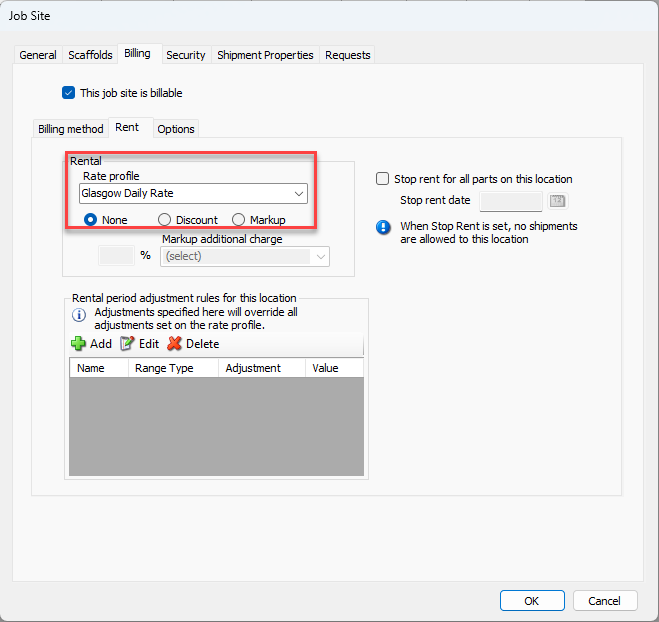
The Job Site dialog appears.Click the Billing tab.
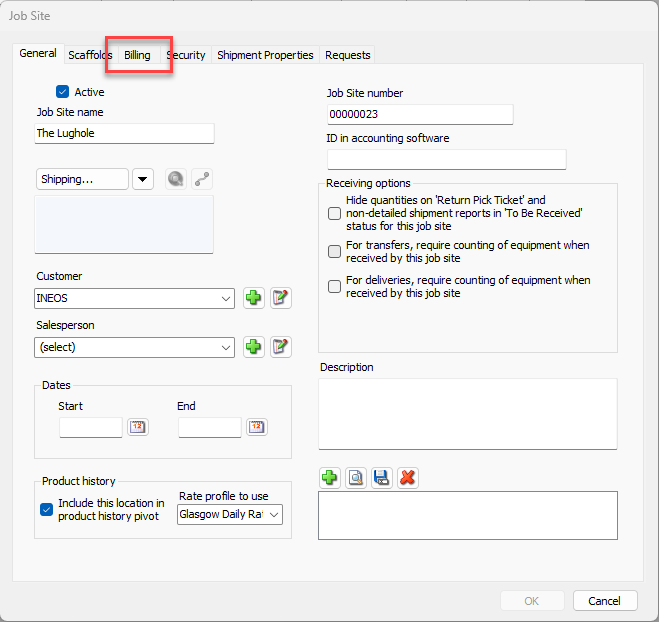
Click the This Job Site is Billable checkbox (to put a check in it).
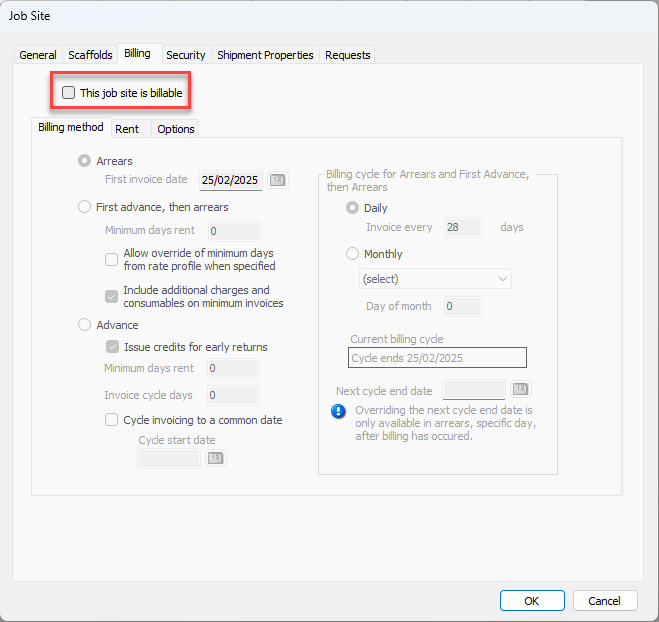
Select the Rent sub-tab.
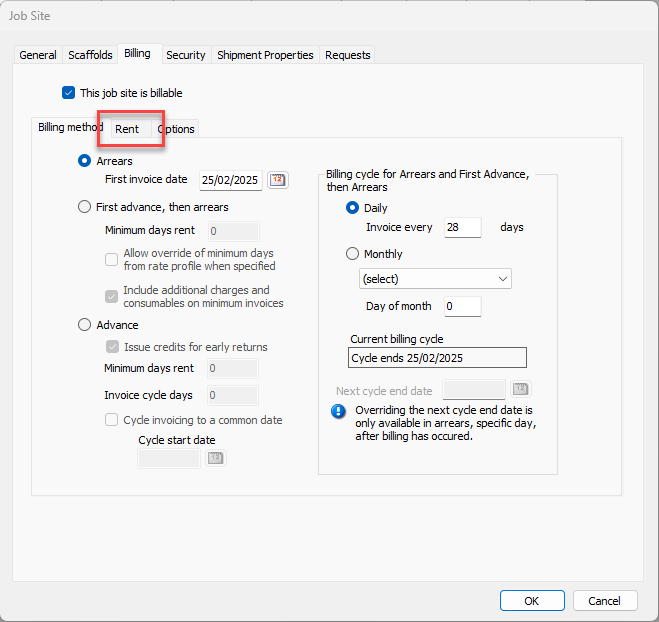
Click the Rate Profile dropdown and select the desired Rate Profile.
Select the Options sub-tab.
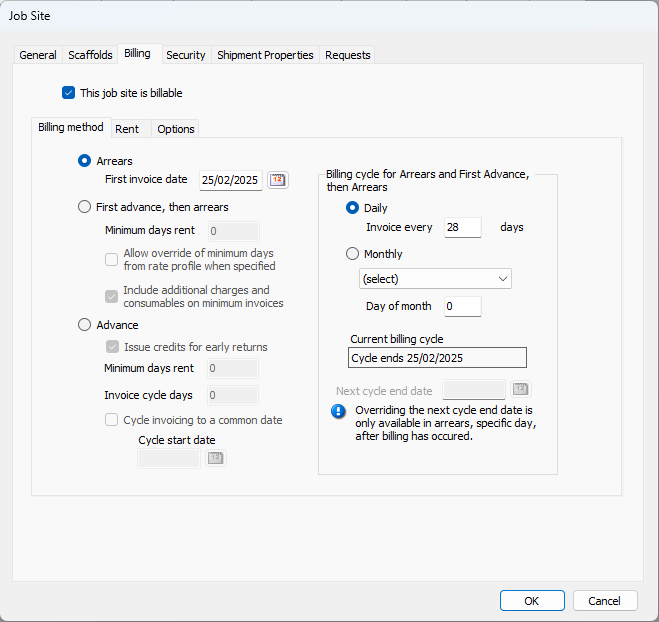
Update the settings on this tab, as they apply to this job. For more information on billing settings, refer to Working with Billing Methods and the Options Sub-Tab section of Configuring the Job Site Billing Tab.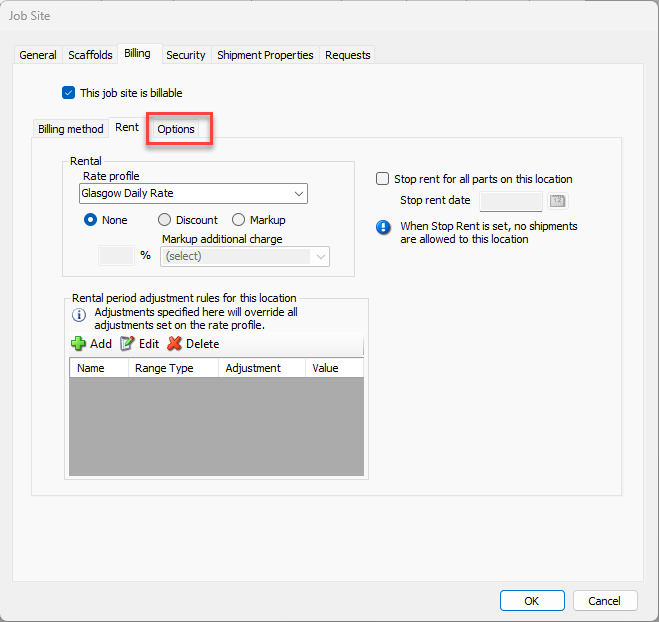
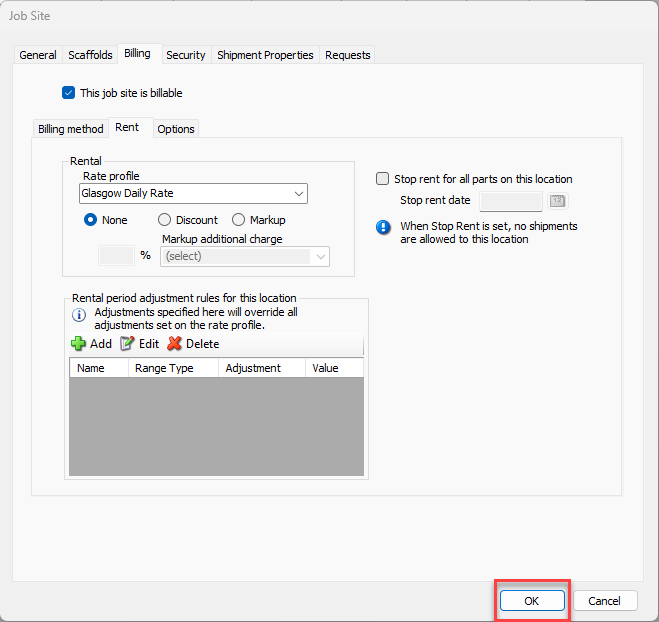
Click OK.
Now, all future shipments will be billable by default.
Important Note: If the Job Site has existing Shipment deliveries that must be included in invoicing, the deliveries must be changed to billable. To change Shipments to billable refer to the next section below.
Changing Non-Billable Shipment Deliveries to Billable
If a Job Site that was changed to billable has existing Shipment deliveries that must be included in invoicing, each delivery must be edited, set to billable and have a rent start date entered.
To include existing Shipment deliveries in invoicing:
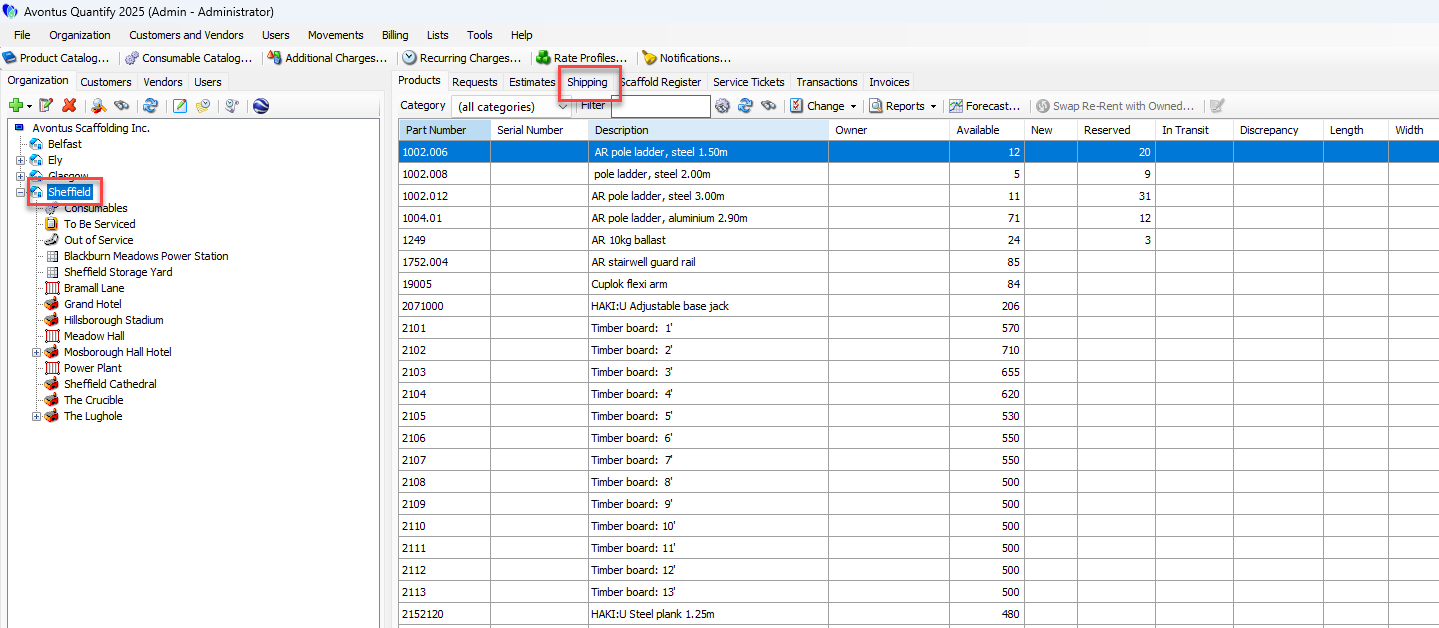
Locate and click the appropriate location and click the Shipping tab.
Click the Shipment delivery that must be set to billable, then click the Edit Shipment button (
 ).
).
Note: You can also double-click the shipment.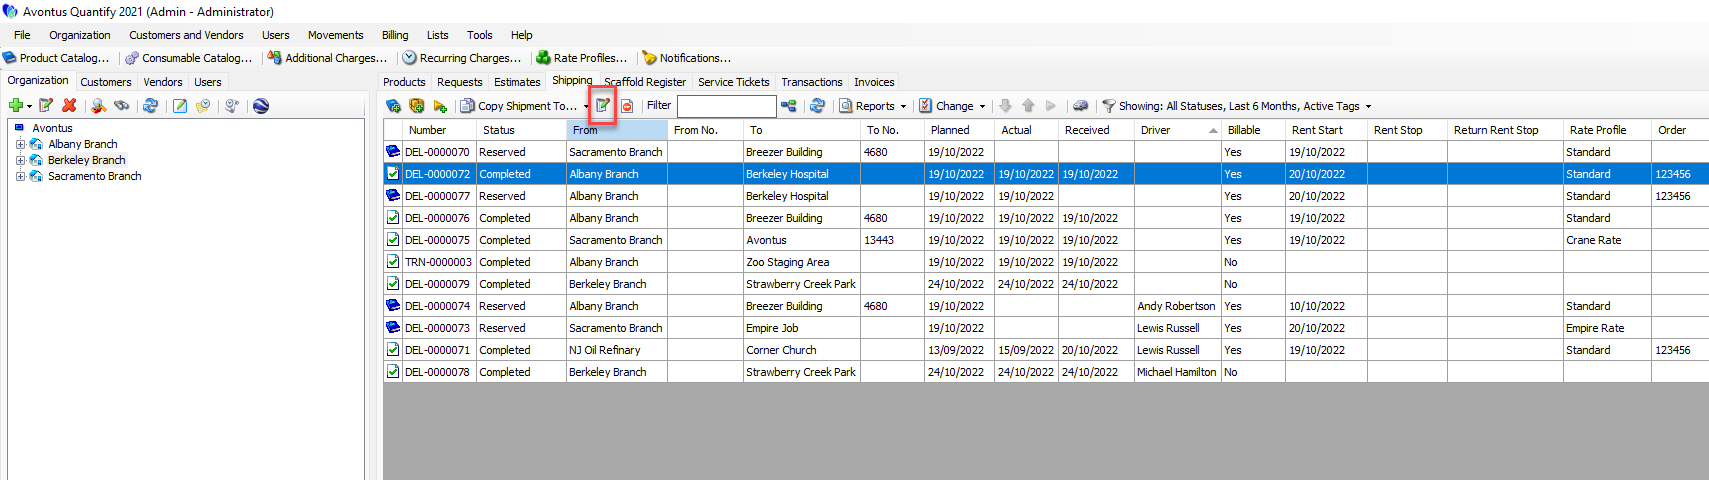
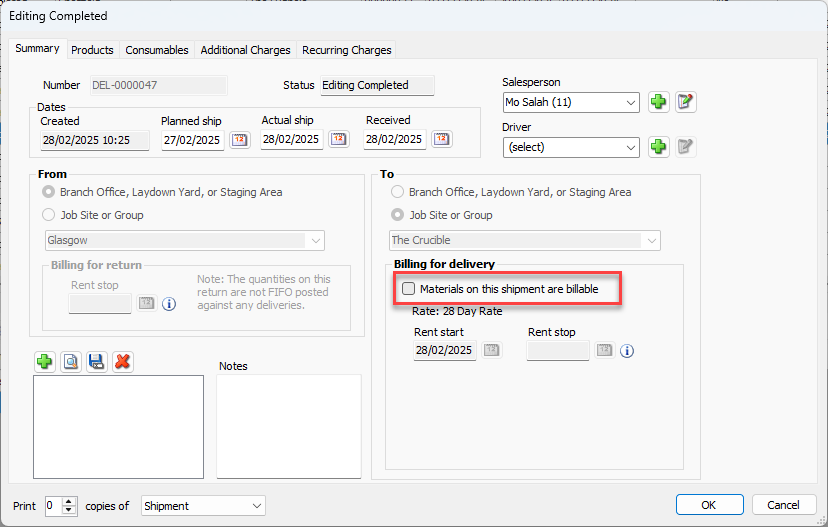
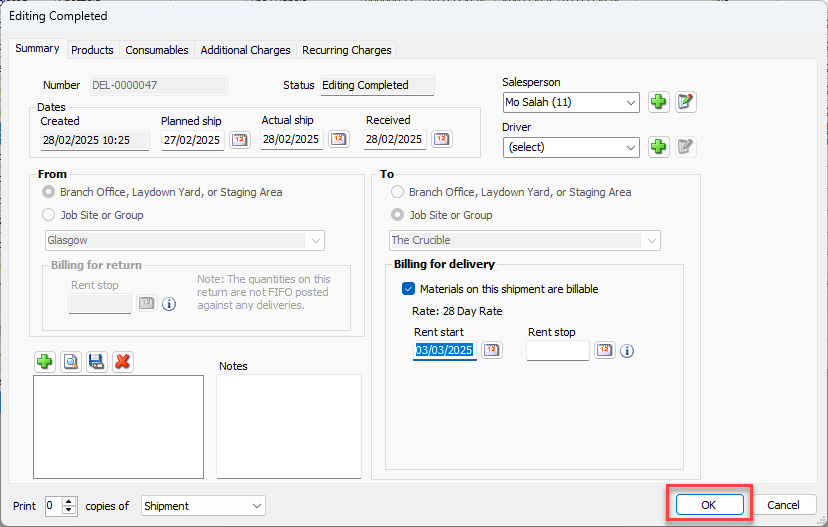
The Editing Completed dialog for the selected shipment appears.Click the Materials on this shipment are billable checkbox so the box is checked.
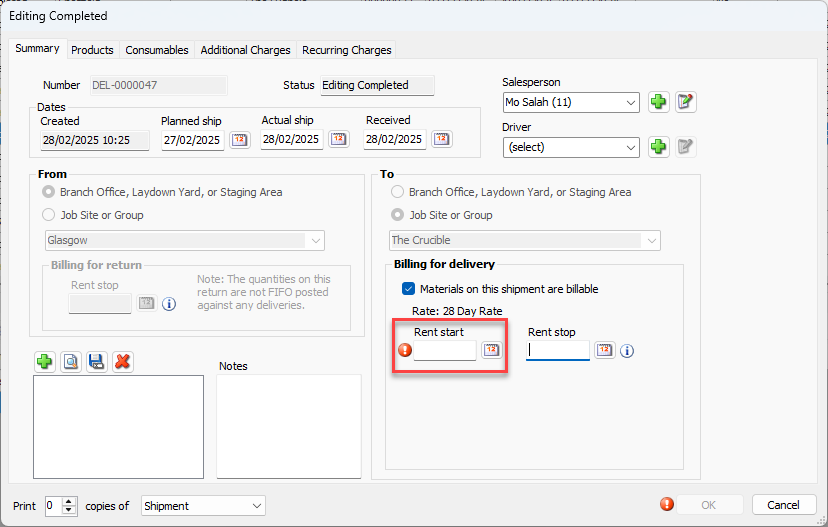
Click in the Rent Start text field and enter an appropriate Rent Start date.
Note: The Rate Profile, as set on the Job Site, is automatically assigned to the delivery.
Click OK.
Repeat for each Shipment delivery that must be set to billable.