This section of Getting Started shows you how to create an L-shaped scaffold drawing, using some of the key Avontus Designer controls and features and using default Material Master parts.
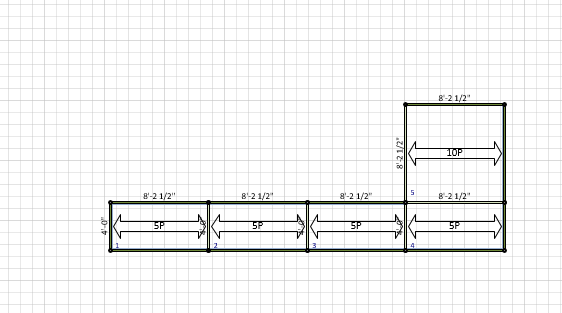
Use the following articles to make the scaffold below.
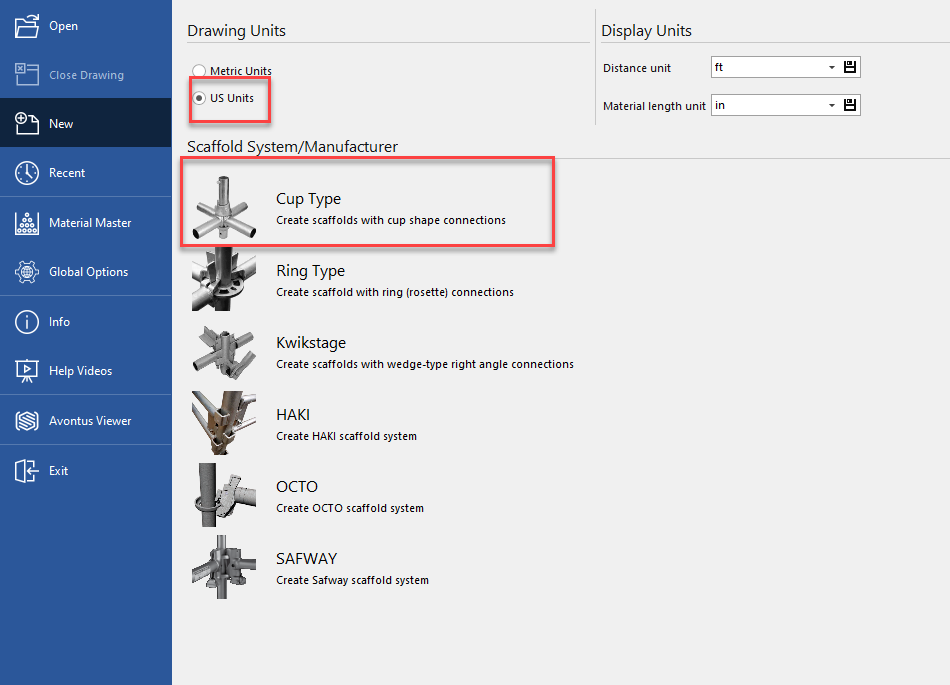
All drawings are initiated from the Backstage. Use this interface to choose the units that Avontus Designer will apply to the new drawing, as well as the type of scaffold system with which to build the drawing.
To start a new drawing:
Launch Avontus Designer.
The Backstage appears with the New option selected.
First, select the unit of measure. In this case, we will use the default selection US Units.Click the US Units radio button.
Next, select the Scaffold Material, Cup Type Scaffold.Click Cup Type.
Avontus Designer launches a new Drawing Page.
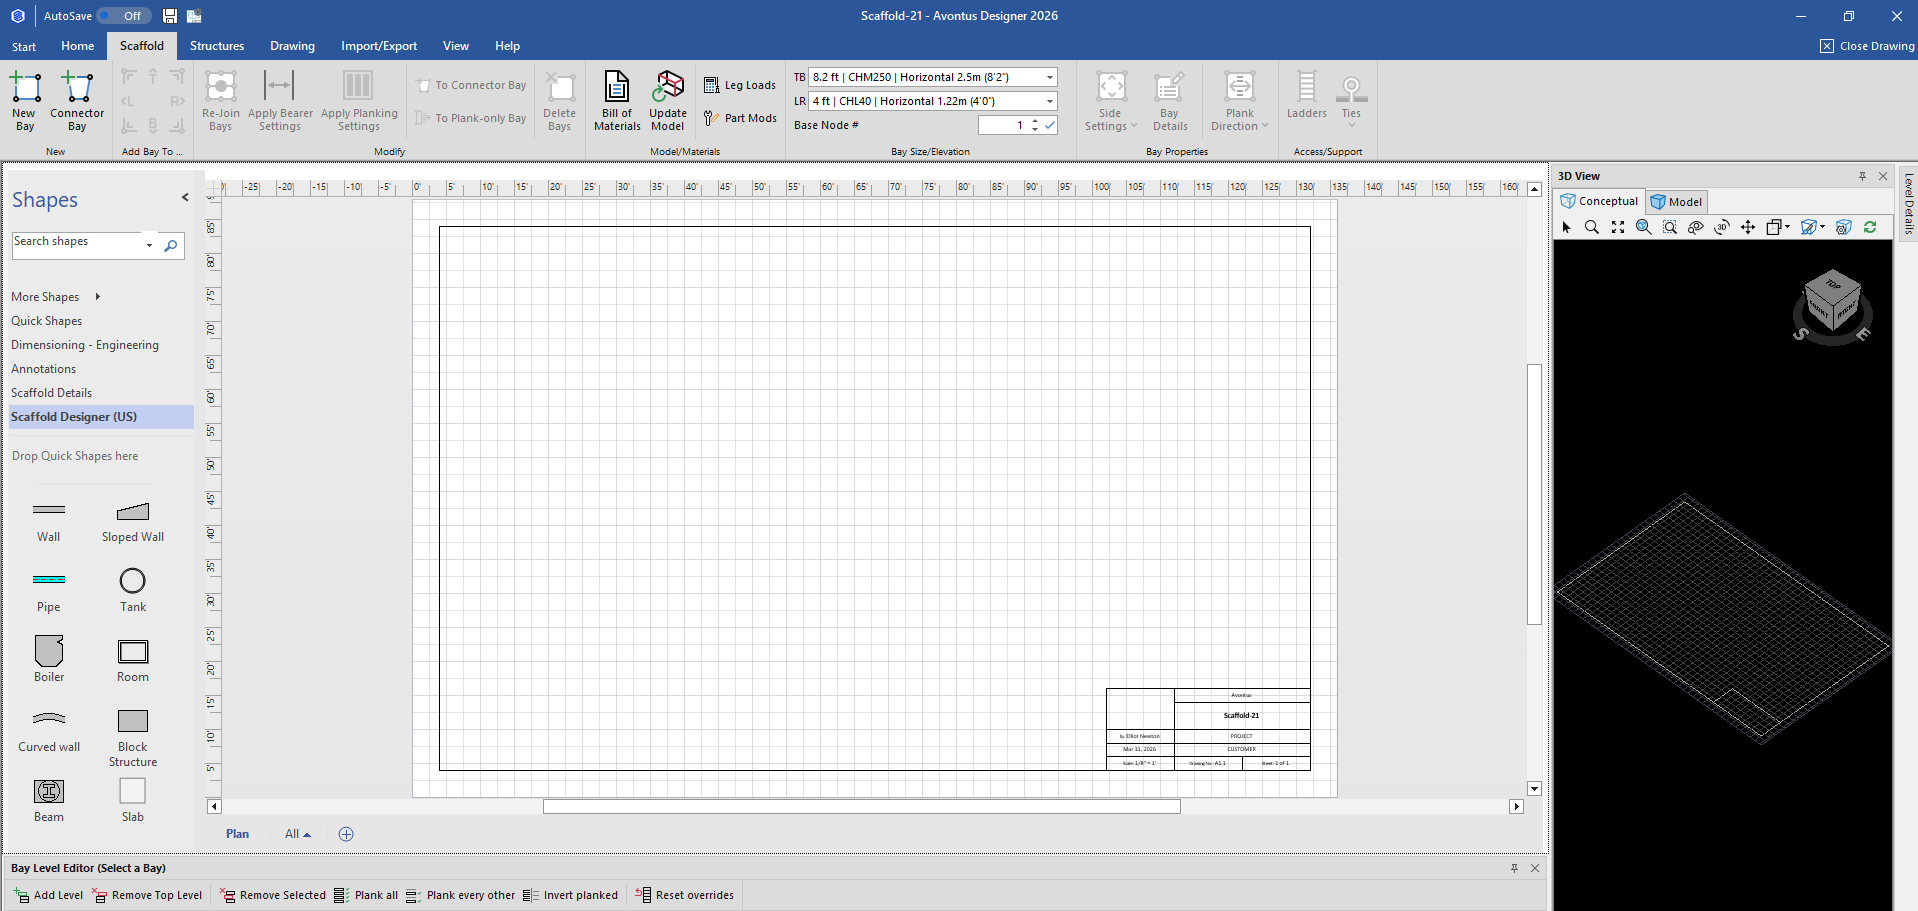
You are ready to add a Bay.
The New Bay control in the Scaffold ribbon enables you to add a new Bay to a Drawing Page. Whenever you create a new drawing or launch an existing one, the Scaffold tab active by default. Each Bay you add to a Drawing Page has the default characteristics that are configured in the Bay Levels interface of the Global Options dialog. As we will show in some of the next steps, you can customize a Bay's characteristics to best suit specific projects.
To add a Bay:Click New Bay and drag the new Bay to the middle of the drawing page.
Avontus Designer adds a new default Bay to the page and updates the 3D view accordingly. The Bay Level Editor displays the details for this Bay.
You are now ready to edit Bay levels.
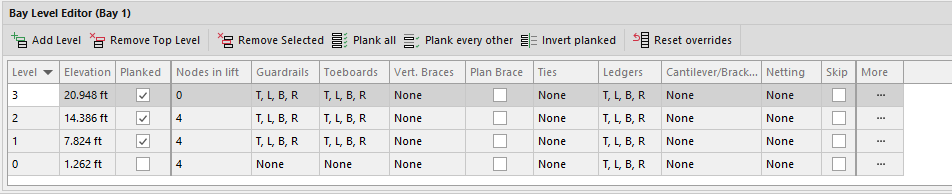
Each Bay you add to a Drawing Page has the default number of levels that can be configured in the Bay Levels interface of the Global Options dialog. However, sometimes specific Bays require more levels. The procedures below show you how to use the Bay Level Editor to add Bay levels. The Bay Level Editor contains settings and controls for a selected Bay and enables level-by-level editing. It makes adding Bay levels very easyNote: You may need to enable the Bay Level Editor in the View tab
To add Bay levels:
Select the Bay and click Add Level twice.
This adds a planked level to the new Bay.
This will add two levels, taking the total to 3.
Next, add additional Bays.
Each Bay on the Drawing Page enables you to use that Bay as a template with which to create new Bays that are connected to specified sides of the original Bay. For example, you can create a new Bay that is a clone of the original and that is connected to the left side of the original. This feature enables you to create a Bay and configure it to suit a project, then use that Bay to populate the drawing without having to create generic Bays and configure each one individually. The steps below show you how to use the original Bay as a template for three (3) new Bays connected to the right side of the original Bay.
To add additional Bays:Make sure the original Bay is selected.
If it isn't, click it to select it.Locate the Add Bay to Side group in the Scaffold tab and click R three times to add three Bays to the right side of the original Bay.
All the added Bays will have the same dimensions and properties as the original Bay. The most recently added Bay will be selected in the Drawing Page by default.
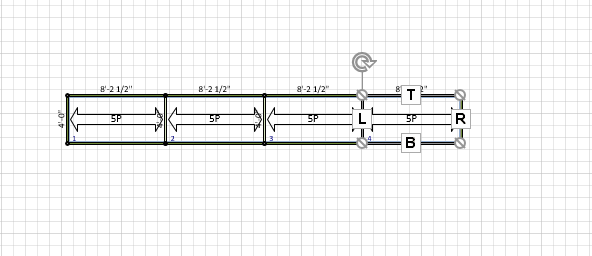
Click the last Scaffold and select T in Add Bay to Side group
Avontus Designer adds a Bay to the top of Bay four.
Next, change the Bay's dimensions.
Each Bay you add to a Drawing Page has the default configured in the Bay Levels interface of the Global Options dialog. However, sometimes specific Bays require different dimensions than the default. The Bay Size/Elevation group in the Scaffold ribbon enables you to define the dimensions for any Bay you select. For this exercise, you will give Bay five new dimensions.
To change the newest Bay's dimensions:Make sure the newest Bay is selected.
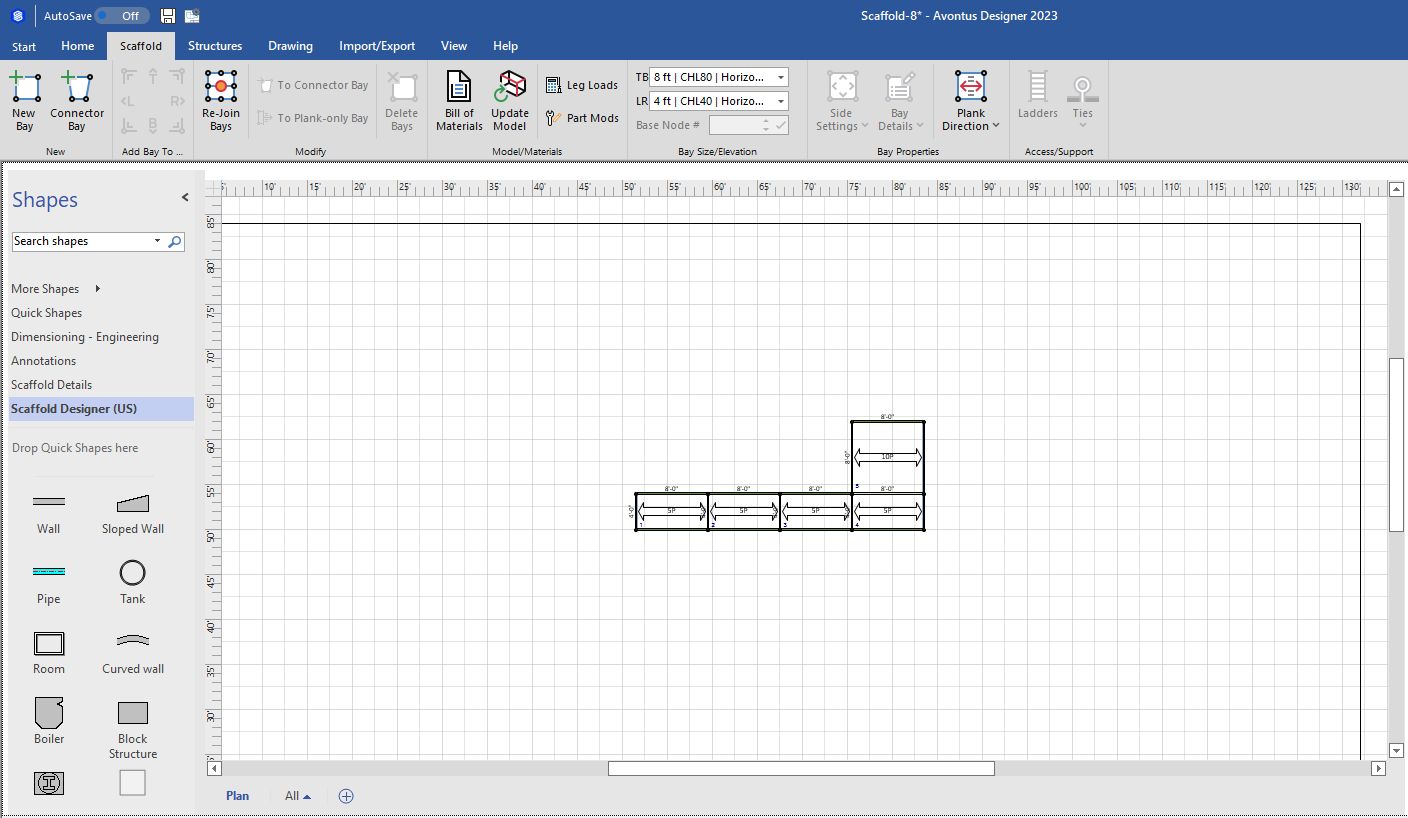
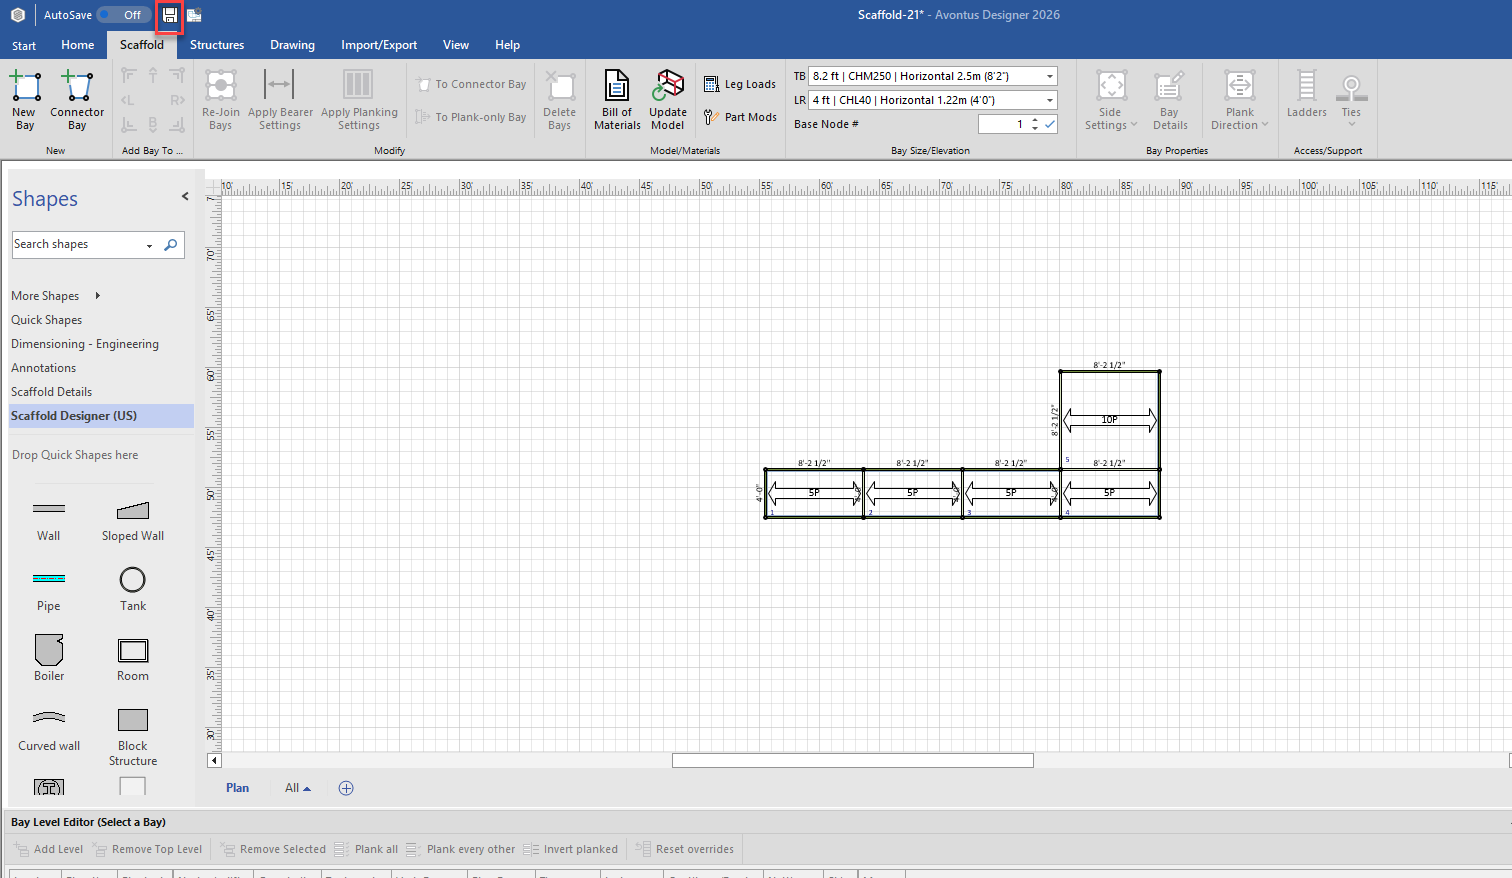
Click the LR dropdown in the Bay Size/Elevation group in the Scaffold tab and select 8' 0" (8 feet).
Avontus Designer updates the drawing and 3D View. Note that, you may need to adjust the position of the Bay.
Avontus Designer enables you to save any new drawing in a location you specify. Once saved, you can continue to save it as your work progresses.
To save a drawingClick Save
The Select File Name to Save dialog appears.
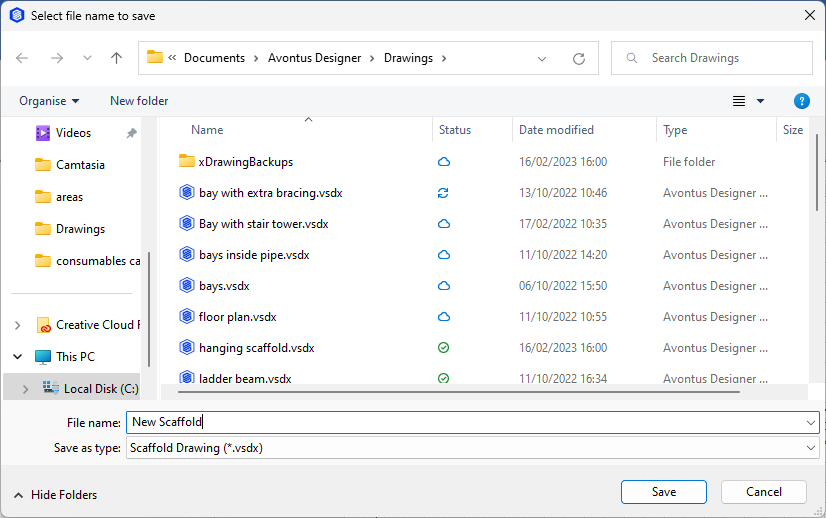
To change the default name, highlight it and enter a new name.
Navigate to the folder into which you want to save the file and click Save.
That's it! You have completed your first drawing!