Use Rent Adjustments to adjust rent for items for a specific period of time; either by the count of days or by a date range. Create and apply Adjustments to items as part of Rate Profiles.
For information about applying Adjustments directly to Job Sites or Scaffolds, refer to the Adding Rental Period Adjustment Rules to a Job Site section of Configuring the Job Site Billing Tab.
Creating a Rent Adjustment
Create a Rent Adjustment in a Rate Profile and then apply it to the appropriate product(s) in the Rate Profile.
To create a Rent Adjustment:
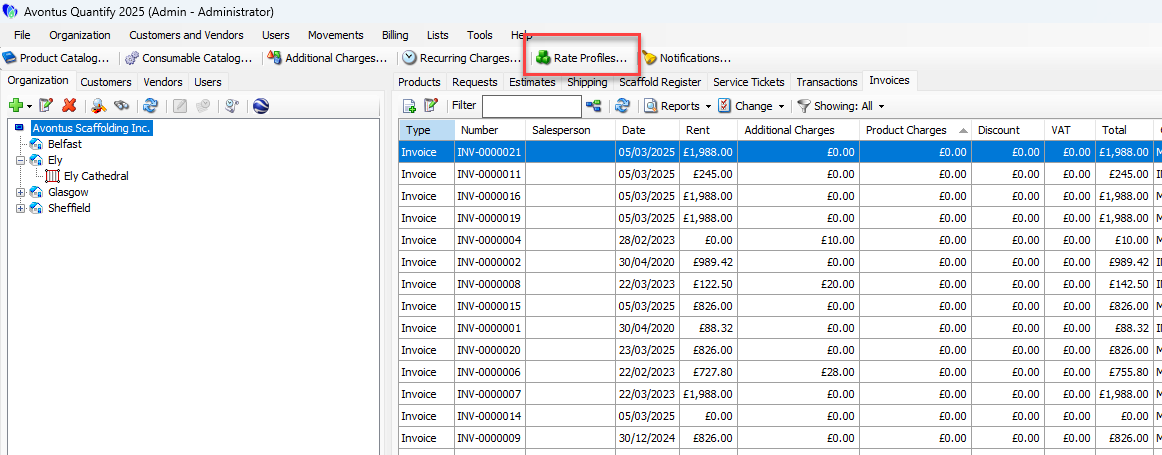
Click Rate Profiles.
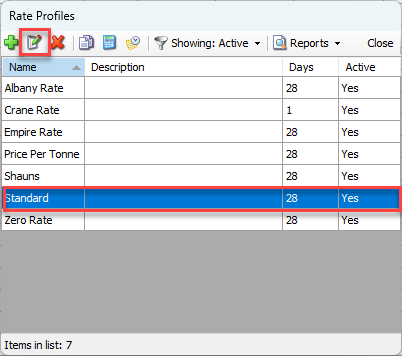
The Rate Profiles dialog appears.Double-click the appropriate Rate Profile.
Note: You can also click the appropriate Rate Profile and click the Edit button (
 ).
).
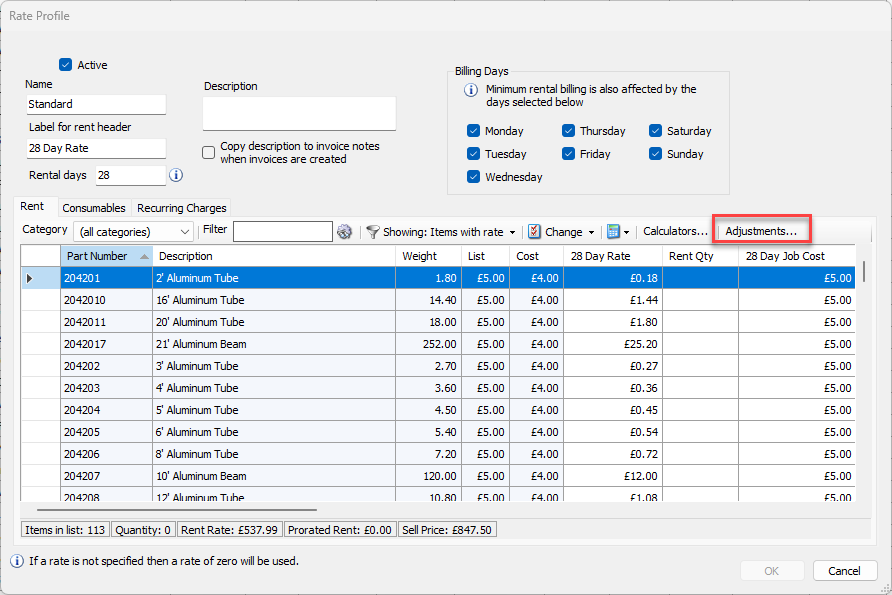
The Rate Profile dialog for that item appears.Select the product(s) for which you want to create an Adjustment and click Adjustments.
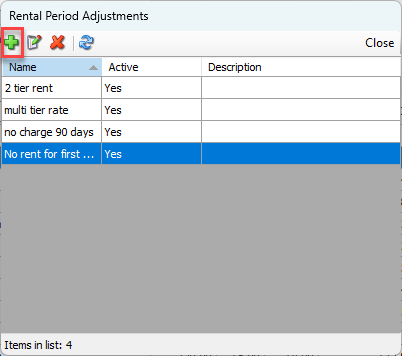
The Rental Period Adjustments dialog appears. This dialog enables you to create, view and edit Adjustments.Click the Add Adjustment button (
 ).
).
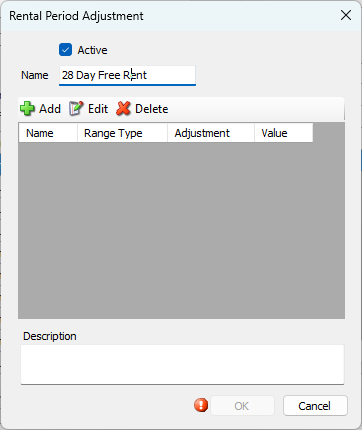
The Rental Period Adjustment dialog appears.Enter a name for the Rental Period Adjustment.
Click the Add button (
 ).
).
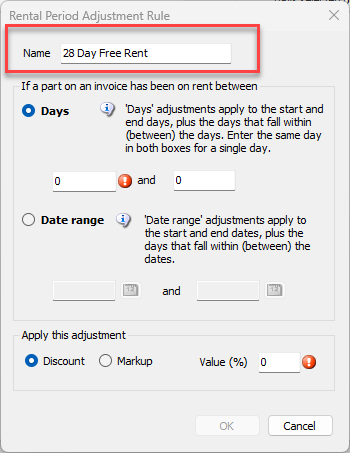
The Rental Period Adjustment Rule dialog appears.Click in the Name text field and enter a name for the new Adjustment rule.
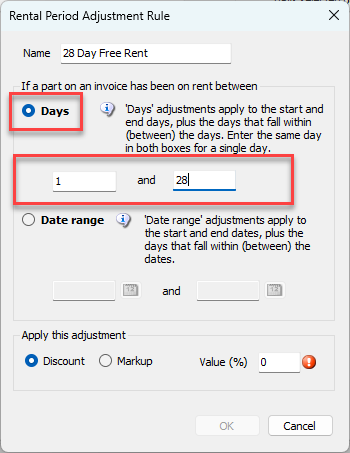
Determine whether this rule should be for a number of days on rent or a date range.
Days
The number of days an item is on rent begins on the rent start date and ends on the rent stop date.
Date range
Date-related rules are based on the actual date range.
Note: If both Days and Date Range Adjustments exist for the same time period, Quantify will apply the Date Range rules and will ignore the Days rule during the overlap time period.
Date RangeClick the Days radio button, if necessary.
Click in the left Day text field and enter the first day on which Quantify will start applying the rule.
Click in the left Day text field and enter the last day on which Quantify will stop applying the rule.
Date RangeClick the Date Range radio button, if necessary.
Click in the left Date Range text field and enter the date on which Quantify will start applying the rule.
Click in the left Date Range text field and enter the date on which Quantify will stop applying the rule.
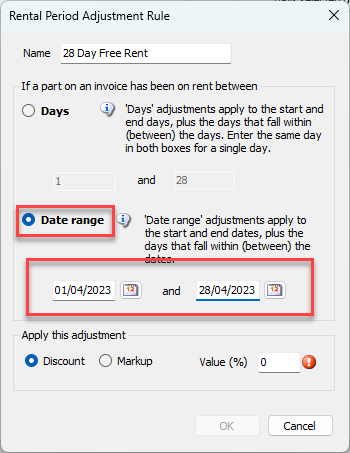
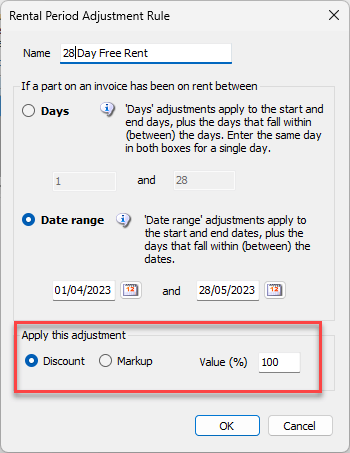
Click the appropriate radio button to apply a Discount or Markup,
Click in the Value (%) text field and enter a value (in percent).
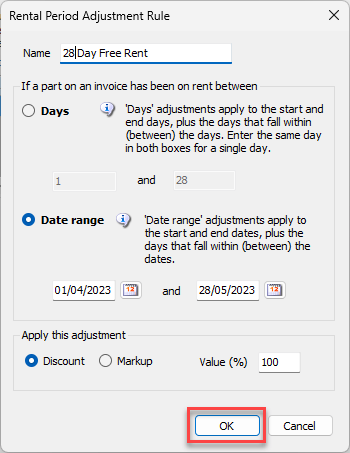
Click OK when ready..
The Rental Period Adjustment dialog returns.Repeat the above steps as many times as necessary.
Note: Multiple Rules may be included for any Rental Adjustment. For example, one Rental Adjustment could be created to include these three rules:
100% Rent Discount for first 30 Days
50% Rent Discount for 31 to 60 days
25% Discount for 61 to 90 days
Click in the Description text field and enter a description, as appropriate.
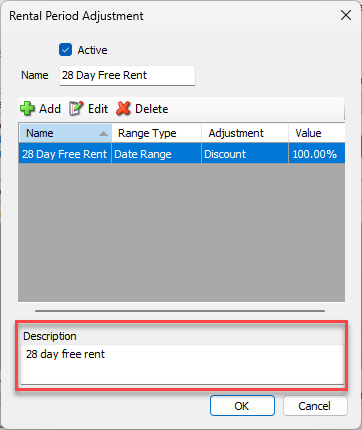
Click OK.
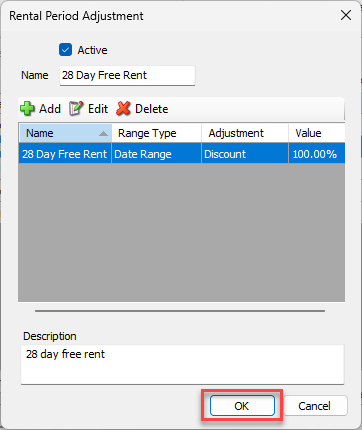
Applying a Rent Adjustment to a Product
Once a Rent Adjustment has been added to a Rate Profile, you can apply it to any Product within that Rate Profile.
To apply a Rent Adjustment to a Product:
Click Rate Profiles.
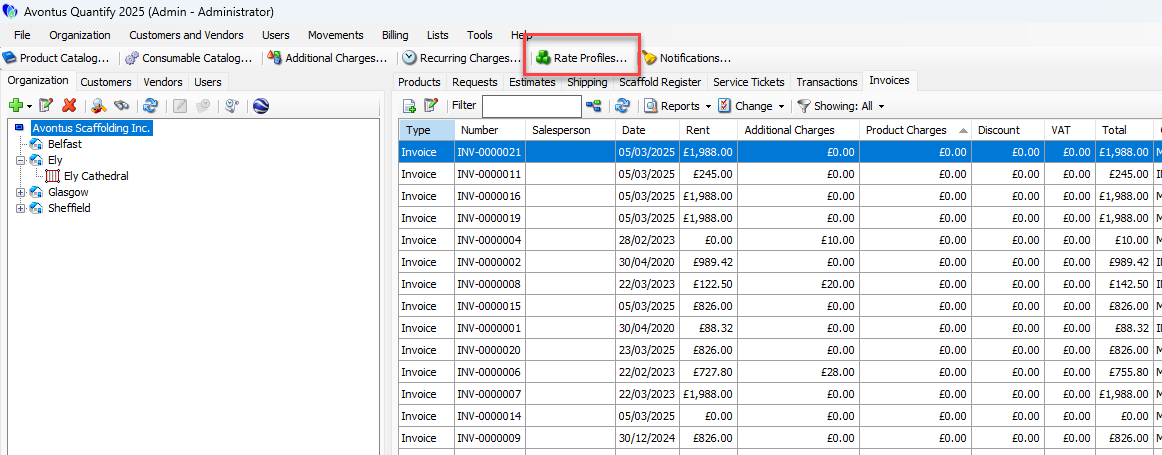
The Rate Profiles dialog appears.Double-click the appropriate Rate Profile.
Note: You can also click the appropriate Rate Profile and click the Edit button (
 )
)

The Rate Profile dialog appears.Select the Product(s) that should have an Adjustment applied.
Note: Press the Shift key to select multiple products in succession. Press the Ctrl key to select multiple random products.
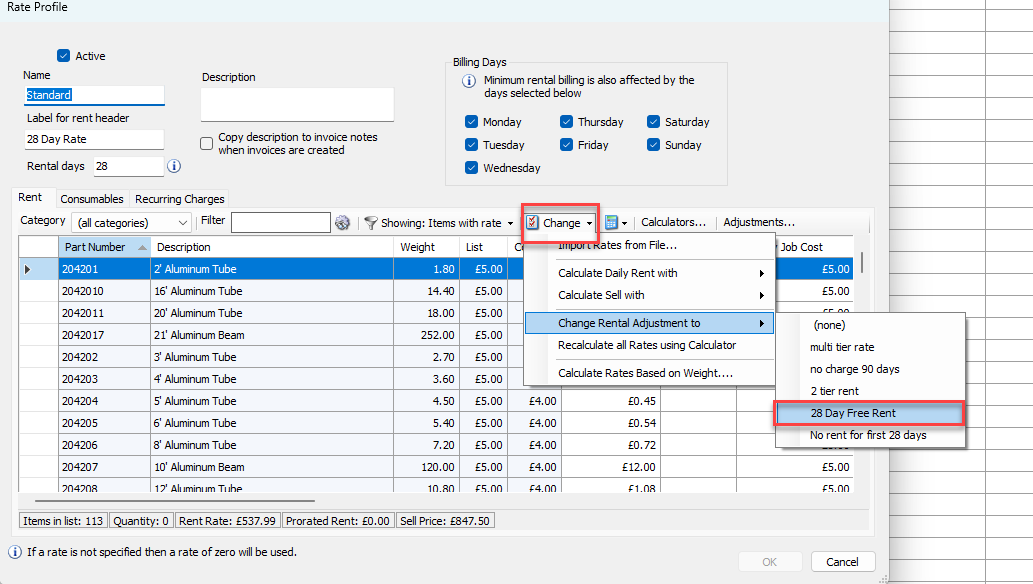
Click the Change dropdown and select the desired Adjustment from the Change Rental Adjustment to sub-menu.
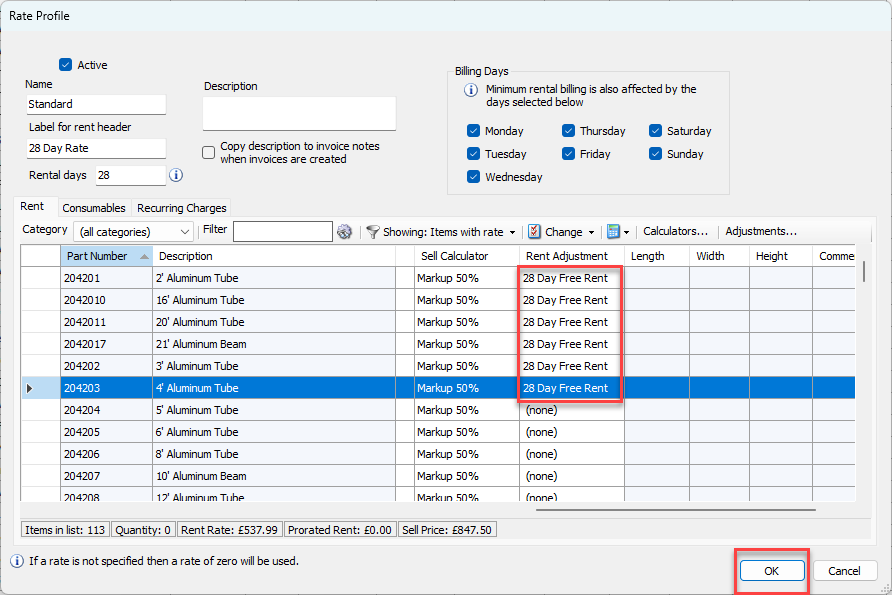
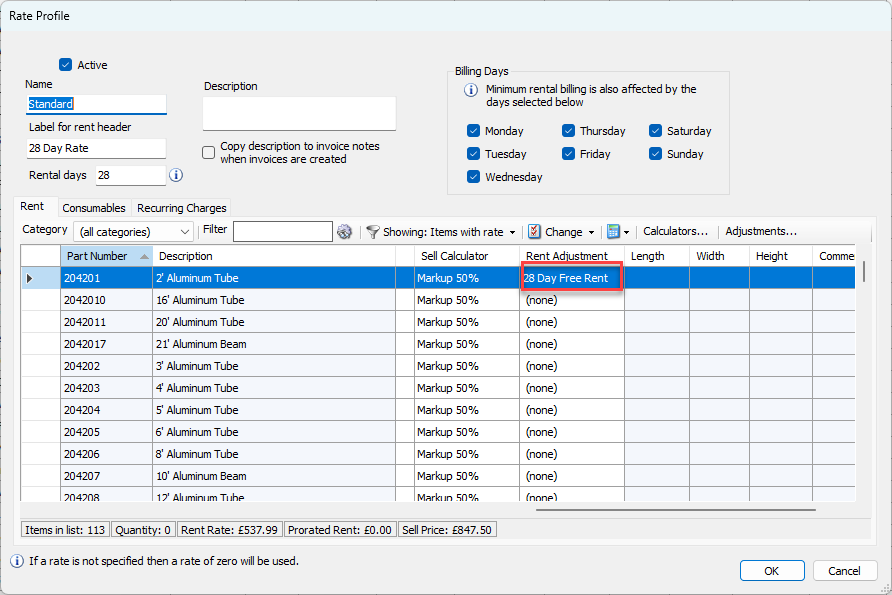
To verify that Quantify has applied the Adjustment, scroll the grid to the right to expose the Rent Adjustment column.
Repeat the above steps as necessary.
Click OK.
