A Staging Area (![]() ) is a basic holding area for off-rent materials, but without the more advanced functionality of a Branch Office. They are unlicensed stocking locations that you can add under a Branch Office or a Sub-Branch. Staging Areas do not support consumable inventory, or the To Be Serviced or Out of Service features. There are no limits on how many Staging Area locations you can create. However, you can convert Staging Areas into Sub-Branches if you have adequate licenses (see bottom sectio. To purchase additional licenses for your database, contact sales@avontus.com.
) is a basic holding area for off-rent materials, but without the more advanced functionality of a Branch Office. They are unlicensed stocking locations that you can add under a Branch Office or a Sub-Branch. Staging Areas do not support consumable inventory, or the To Be Serviced or Out of Service features. There are no limits on how many Staging Area locations you can create. However, you can convert Staging Areas into Sub-Branches if you have adequate licenses (see bottom sectio. To purchase additional licenses for your database, contact sales@avontus.com.
You can move stock in and out of Staging Areas with standard Deliveries, Returns and Transfers. You cannot adjust inventory at Staging Areas with the Adjust Quantities button.
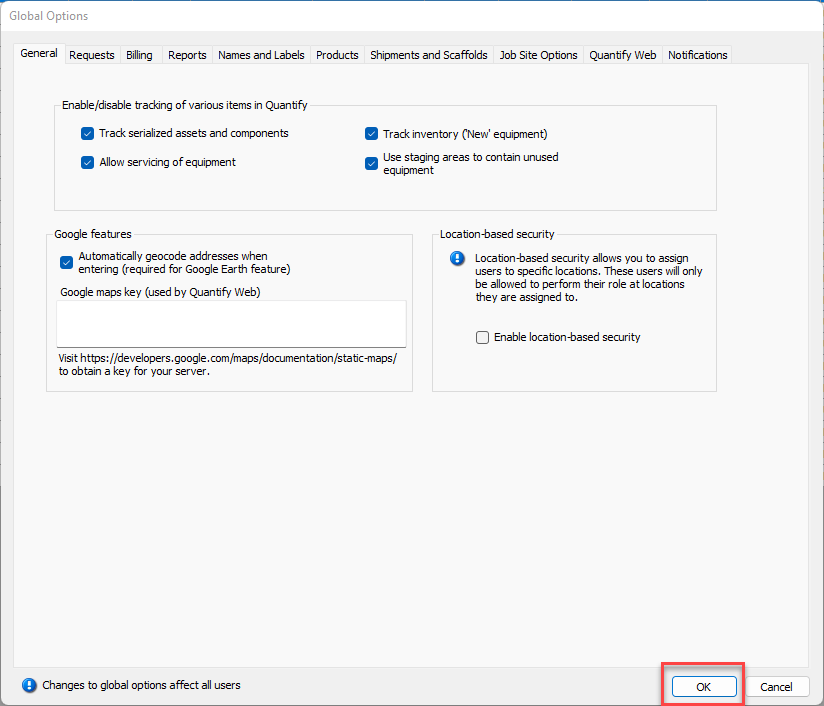
To be used, the Staging Area feature must be enabled globally. Refer to the General tab in the Global Options dialog.
For complete details about the available features and options for Staging Areas, refer to Comparison of Branch Office, Sub-Branch and Staging Area.
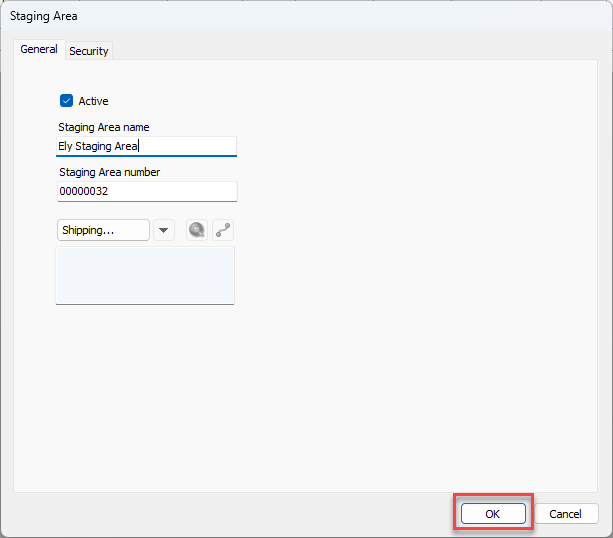
The Staging Area Dialog
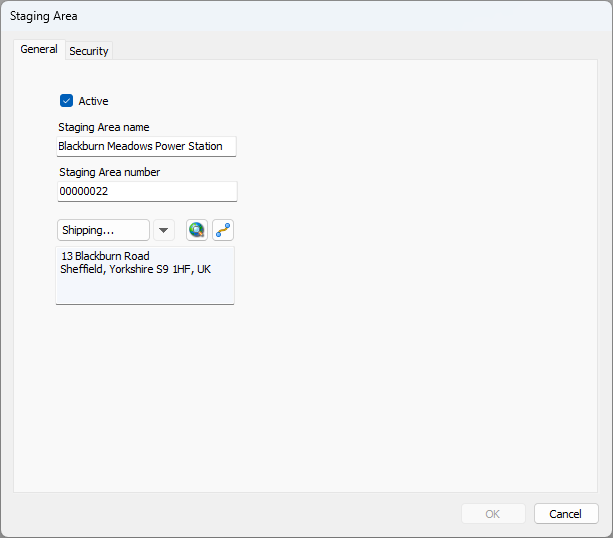
The General Tab
Active Checkbox | A check in this checkbox means the selected Staging Area is active. |
Staging Area Name text field | Use this text field to configure the unique name for the selected Staging Area. |
Staging Area Number text field | Use this text field to configure the unique number for the selected Staging Area. |
Shipping area | Use this area to add and manage shipping addresses for the selected Staging Area. This includes geolocation information. |
The Security Tab
To learn about the Security tab, refer to the Staging Area Security section of the Location-Based Security.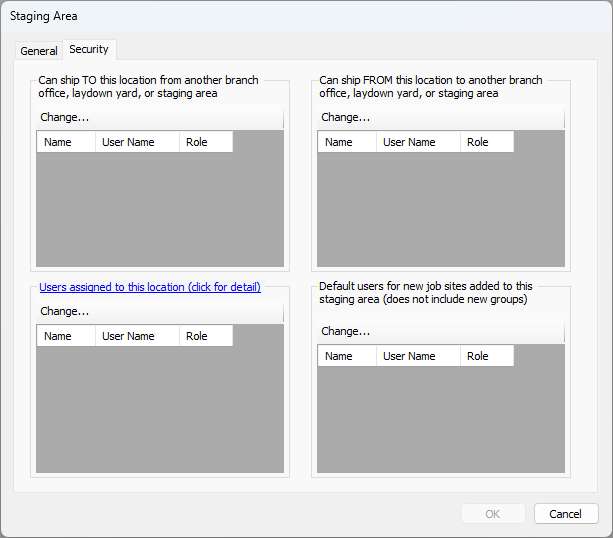
Enabling the Use of Staging Areas
To add, manage and delete Staging Areas, the Staging Area feature must be enabled globally.
To enable use of Staging Areas:
Click the Tools menu and select Global Options.
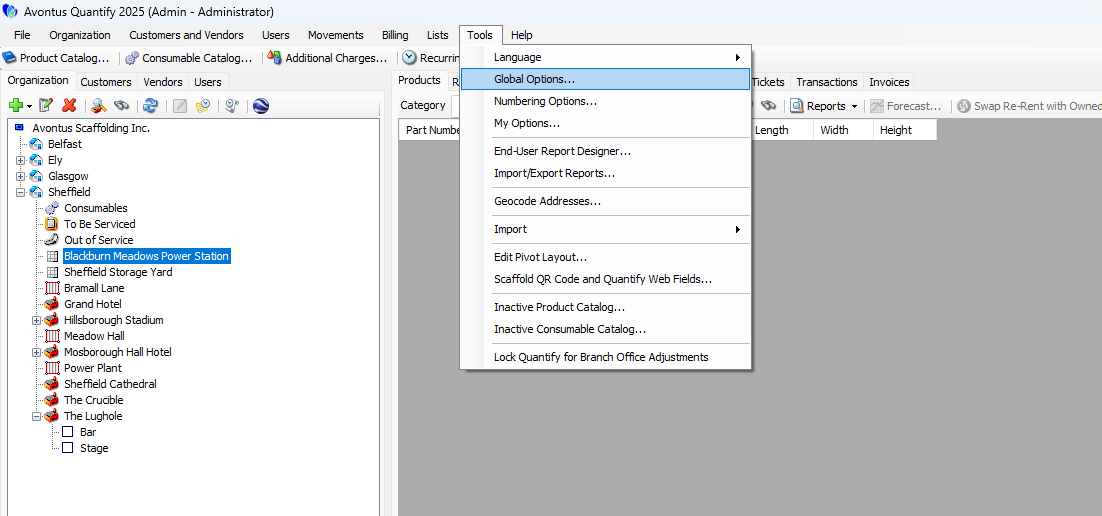
The Global Options dialog appears.Click the Use staging areas to contain unused equipment.checkbox, to put a check in it.
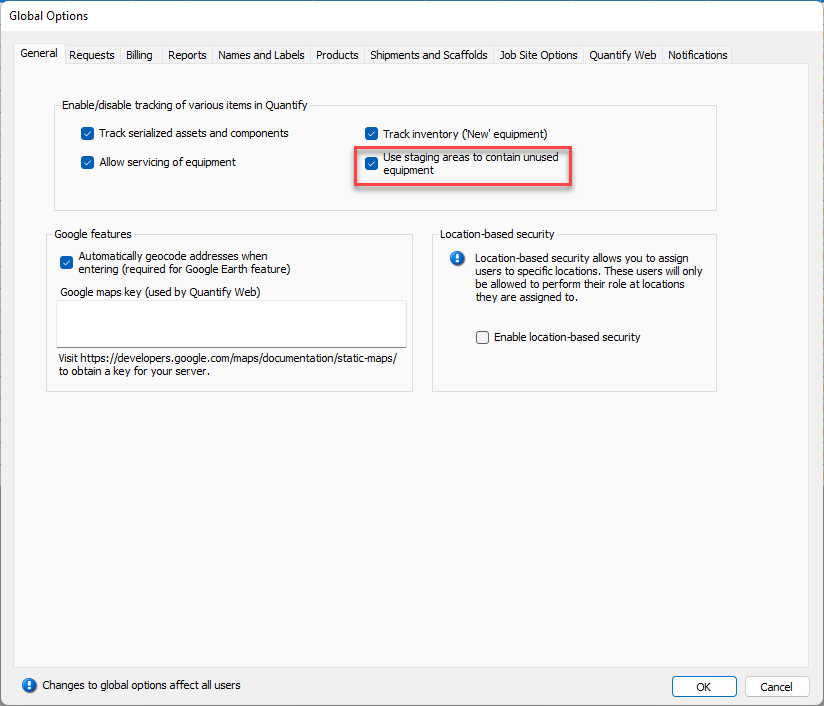
Click OK.
Quantify will make Staging Areas available for you to add, either beneath a Branch Office or Sub-Branch.
Adding a Staging Area
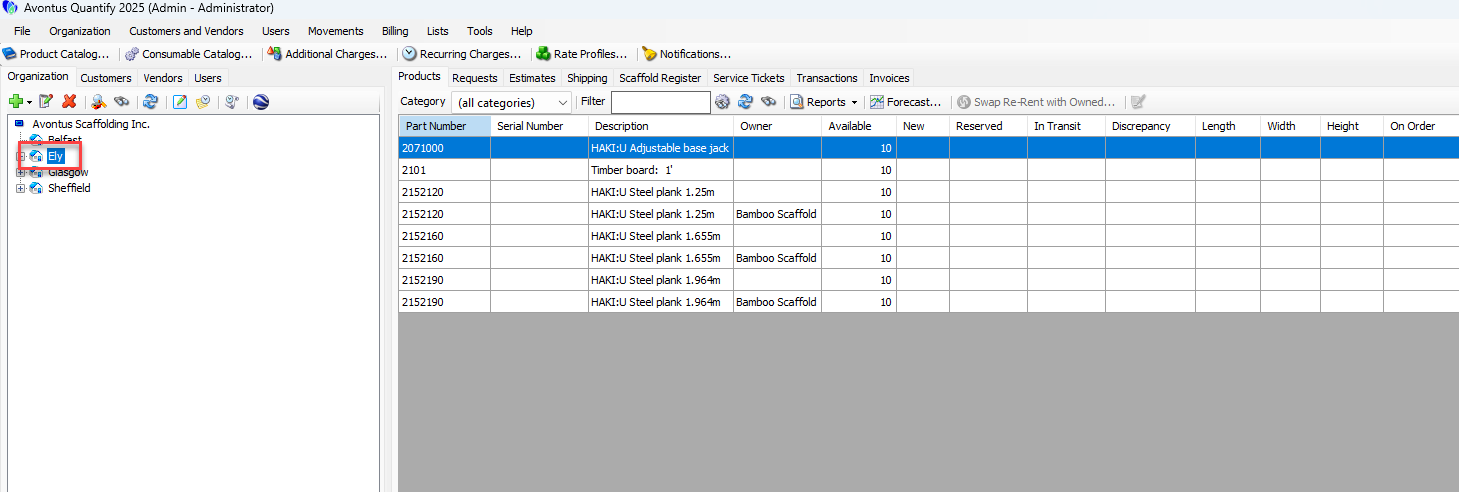
You can add Staging Areas to Branch Offices or Sub-Branches.
To add a Staging Area:
Click the appropriate Branch Office or Sub-Branch.
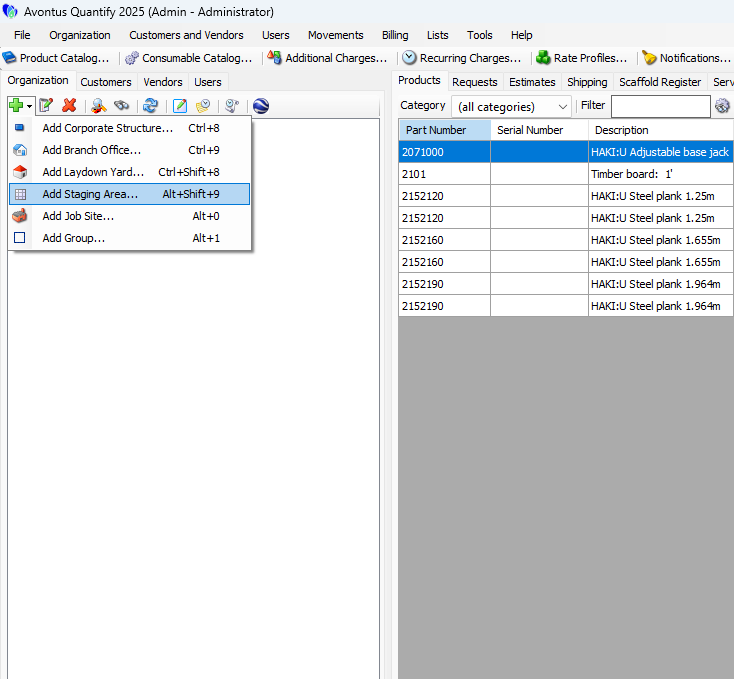
Click the Add button (
 ) and select Add Staging Area from the dropdown that appears.

You can also right-click on the Branch Office and select add Staging Area
The Staging Areadialog appears. The default required fields for a Staging Area are:Staging Area Name
Click in the Staging Area Name text field and enter a name for the new staging area.
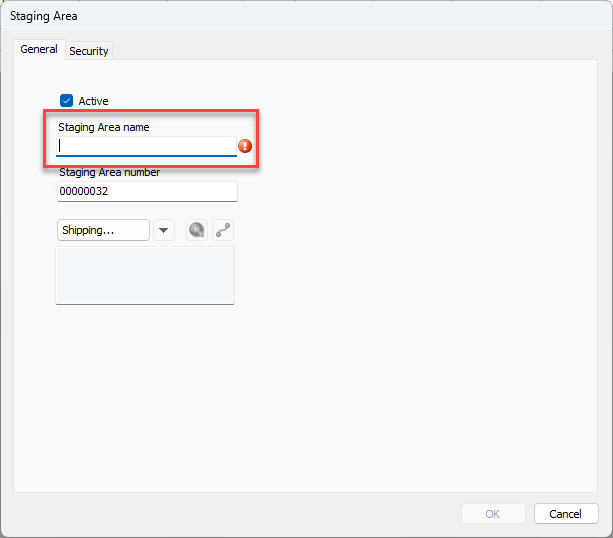
Click OK when you are ready.
The Staging Area will be added

Converting a Laydown Yard to a Staging Area
You can convert a Laydown Yard into a Staging Area if the Laydown Yard meets specific requirements. Therefore, verify the following before trying to convert:
The Laydown Yard hasn’t previously supported Consumable tracking, Servicing and Out of Service features.
Counting features are turned off (refer to Configuring a Job Site to Count Shipments upon Receipt).
There are no shipments in To Be Received status.
There are no unresolved discrepancies from previous shipments with receiving options enabled.
There are no negative product balances
Note: You can only convert Staging Areas to a Laydown Yard if your database has adequate licenses.
To convert a Laydown Yard to a Staging Area:
Ensure that the above criteria are met.
Locate and right-click the Laydown Yard you want to convert, then select Convert Laydown Yard to a Staging Area from the menu that appears.
A confirmation dialog appears.Click Yes.
Quantify converts the Sub-Branch to a Staging Area, then displays an acknowledgement dialog.Click OK.
.gif)