A variety of Stair Tower options are available for each supported system in Avontus Designer.
Adding a Stair Tower
To add a Stair Tower to a drawing:
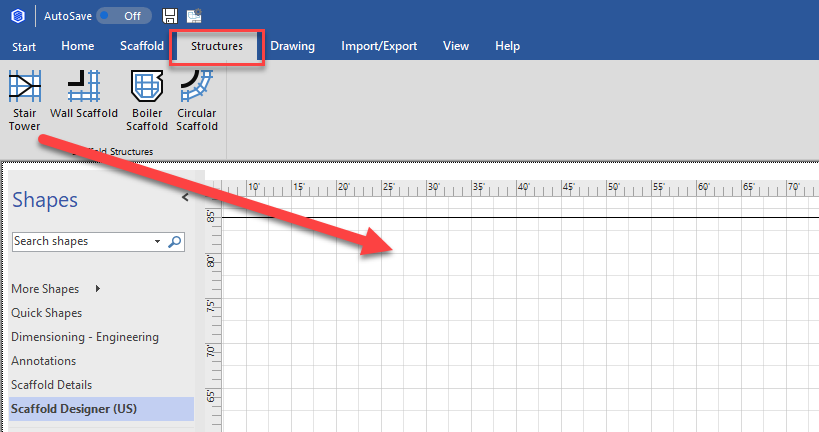
Click the Structures tab, then click and drag the Stair Tower onto the desired location on the Drawing Page.
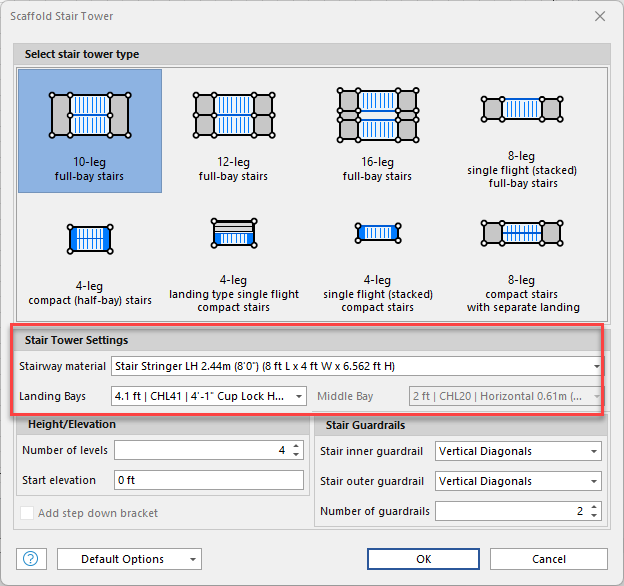
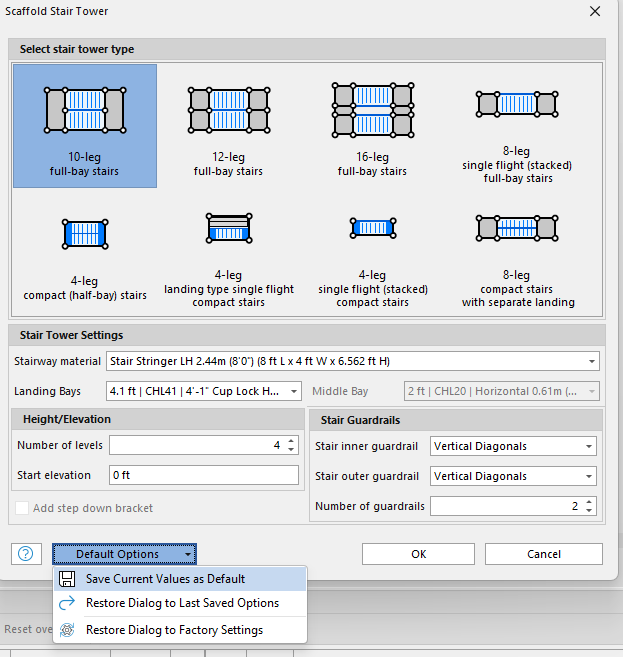
The Stair Tower dialog appears.Click the appropriate Stair Tower Type. For a complete list of types and descriptions, refer to the About Stair Tower Types section of Working with Stair Towers.
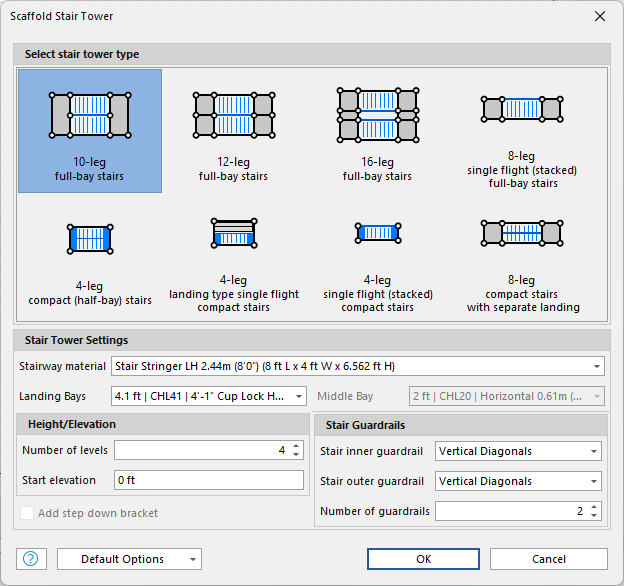
Click the Stairway Material dropdown and select the appropriate material. Stairway material options are based upon available materials and Custom Options in the Material Master.
Set the Landing Bays
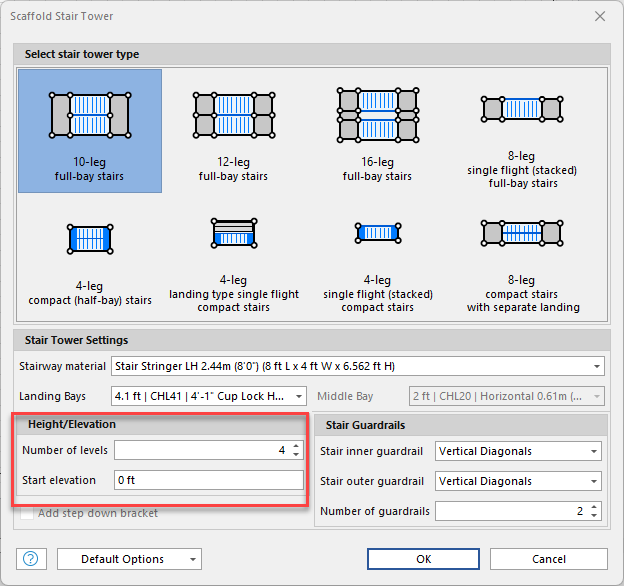
Click in the Number of Levels text field and enter the number of levels for the new Stair Tower. The default is 4.
Click in the Start Elevation and enter the base or starting elevation for the lowest level of the Stair Tower. The default is - 0 cm./in.
Select options for Stair Guardrails. Default Guardrail materials will vary based upon selected type and materials. For more information, refer to the About Stair Guardrails section of Working with Stair Towers.
Click the Stair Inner Guardrail dropdown and select the type of material to use for the interior sides of the stairs.
Click the Stair Outer Guardrail dropdown and select the type of Guardrail material to use for the exterior sides of the stairs.
Click in the Number of guardrails text field and enter 2 or 3.
Note: For Kwikstage drawings, the option to Add step down bracket is available. This will add a step-down bracket to the first level.
To save this configuration as the default each time a Stair Tower is added for the selected system, click the Default Options drop-down and select Save Current Values as Default
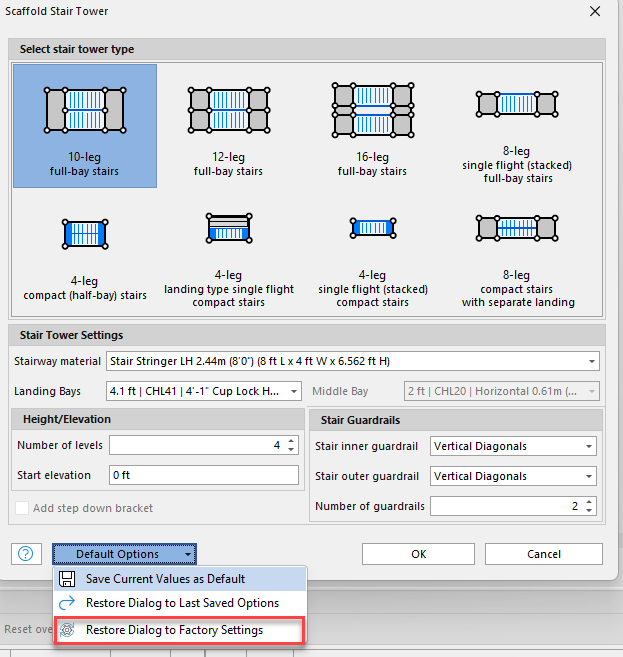
Note: To remove custom settings and return the options back to the system default, click Restore Dialog to Factory Settings under Default Options
12. Click OK.
Avontus Designer adds the Stair Tower to the Drawing Page.
You can move or rotate the tower bay. Each section of the Stair Tower can be edited like a regular bay using features such as the Bay Level Editor or Bay Details Dropdown.
Editing a Stair Tower
Once you use the Scaffold Stair Tower dialog to configure and add a Stair Tower, you cannot access that dialog again to edit those settings. However, you can use the Bay Level Editor to edit the stairwells as well as the end bays. For example, you can add and delete levels, add planking, adjust nodes, add side brackets, etc.
Note: The procedures below only include steps for a few modifications. However, you can perform any modification that the Bay Level Editor makes available to you. For more details, refer to About the Bay-Level Editor.
To edit a Stair Tower:
Click the stairwell you want to edit.
In the Bay Level Editor below, make your required changes.
Click Add Level and/or Remove Select to add/remove a complete level (not just a bay).

Click Remove Top Level to remove just the top level of the selected bay.

Click the appropriate Planked checkbox(es).

Click in the appropriate Nodes in Lift text field, enter the new number of nodes, then click the check to the right of the text field.

Click the appropriate Cantilever/Bracket dropdown, click the side to which you want to add a side bracket and click OK.

Click the appropriate Stairs checkbox(es).

Avontus Designer updates the drawing and the 3D View dialog as you make changes.