Welcome to ScaffoldIQ!
This guide contains recommended steps to quickly configure ScaffoldIQTM for your unique company needs. Additional resources are at the end of the guide.
Keep in mind:
The ScaffoldIQ administrator needs to configure your ScaffoldIQ instance.
Before adding users, we recommend setting up the basics outlined in this guide. As soon as a user is added to ScaffoldIQ, they will receive a notification email inviting them to install the software and log in.
User Roles
After launching ScaffoldIQ for the first time, we recommend starting the configuration process with User Roles, which control what each user can do within the software.
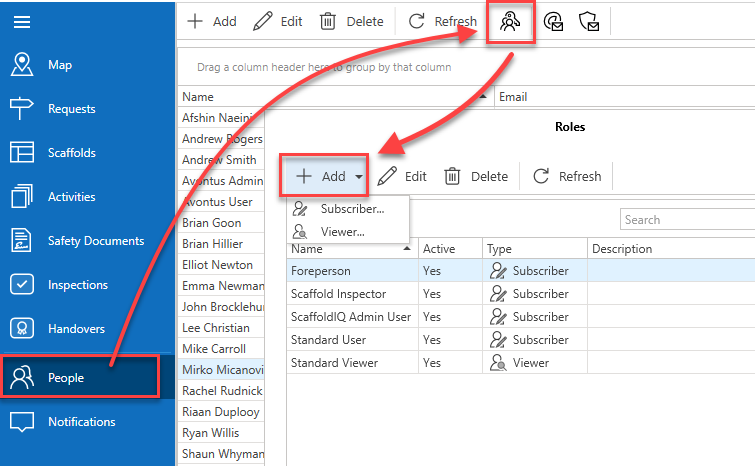
To set up your User Roles, click on the People tab and then on Roles  . In the Roles window, click on Add and then add a Subscriber (paid user) or Viewer (view-only access), which will launch the Role Details window.
Role Details
In this window, you will specify which actions a user who is assigned this role is able to take in ScaffoldIQ.
Create a name for the role and check the appropriate boxes to define the duties and responsibilities associated with this position. We recommend establishing roles and responsibilities for all types of work that personnel may be assigned to, such as maintenance staff, scaffolders, scaffold supervisors, contracts managers, and safety inspectors.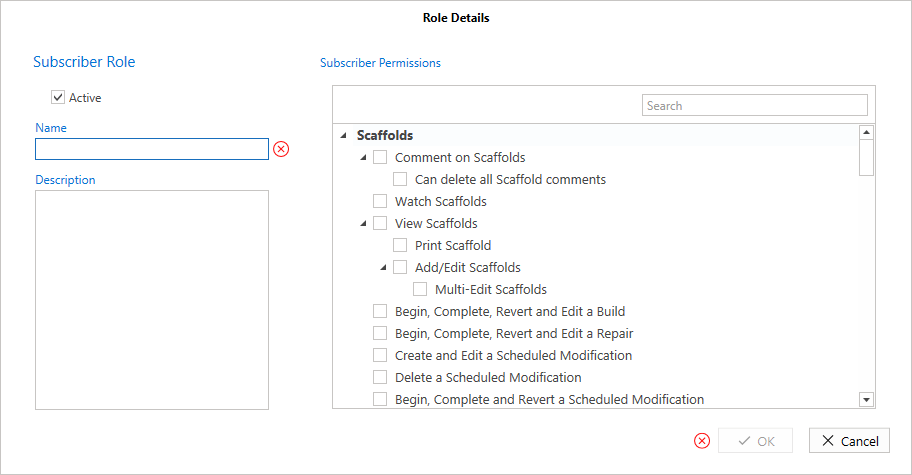
For more information, please see our detailed guide Roles & Permissions
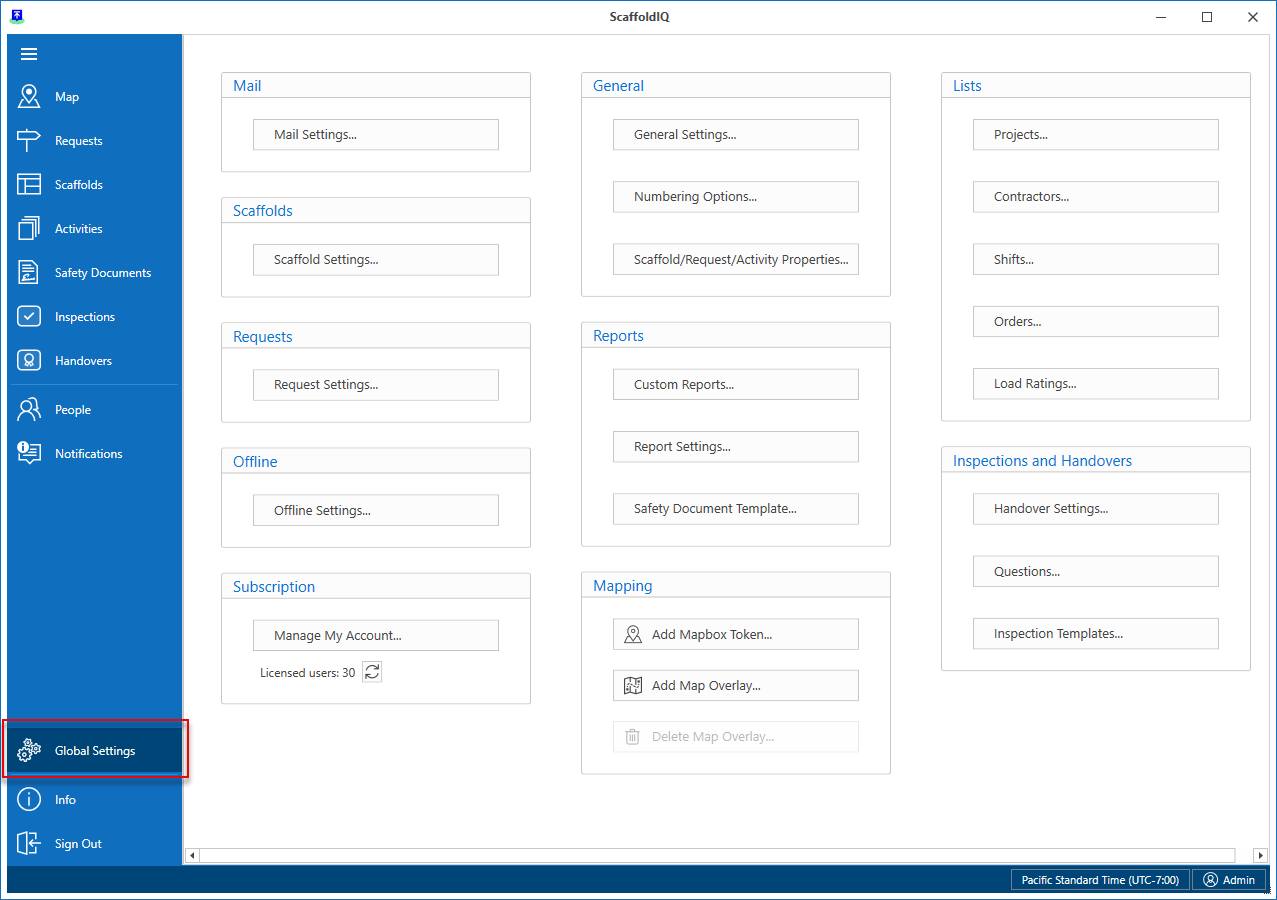
Global Settings
Global Settings are only accessible by ScaffoldIQ admin users and manages many of important features of the software. The section below will cover individual subsections of Global Settings that we recommend configuring to start with.
For a general overview of ScaffoldIQ settings, please see our Settings video.
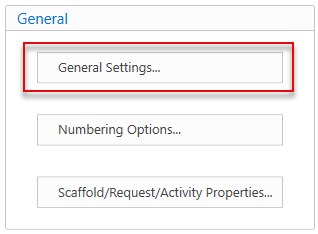
2.1 General settings
In Global Settings, the first thing to configure is your time zone, time format, and paper size used for generating your reports. To do this, click on “General Settings…” under General section of Global Settings.
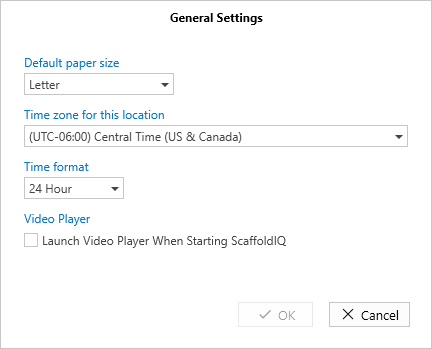
Additionally, if you would like the ScaffoldIQ Help videos to launch every time you open the application, please check the box. If you prefer not to see the video player each time you launch ScaffoldIQ, simply uncheck the box.
See General Settings for more information.
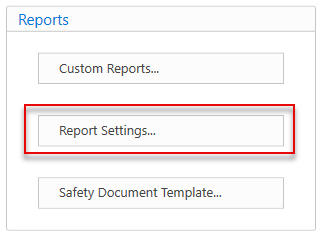
2.2 Your Company Logo
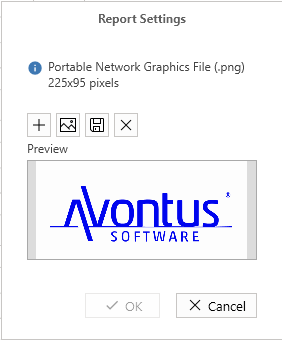
Your company logo will appear on reports generated in ScaffoldIQ. To add your logo click on “Report Settings…” under Reports in Global Settings
In the Report Settings window, click on the plus symbol icon to add your company logo. Please note that your logo is required to be a .png file of 225x95 pixels.
2.3 Lists
The Lists section of Global Settings controls important lists that are used throughout the software.
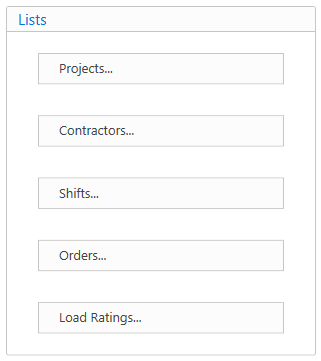
Projects: In this section, include the types of work involved, such as maintenance, shutdowns, and emergency services.
Contractors: Add details about the contractors you will be collaborating with in this section.
Shifts: Provide information on work shift patterns, including any specific work schedules that may be necessary.
Orders: Add orders to be assigned to a Request or Scaffold.
Load Ratings: This section requires you to specify the types of scaffold ratings, including light duty, medium duty, and heavy duty.
For a more detailed guide on each section under Lists, please see Lists.
2.4 Questions
You can customize the questions included in Inspections and Handovers. Additionally, questions can be combined into Groups for quickly adding multiple relevant questions.
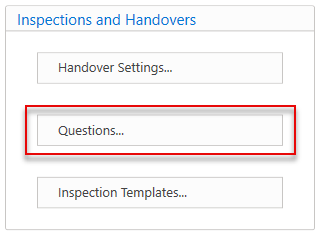
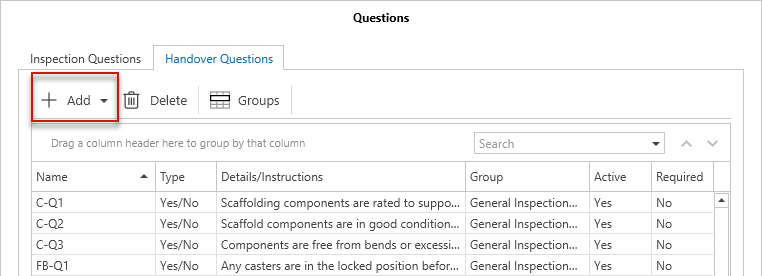
Under the Inspections and Handovers section of Global Settings, click on the “Questions” button to bring up the Questions window.
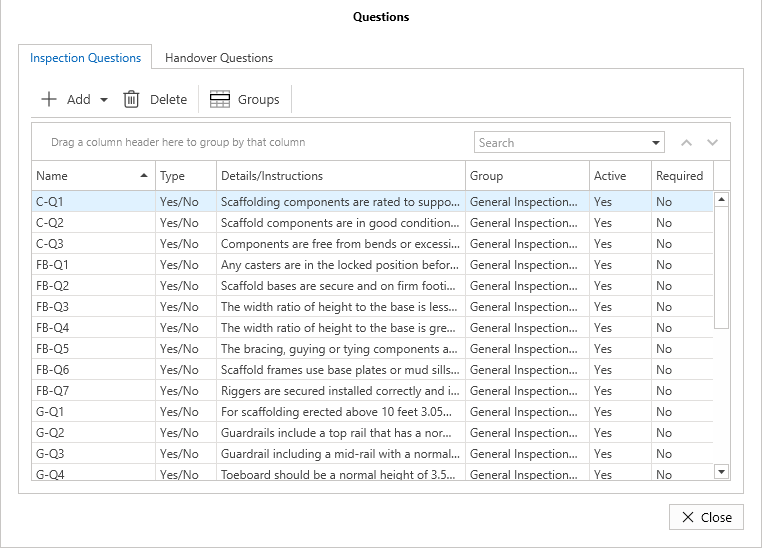
In the Questions window there are two separate tabs, one for Inspection Questions and the other for Handover Questions. There is also a button to configure question groups.
2.4.1 Question Groups
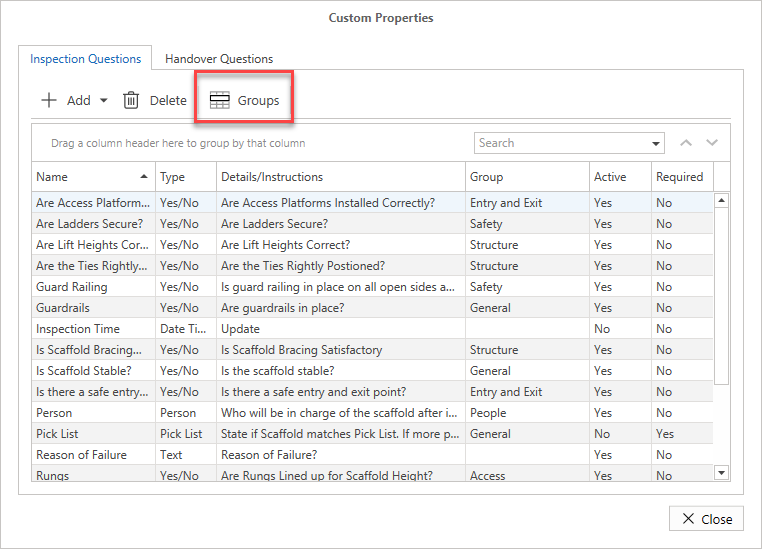
In the Questions window, on either the Inspection Questions or Handover Questions tab, click on the “Groups” button to bring up Question Groups window:
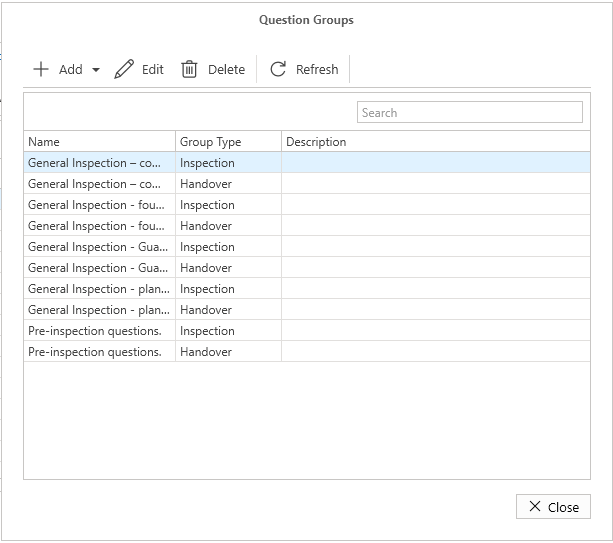
Question groups can be added here for various categories. For example, you might set up groups for topics such as guard rails and safety controls, planks and decks, components, and pre-inspection questions.
See Groups for more details.
2.4.2 Inspection Questions
Questions that we would like to see appear on Inspections are added here. Click on the Add button and you will be given a choice of question response options: number, text, yes/no, date/time, list, or person.

Select one of these options and fill out the name, for example, "Guardrail Q1" or "GQ1." In the details/instructions, provide the question you wish to ask. Assign this question to a previously created group using the drop-down menu.
In the validation rules, specify if answering this question is mandatory by ticking the box. This will require the user to answer the question before proceeding.
For a more information on Inspection questions, please see Adding an Inspection Question.
2.4.3 Handover Questions
Questions that we would like to see appear on Inspections are added here. Click on the Add button and you will be given a choice of options for how you would like this question to be answered: number, text, yes/no, date/time, list, person.
Select one of these options and fill out the Name, for example, Handover Q1 or HQ1. In the details/instructions section, include the question you wish to ask. Assign this question to a group from the dropdown menu (previously created).
In the validation rules, specify whether it is required to be answered by ticking the box. This will ensure that the user must answer the question before continuing.
All handover questions created will automatically be added to the handover sheet, which must be completed for the official handover of the scaffold.
For a more information on Handover questions, please see Adding a Handover Question.
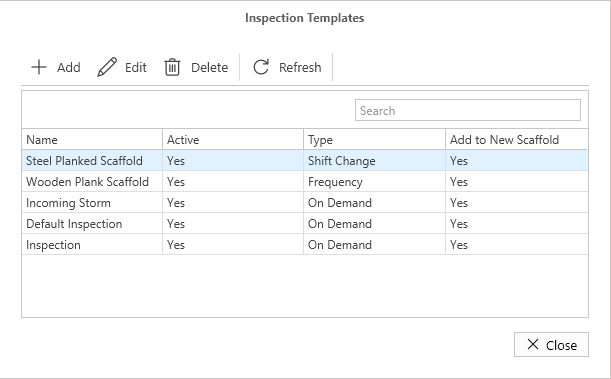
2.5 Inspection template
In this section, you will create the inspection templates required for various types of inspections, such as weekly scaffold inspections and six-weekly board inspections, including galvanisation inspections.
To create a new template for inspections, click on “Inspection Templates…” button under Inspections and Handovers section of Global Settings. In the inspection Templates window, click Add to bring up the Inspection Template Details window:
Fill in the name of the inspection. If you would like this inspection to be assigned to every scaffold, check the box to automatically add this inspection to all new scaffolds.
If this type of inspection needs to be conducted at a distance from the scaffold, please check the box for highlighting inspections that are beyond the specified distance. After checking this box, you will need to specify how many feet away from the scaffold the inspection should be conducted. If the distance is greater than what has been selected, you will receive a notification during the inspection process.
Next, enter the frequency for when this inspection needs to be completed. In the list of questions included in this inspection, check the box next to the questions you wish to add (these should have been created previously).
Once you are satisfied with the setup, click OK.
After completing these steps, you will see a list of the inspection templates you have created on the inspection templates page.
For more information about Inspection Templates, please see Inspection Templates.
2.6 Safety Document
In this section, you will find pre-generated sample safety information to guide you. Please review all parts of this template carefully. You can remove, edit, or recreate any information as needed for your document.
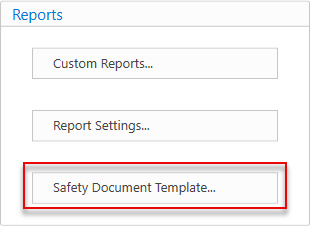
To configure safety documentation, click on “Safety Document Template…” button under Reports section of Global settings.
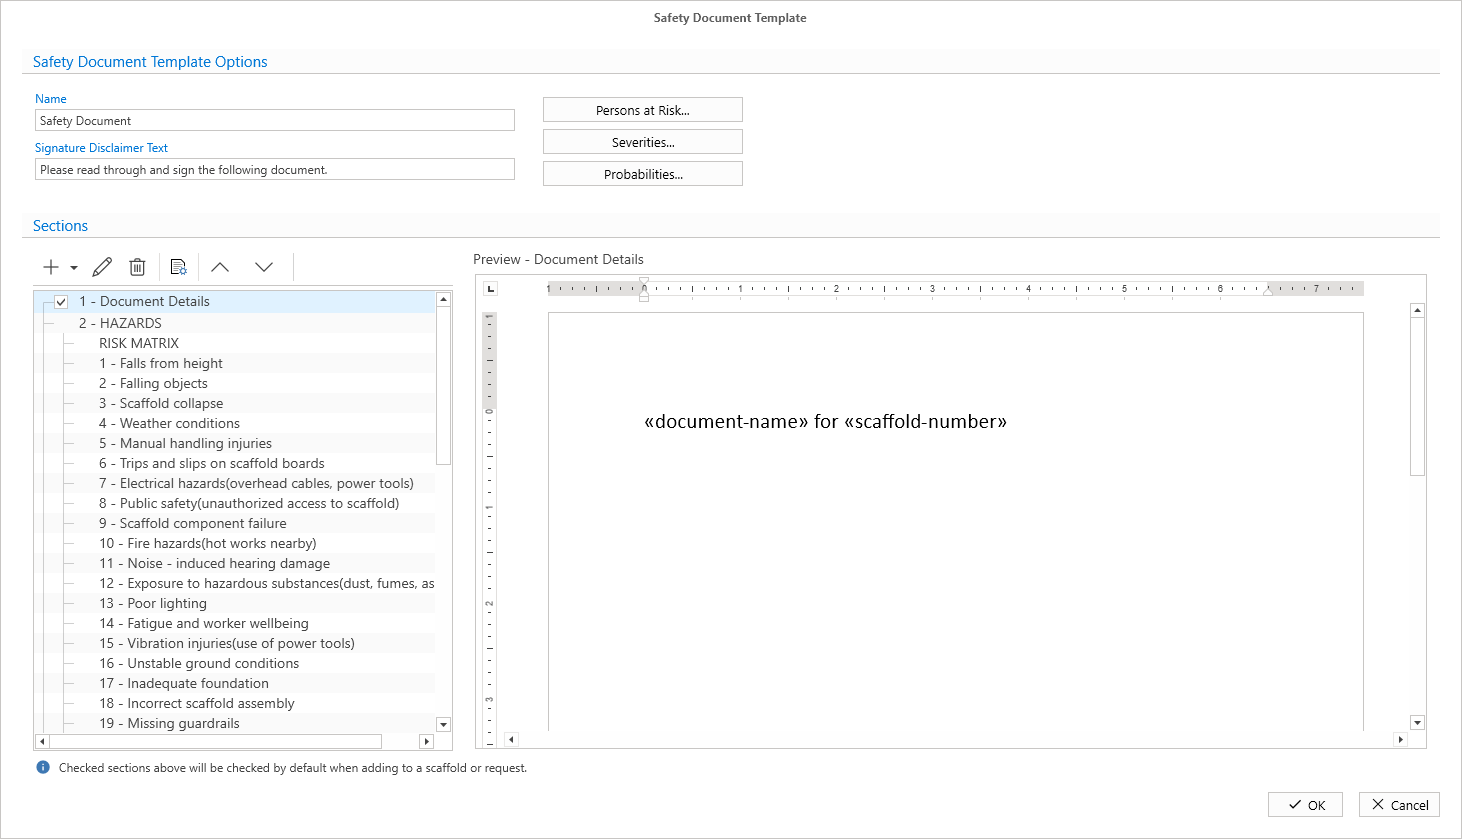
At the top of this section, there is a hazard matrix. Each item in the matrix is assigned a number. Click on a number to view the corresponding information in the preview window, and then click "Edit" to modify the information displayed.
Below the hazard matrix section you will find your method of work documentation. It should include guidance on the following topics: site information delivery, equipment loading and unloading, erecting and dismantling, and handover inspection procedures. Each item in this list is also assigned a number. Click on a number to view the corresponding information in the preview window, then click "Edit" to change it.
Remember, you can fill out as many sections as you wish for various scenarios and types of work, as this is a working template. All the information you enter here will be transferred to the initial template during the Request or Scaffold stage. In this template, you can select the sections you wish to include in the final document.
For more detailed information about the Safety Document Template, please see Safety Document Template Options.
2.7 Scaffold Request settings
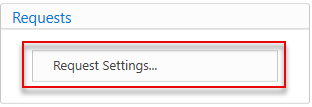
Scaffold Requests can be configured to include multiple steps. To configure these steps, click on “Request Settings…” button under the Requests section of Global Settings.
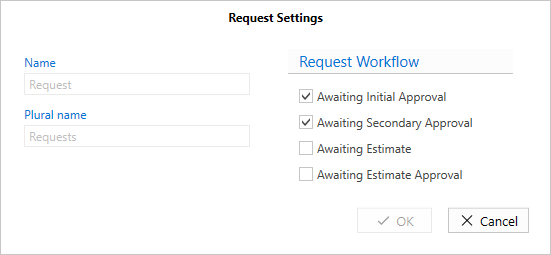
The Request Settings window shows your request workflow. Please check the box for any stage you wish to add and uncheck it if you want to remove a stage based on your preference. Feel free to experiment and find the workflow that works best for you and your company.
For more information about Request Settings, please see Request Settings.
2.8 Scaffold settings
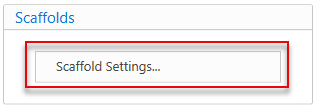
Just like Requests, Scaffolds can also be configured to fit your needs. To configure Scaffolds settings, click on “Scaffold Settings…” button under Scaffolds section of Global Settings.
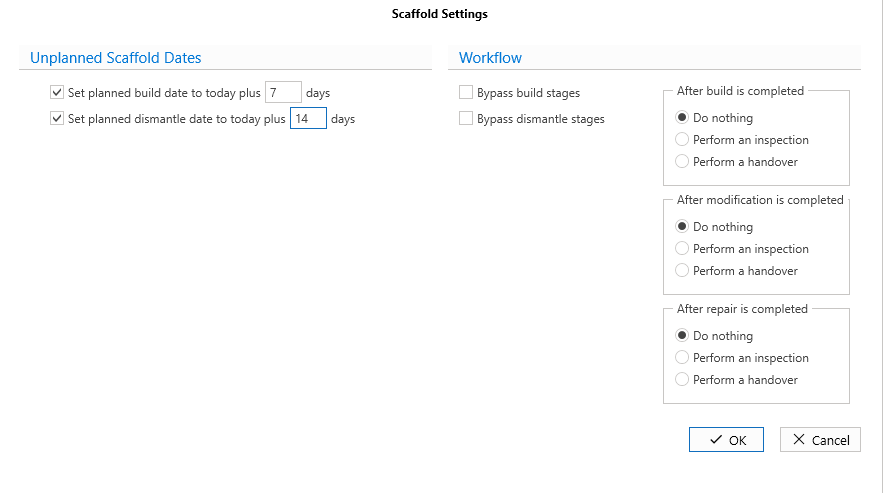
The Scaffold Settings window shows your scaffold workflow. Please check the box for any stage you wish to add and uncheck it if you want to remove a stage based on your preference. Feel free to experiment and find what works best for you.
For more details about Scaffold Settings, please see Scaffold Settings.
3. Areas
ScaffoldIQ gives you the ability to separate Requests and Scaffolds into different areas. To see existing Areas, or to add new ones, click on the Map tab:
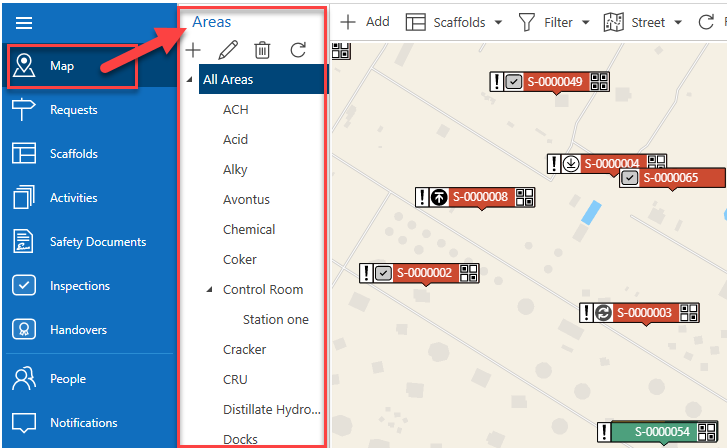
To add an area, click "Add new Area" (the + icon in the Areas section), enter the name of the area in the dialogue box, and then click OK. This new area will now appear under "All Areas."
If you want to create a sub-area within an existing area, simply click on the area you created and then click "Add new Area" again. After you enter the name for this sub-area, click OK to save it. This will now appear under the previously created area.
For more information about Areas, please see Areas.
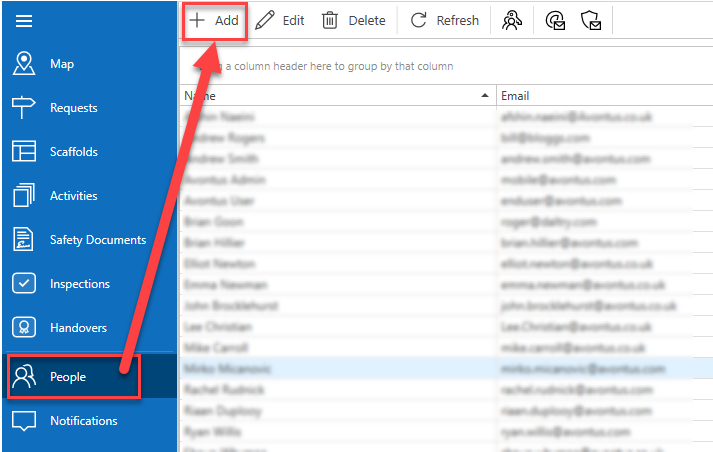
4. People (Users)
As mentioned in the beginning of this guide, we recommend configuring all necessary settings first before adding users to ScaffoldIQ. This is simply to avoid confusion for users if they attempt to use ScaffoldIQ while settings are still being configured by the administrator.
To add users, click on “People” tab and then on Add button.
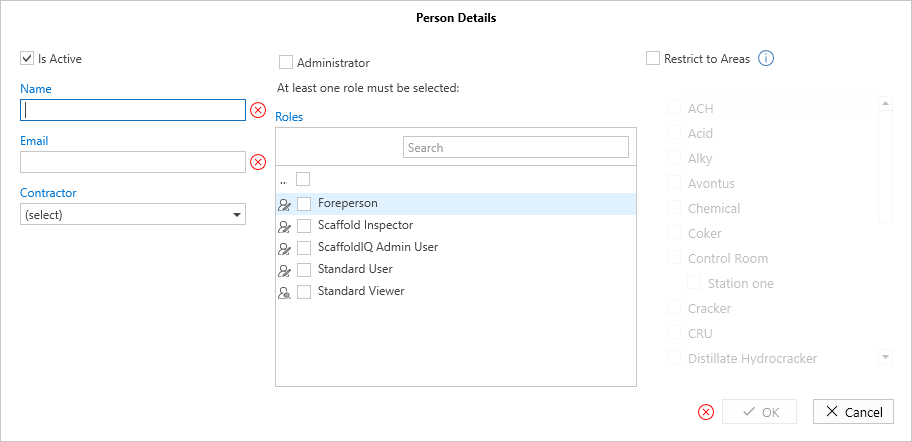
In the Person Details window, enter information about the user.
Name: Enter the user’s name.
Email: Enter the user’s email address.
Contractor: Select the contractor from the drop-down menu if they are a contractor.
Roles: Assigning a role to the user controls what actions the user can take in ScaffoldIQ. Roles were created in step 1 of this guide.
Areas: If needed, we recommend assigning areas once they have been established.
After you have completed the person's information, an email will be sent to notify them that they have been added and inviting them to download the software and log in.
For more details about users, please see Working with People.
Additional Resources & Support
Additional instructions are available from the resources below.
Help documents: ScaffoldIQ
Help videos: ScaffoldIQ Help Videos
Live webinars: Training
If you have any questions or need assistance with getting started with ScaffoldIQ, please don’t hesitate to contact us.
Reach out to our support team at support@avontus.com or call us.